There are a few different ways that you can animate a rotation in Figma. The simplest way is to adjust the angle of the object that you want to rotate and then to set the Animation as ‘Smart Animate‘.
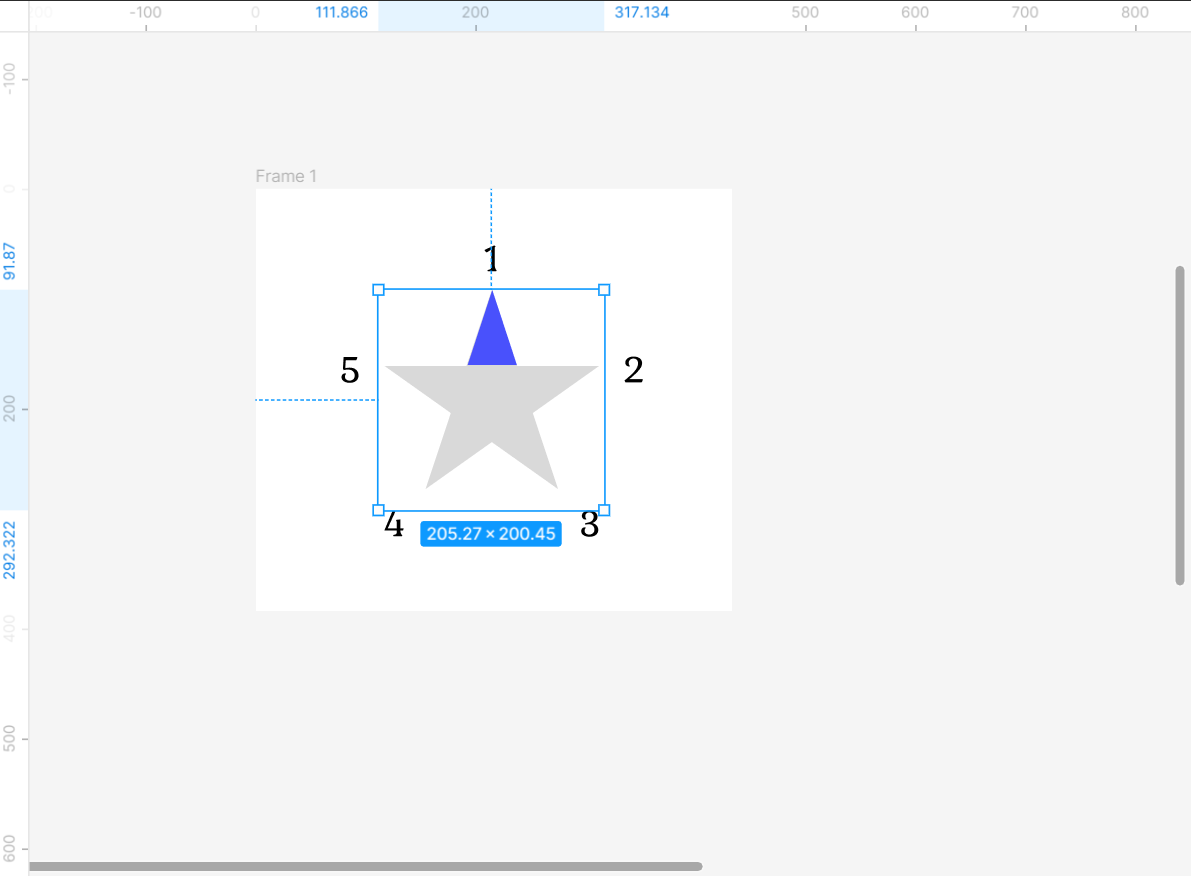
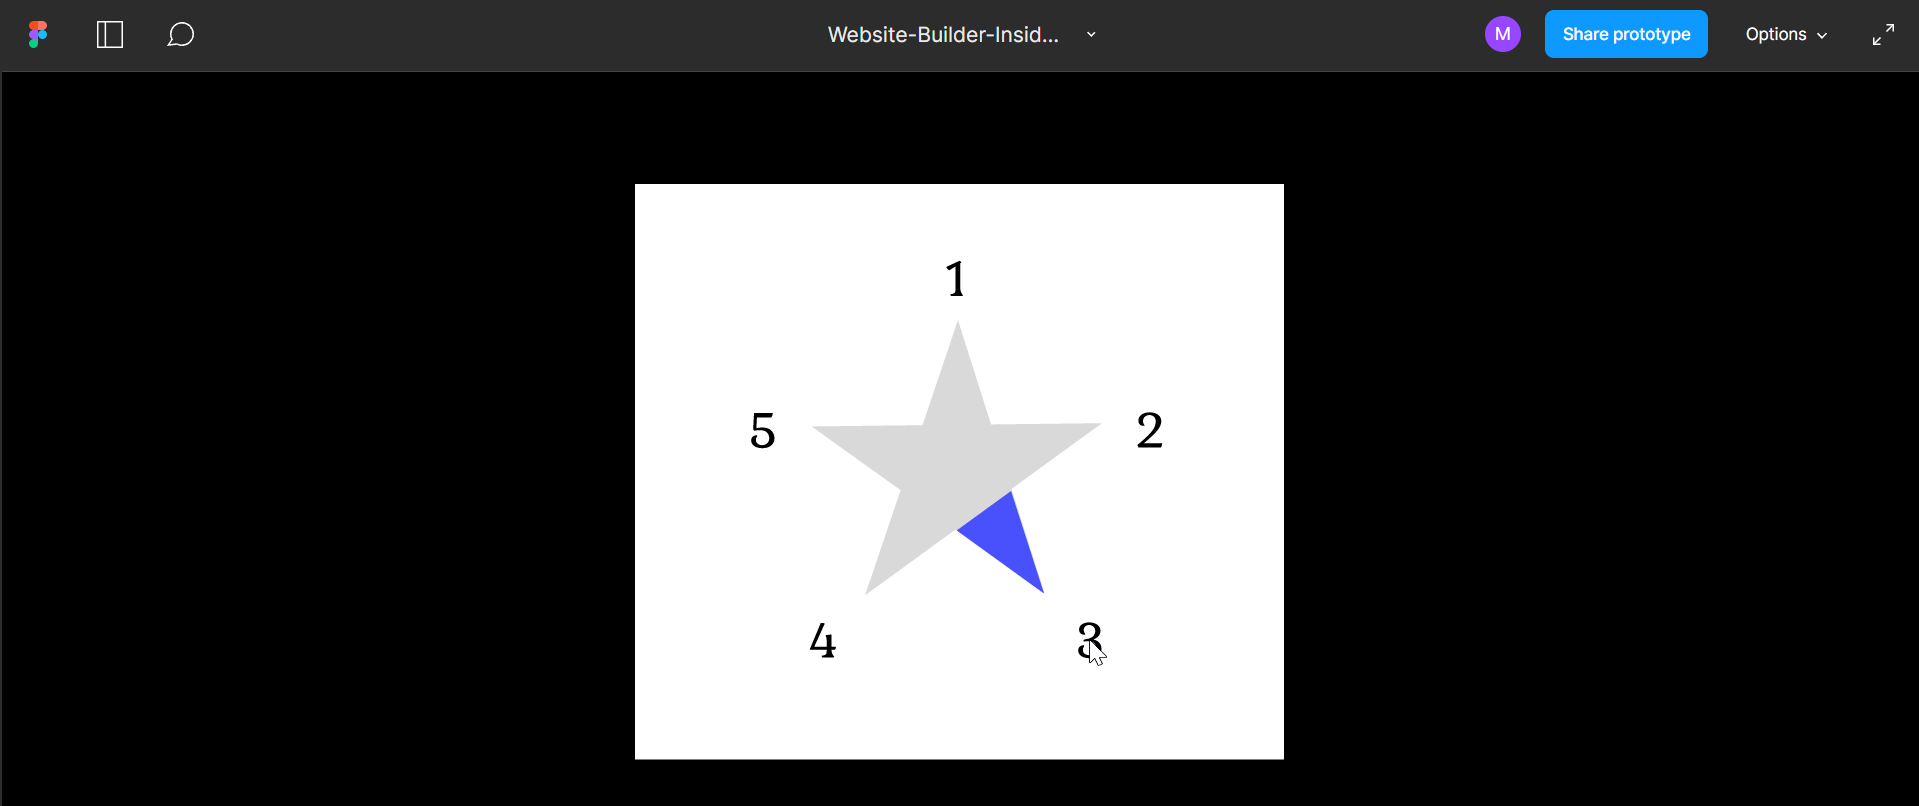
In this example, we will rotate the star icon in the middle to 5 different angles. As we click on each number, the star should rotate and the blue pointer should point to the number that was selected.
To get started, first create 4 copies of the original frame.
NOTE: The number of copies you will create will depend on the number of choices that you want to rotate to.
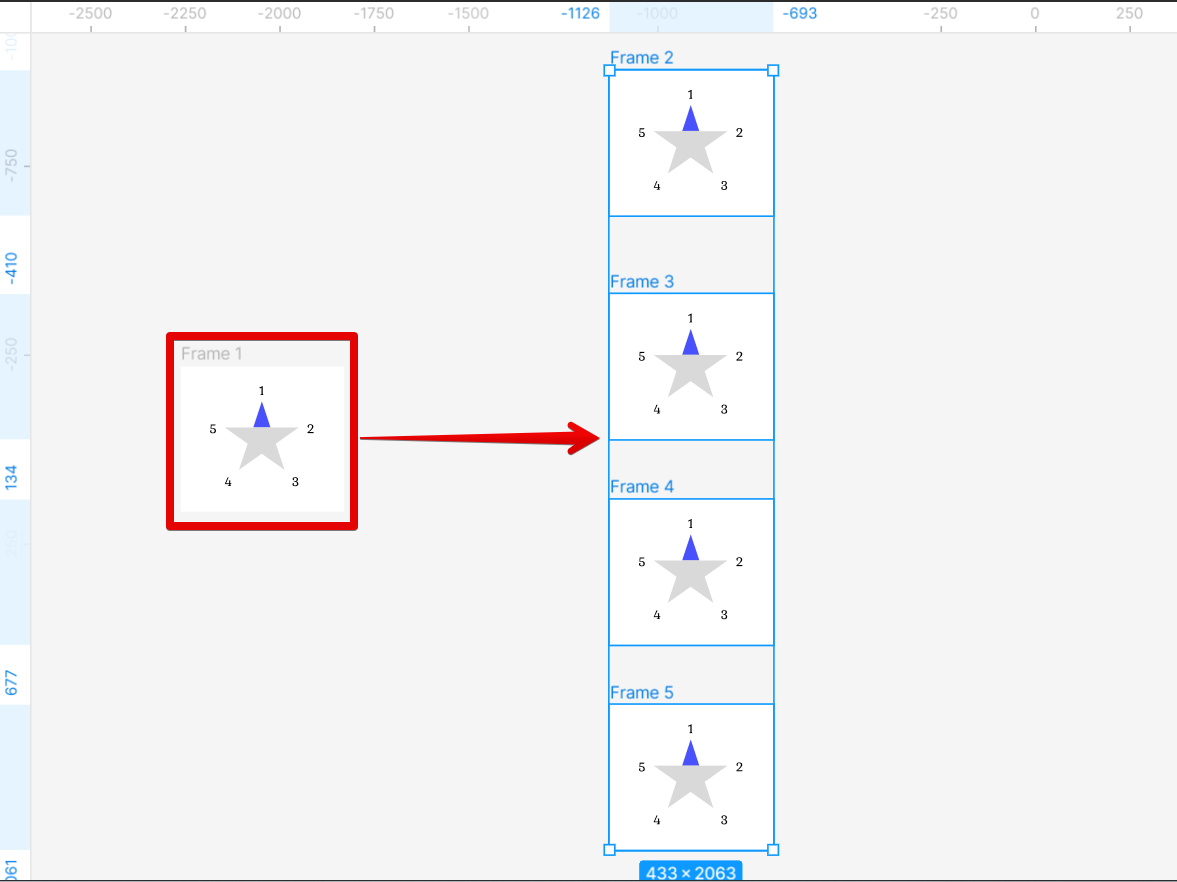
From there, set the angle of the star on each frame in increments of 72 degrees (360 degrees of full rotation divided by 5) starting from zero degrees for Frame 1. In this case, follow the angle settings below:
Frame 2 (blue pointer to number 2): -72 degrees
Frame 3 (blue pointer to number 3): -144 degrees
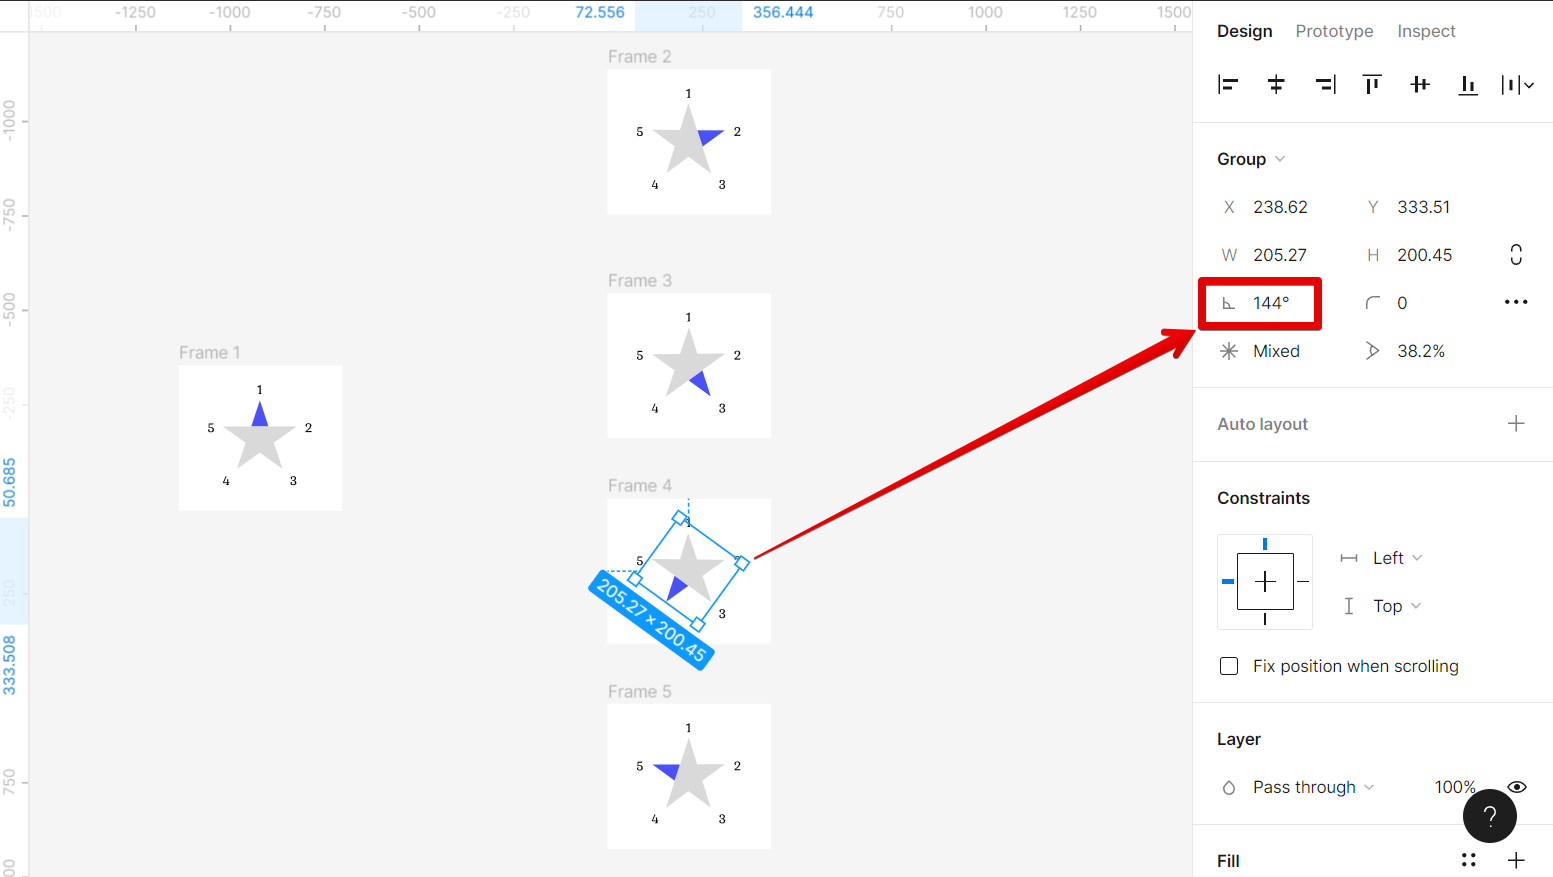
Frame 4 (blue pointer to number 4): 144 degrees
Frame 5 (blue pointer to number 5): 72 degrees
NOTE: The increment depends upon the rotation you would like to apply in your design. For example, if you only have 3 choices to rotate to, divide 360 degrees by 3 and the increment for each rotation should be 120 degrees.
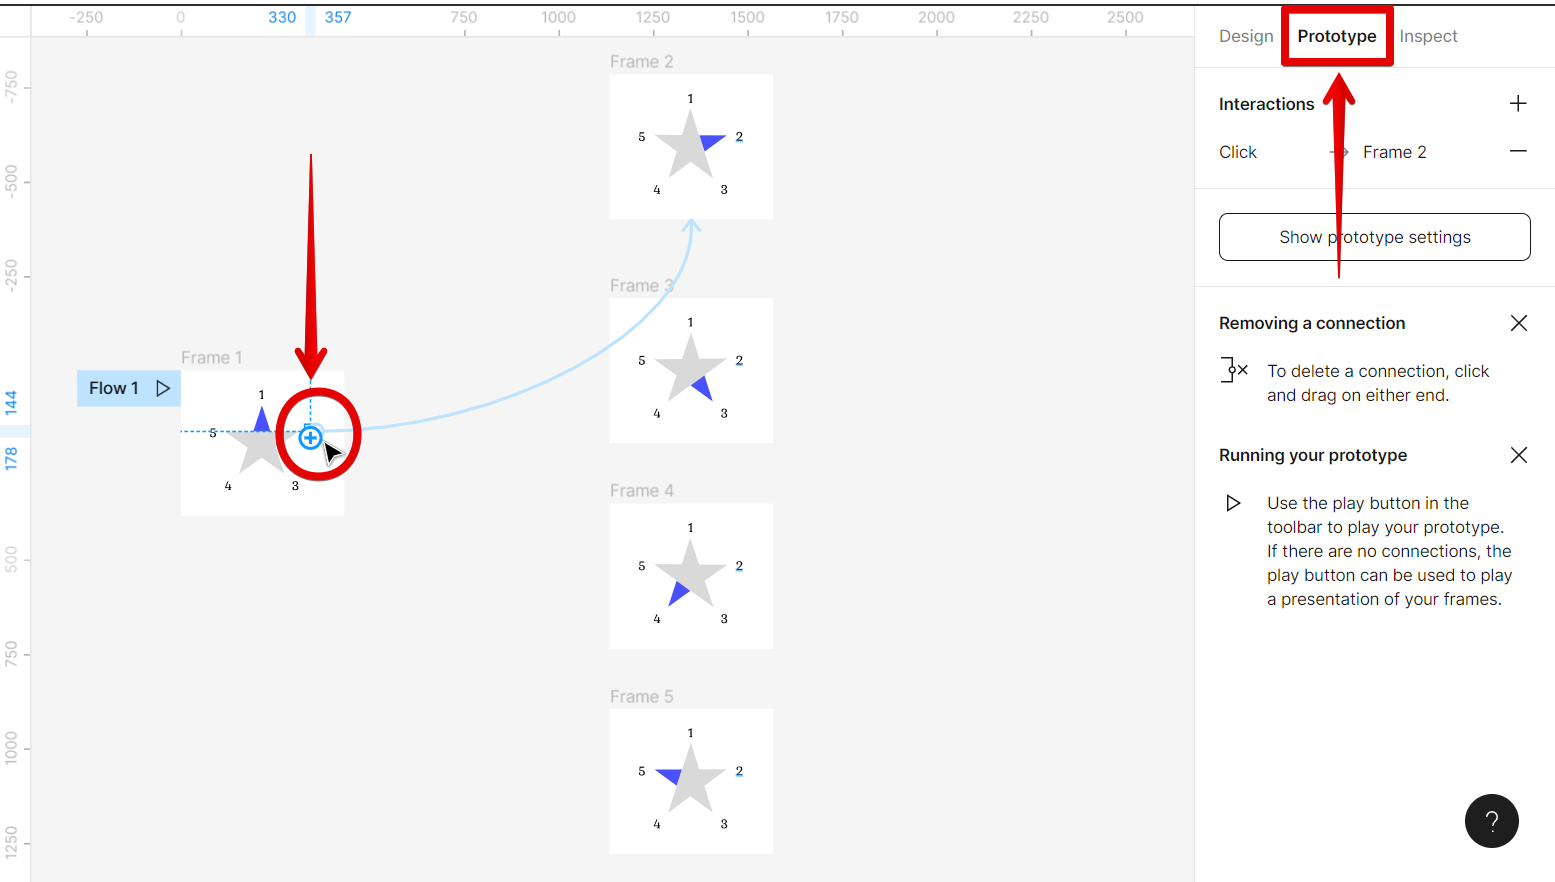
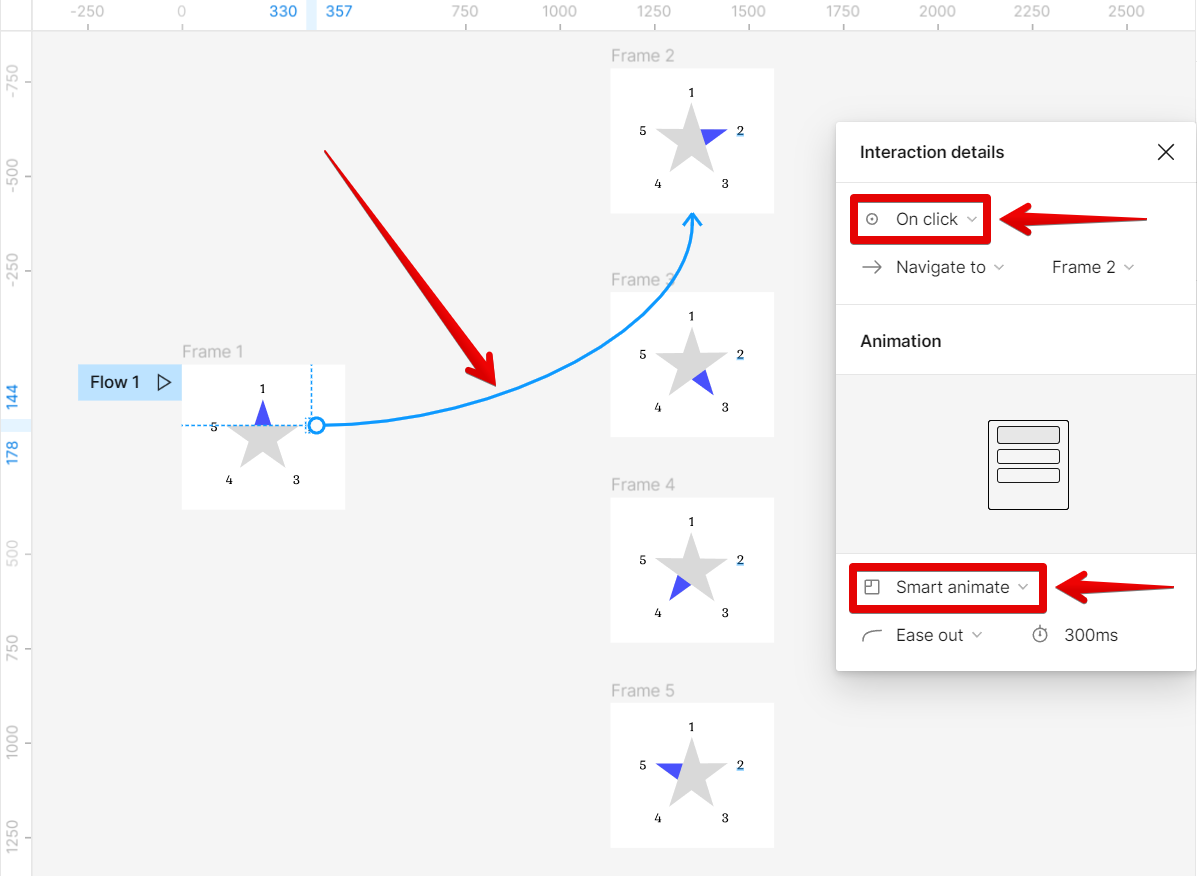
Now let’s set up the connections in our prototype to make a rotation animation. To do this, first, select the Prototype tab on the right menu, then hover your cursor over the number “2” in Frame 1 until a plus icon appears. Click on this then connect it to Frame 2 (where the blue pointer is pointing to the number “2”).
PRO TIP: This article discusses the procedures for making a rotation animation in Figma. The steps can be tricky and might take some time. If you are not familiar with Figma, we recommend seeking the assistance of a professional.
In the Interaction details window, select “On click” and “Smart animate” from the options.
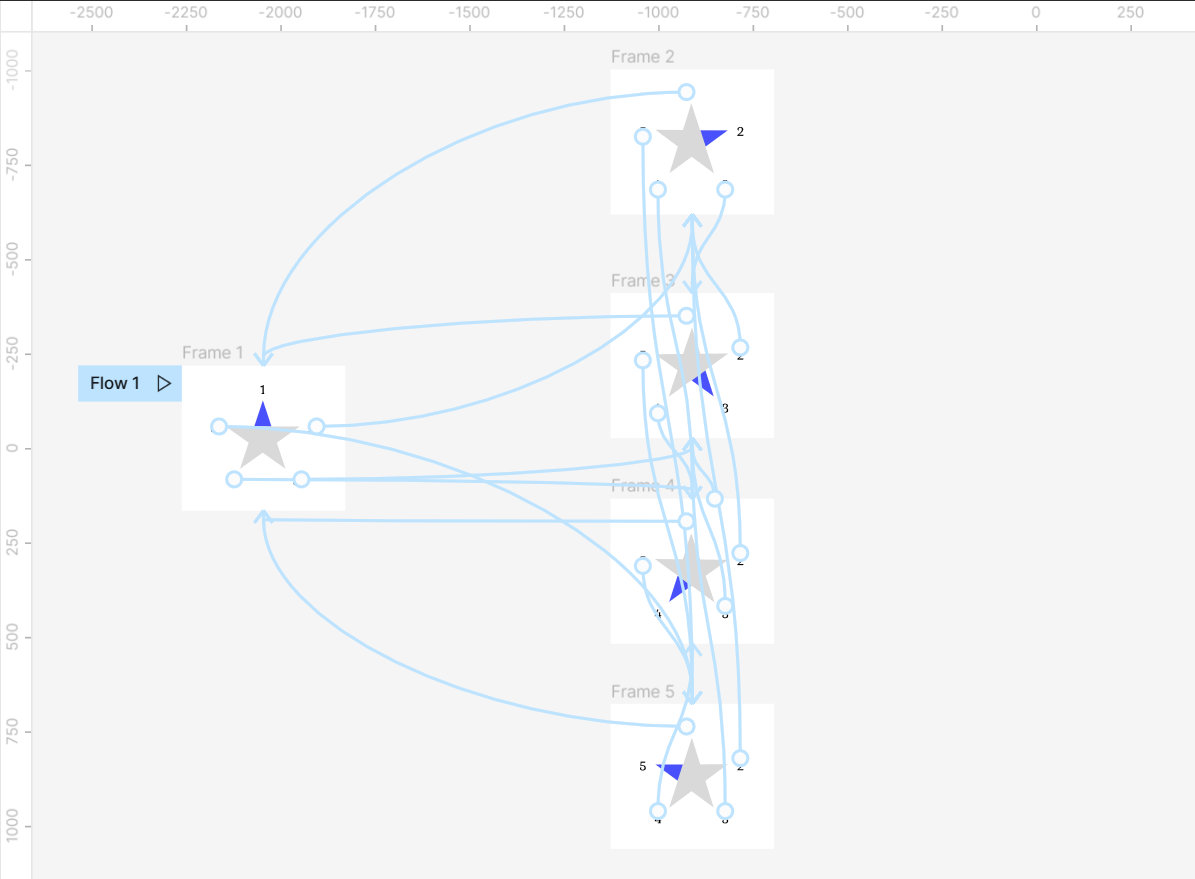
Do the same with the other numbers and interconnect the frames with each other. Make it in such a way that when you click on a number in a specific frame, the star will rotate to that number. The final connections should look something like this.
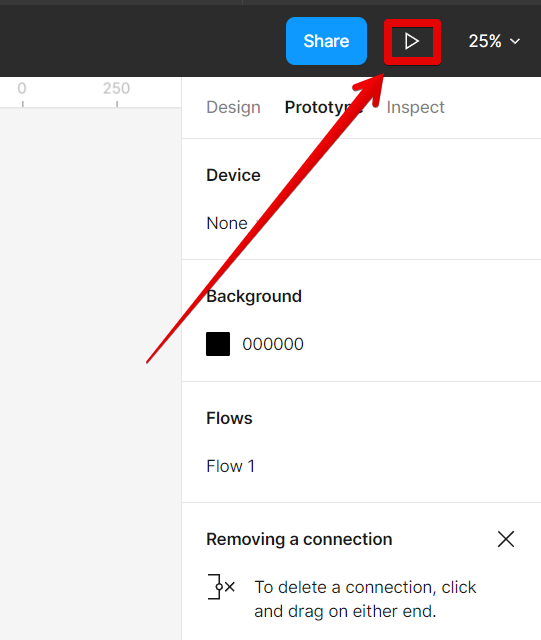
Once done, click on the “Play” button in the upper-right corner to see a preview of your design.
Now you know how to make a smooth rotation animation!
Conclusion:
Using the ‘Smart Animate’ option is really helpful if you want more control over how your final animation looks. Adjusting the angle of the object that you want to rotate accurately also helps with smoother animations.
10 Related Question Answers Found
Figma is a vector graphics editor and prototyping tool – the first interface design tool with real-time collaboration. How do I rotate in Figma? To rotate an object in Figma, select the object and then use the Rotate control in the top toolbar.
If you’re working on a design in Figma and need to rotate an object, there are a few different ways to do it. One way is to select the object you want to rotate and then click on the “Rotate” tool in the toolbar at the top of the screen. This will allow you to click and drag the object to rotate it to the angle you want.
In Figma, the rotation point is the anchor point around which an object rotates. By default, the rotation point is centered in the middle of an object. However, you can change the rotation point to any location on the object.
There are a few different ways to rotate text in Figma. You can use theRotate tool, which is located in the Transform section of the toolbar. You can also use the Free transform tool, which is located in the same section.
There are a few different ways that you can rotate a vector in Figma. One way is to use the Rotate tool. Select the vector you want to rotate, then click and drag the Rotate tool to rotate it.
To rotate an isometric figure, you will need to use the rotation tool. First, select the figure that you want to rotate. Then, click on the rotation tool in the toolbar.
There are a few different ways that you can rotate a point in Figma. The first way is to use the Rotate tool. Select the Rotate tool from the toolbox, then click on the point you want to rotate.
Figma is a vector graphics editor and prototyping tool – the first of its kind. It’s web-based, making it easy to use and accessible from anywhere. And it has some pretty cool features, like 3D rotation.
There are a few ways to crop a circle in Figma. The first way is to use the Crop tool. With the Crop tool selected, click and drag a selection around the area you want to crop.
There are a few different ways that you can arc a circle in Figma. One way is to use the pen tool to draw your own custom arc. Another way is to use the built-in arc tool.