Scroll animations are a great way to add interest and interactivity to your Figma designs. They can be used to animate the appearance of elements as they scroll into view or to animate their position when the user scrolls up or down the page.
There is one simple way to create scroll animations in Figma. That is to by creating your custom animations using the Interaction details window. Follow the steps enumerated below to get started.
1. Select the design or frame to which you want to add a scroll bar. Then, click on the Shape Tools tab in the upper-left corner of the screen, then select the “Rectangle” tool.
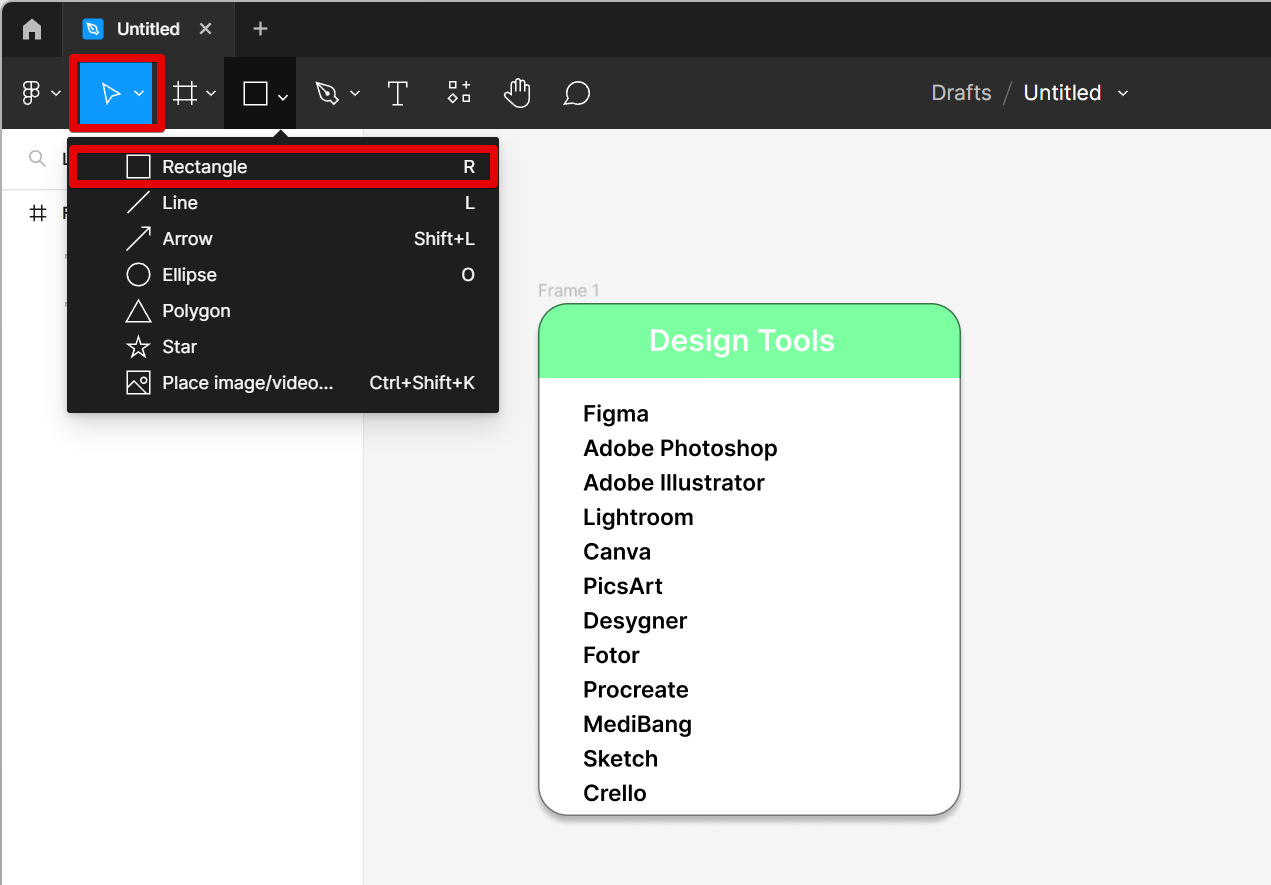
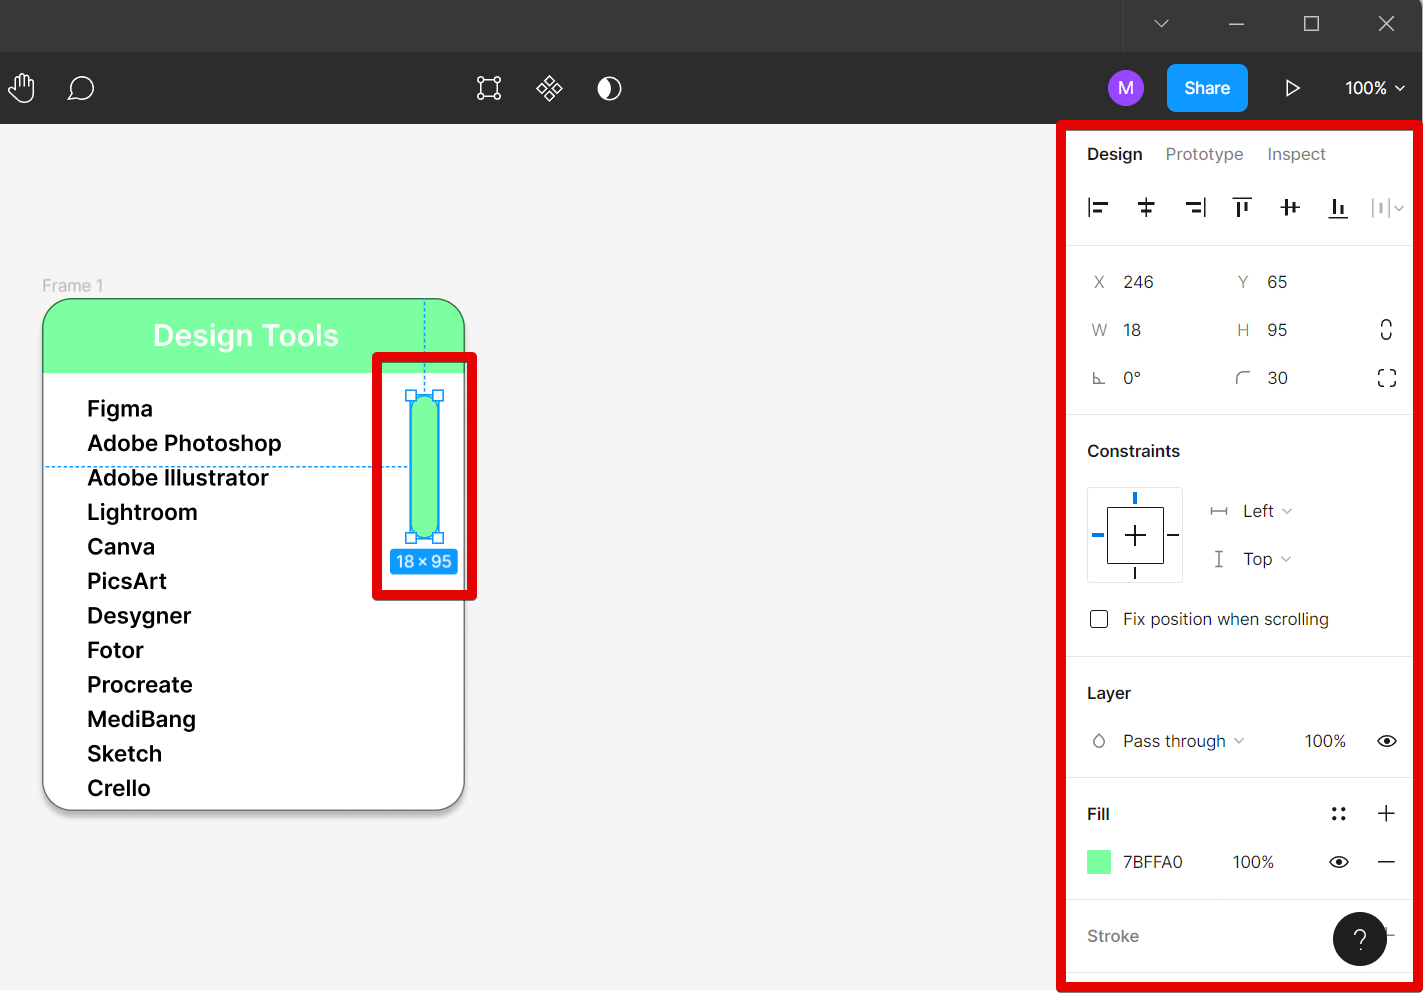
2. This will let you add a scroll bar of your desired shape and size to your frame. You can edit the design of your scroll bar using the menu on the right.
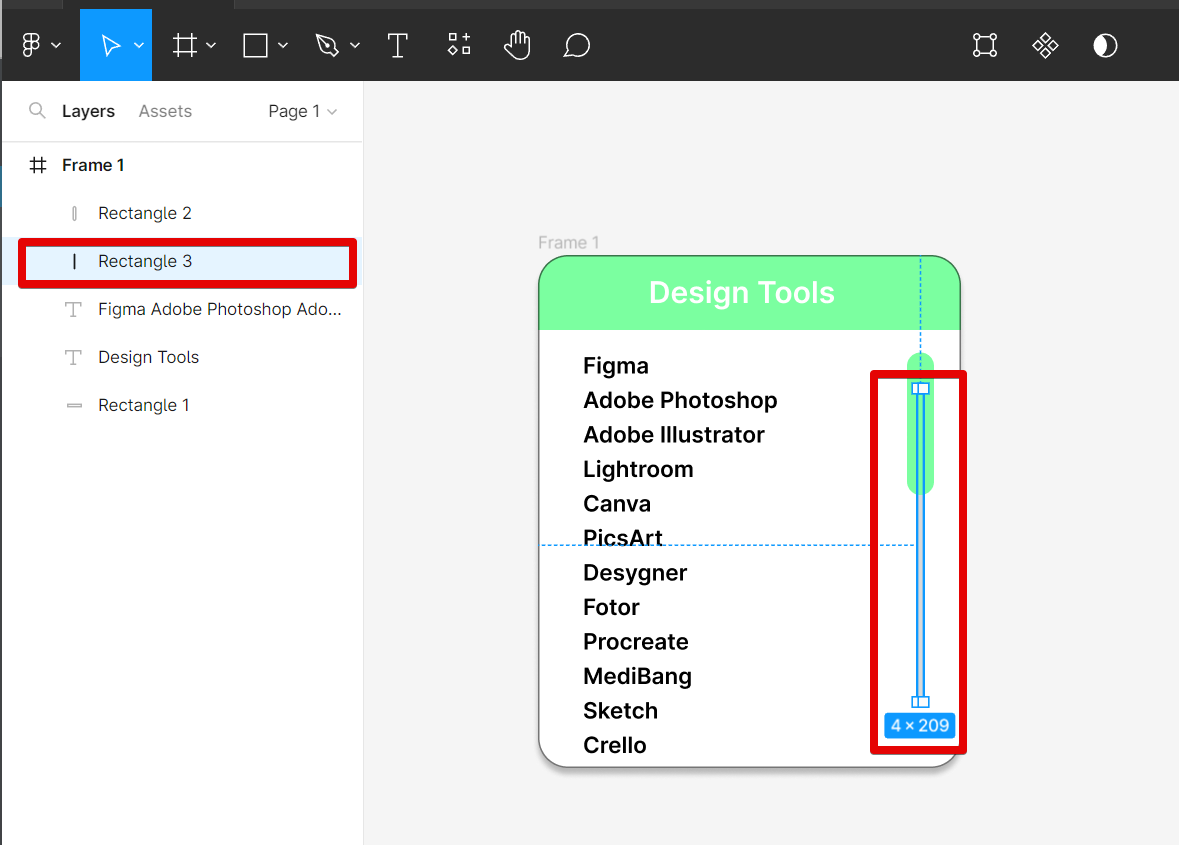
3. Now, add another rectangle that is thinner and longer in size to your frame. This will serve as a scrolling guide. Make sure that it is behind the actual scroll bar.
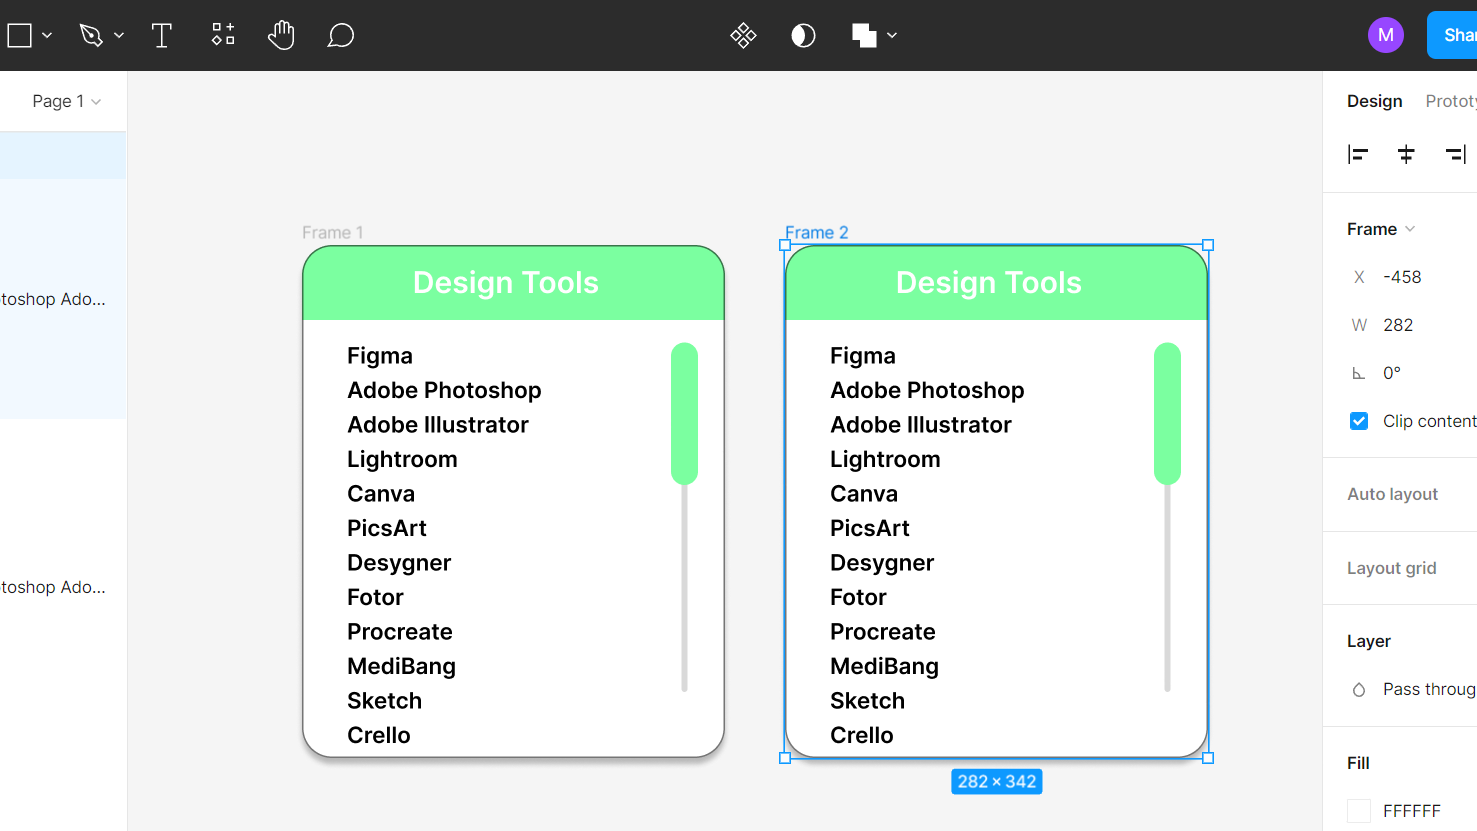
4. Next is to create another copy of the frame. To do so, select the whole frame to copy it (Ctrl+C) and then paste it (Ctrl+V) on the same page. Now you can see two frames of the same design side by side.
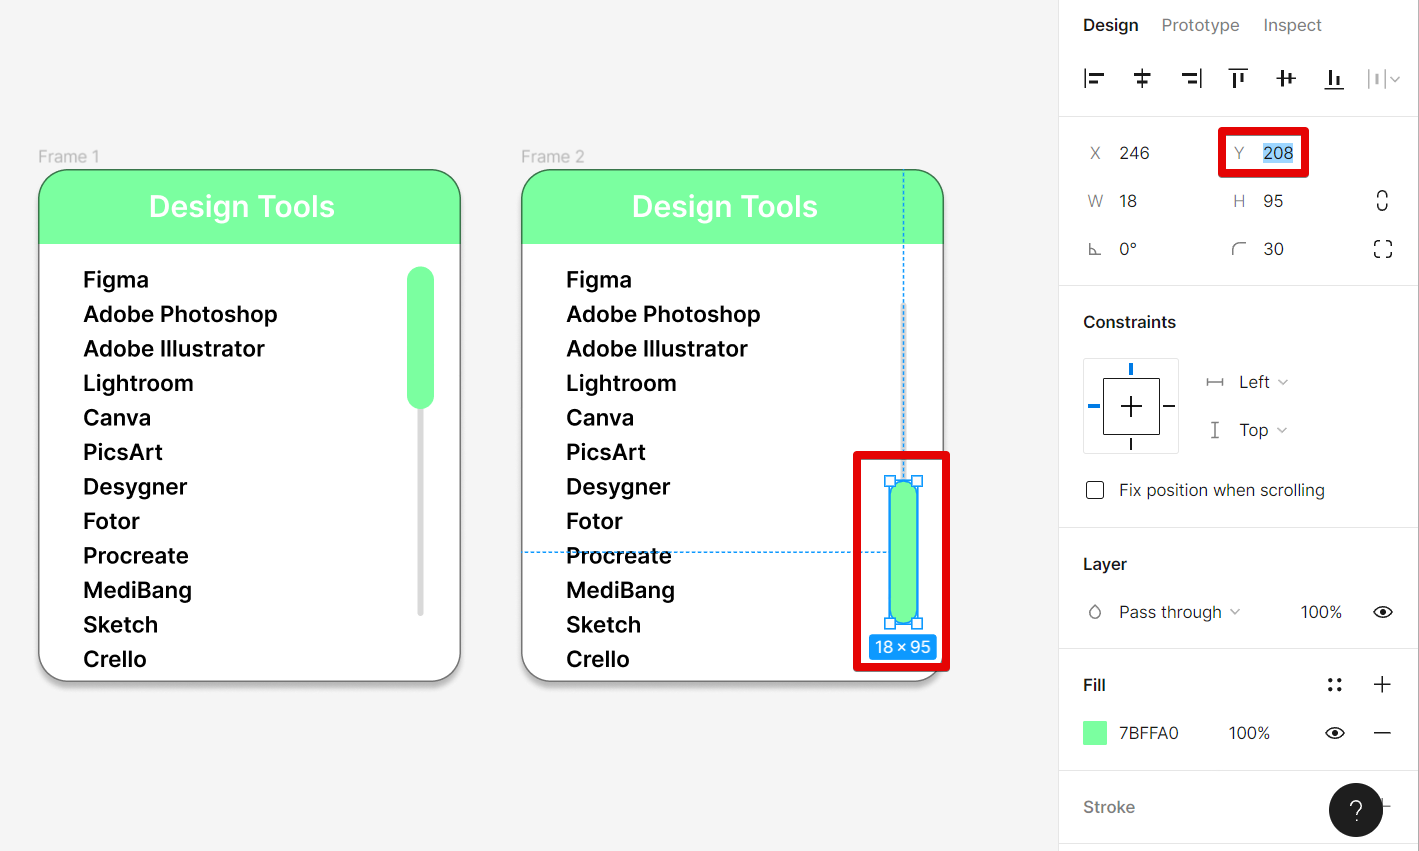
5. The second frame will be meant for the second part of the animation when you scroll down. For this, select the scroll bar and adjust the “Y” component.
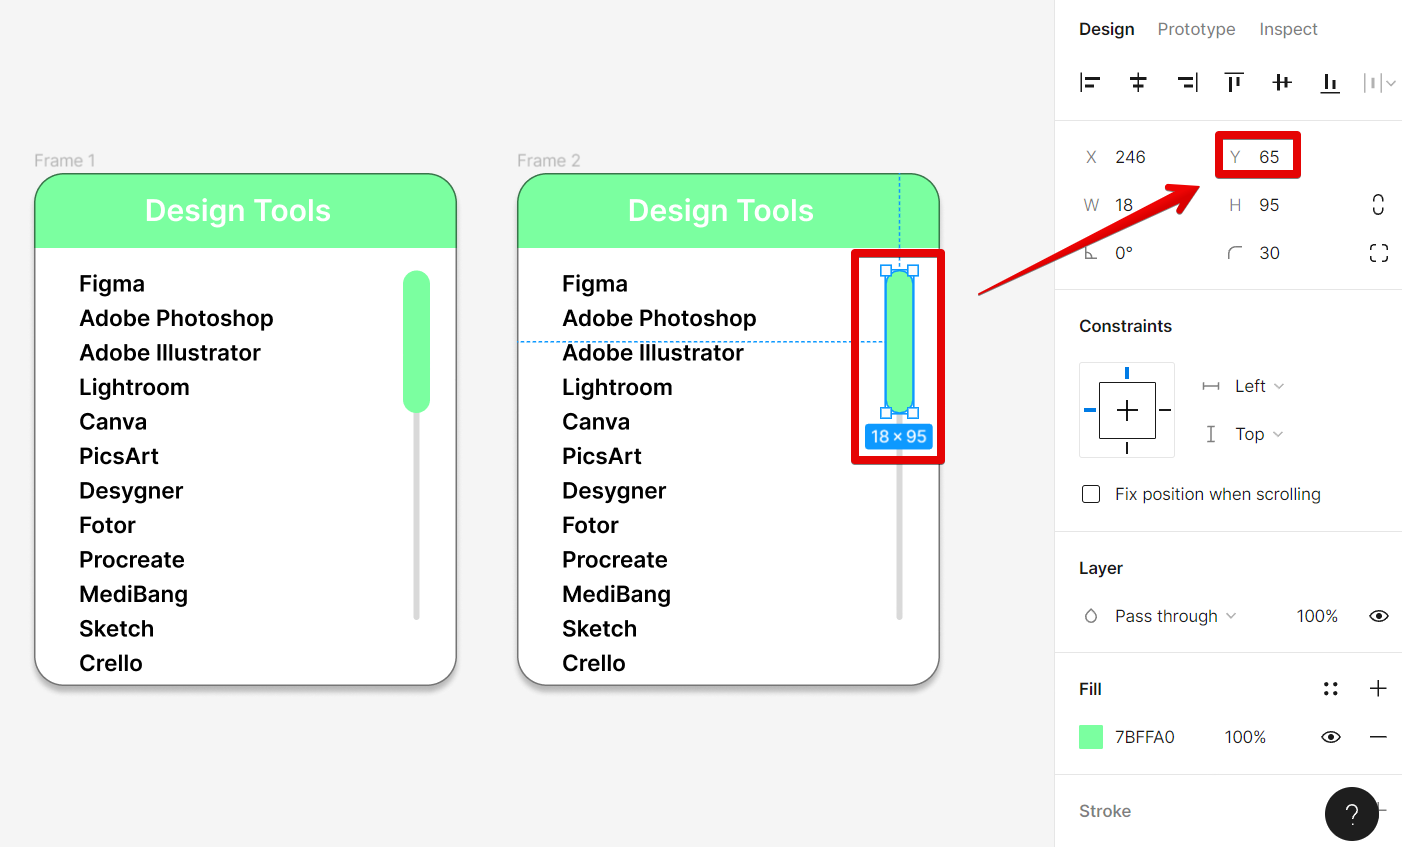
6. Do this until it goes down to the bottom of the scrolling guide.
NOTE: The most important thing to understand in animating the scrollbar is that it tells you how far the user has scrolled down the page.
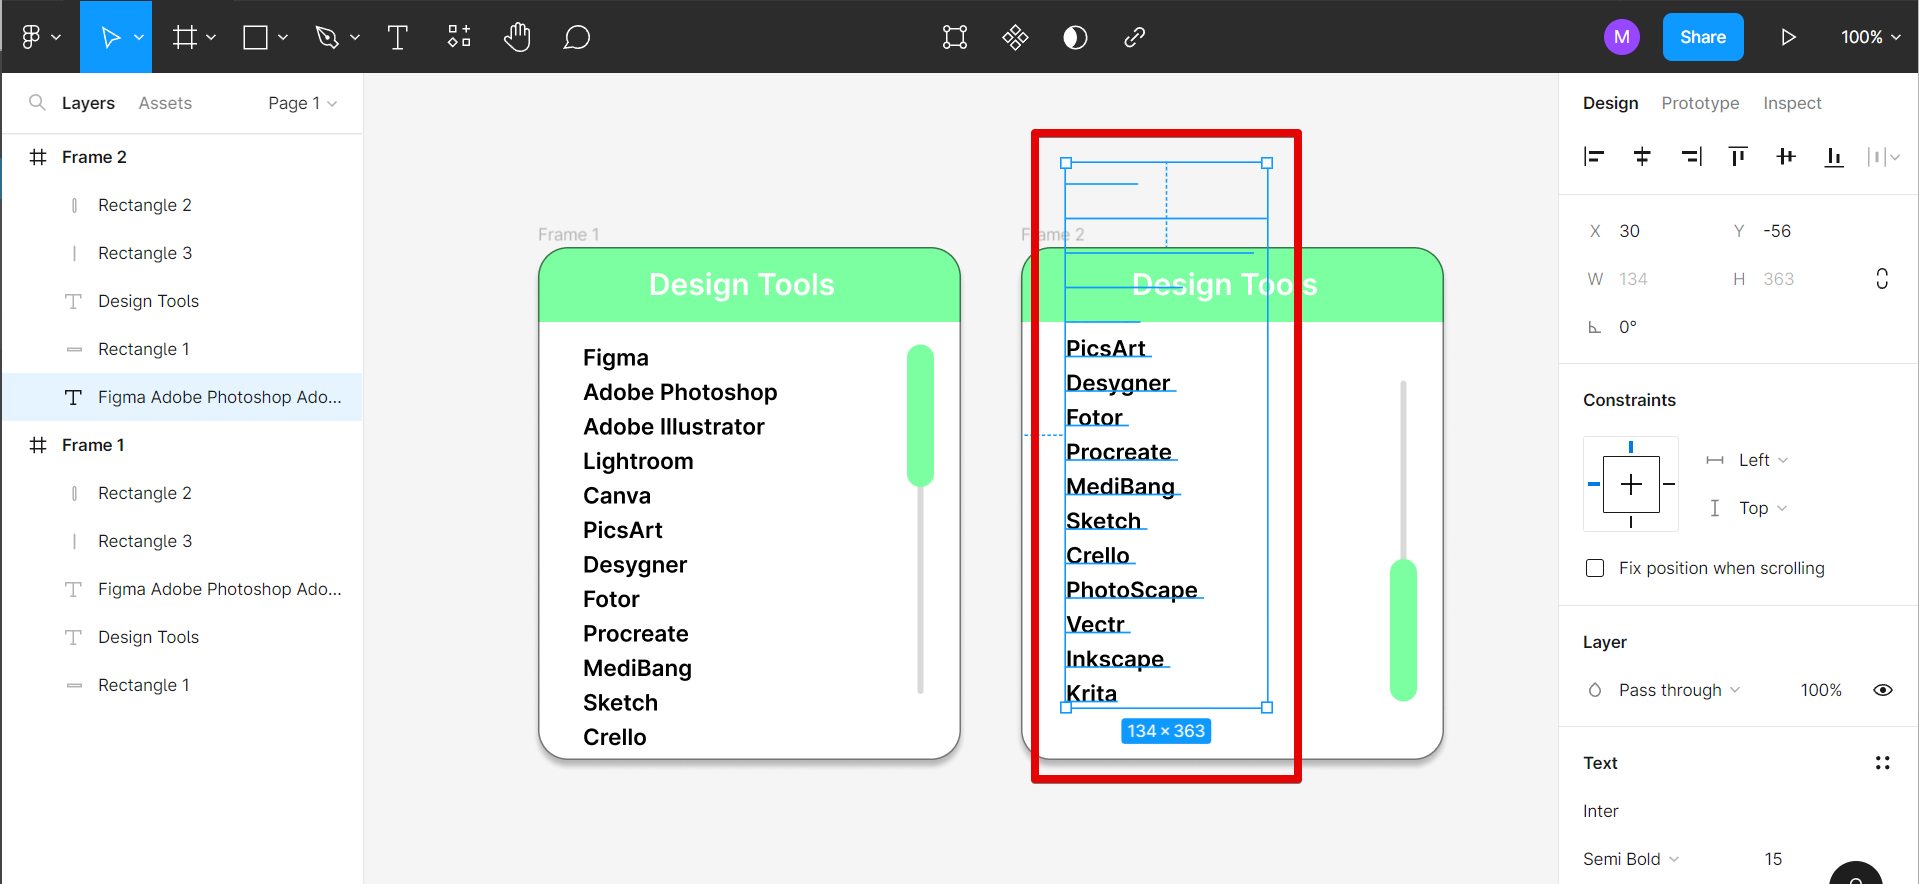
7. Next is to adjust the text to show what will happen after scrolling down.
PRO TIP: This article contains information about how to create a scroll animation in Figma. It details the step-by-step procedures on how to make custom scrollbar animations in Figma using the Interactions feature. Make sure to thoroughly follow the guide to achieve the expected results.
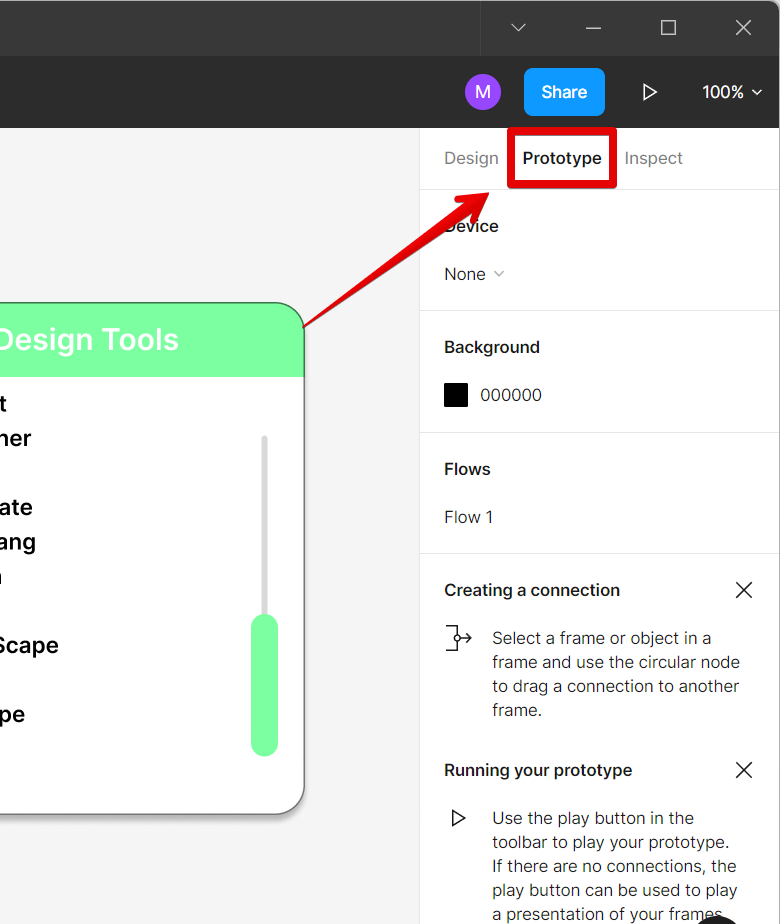
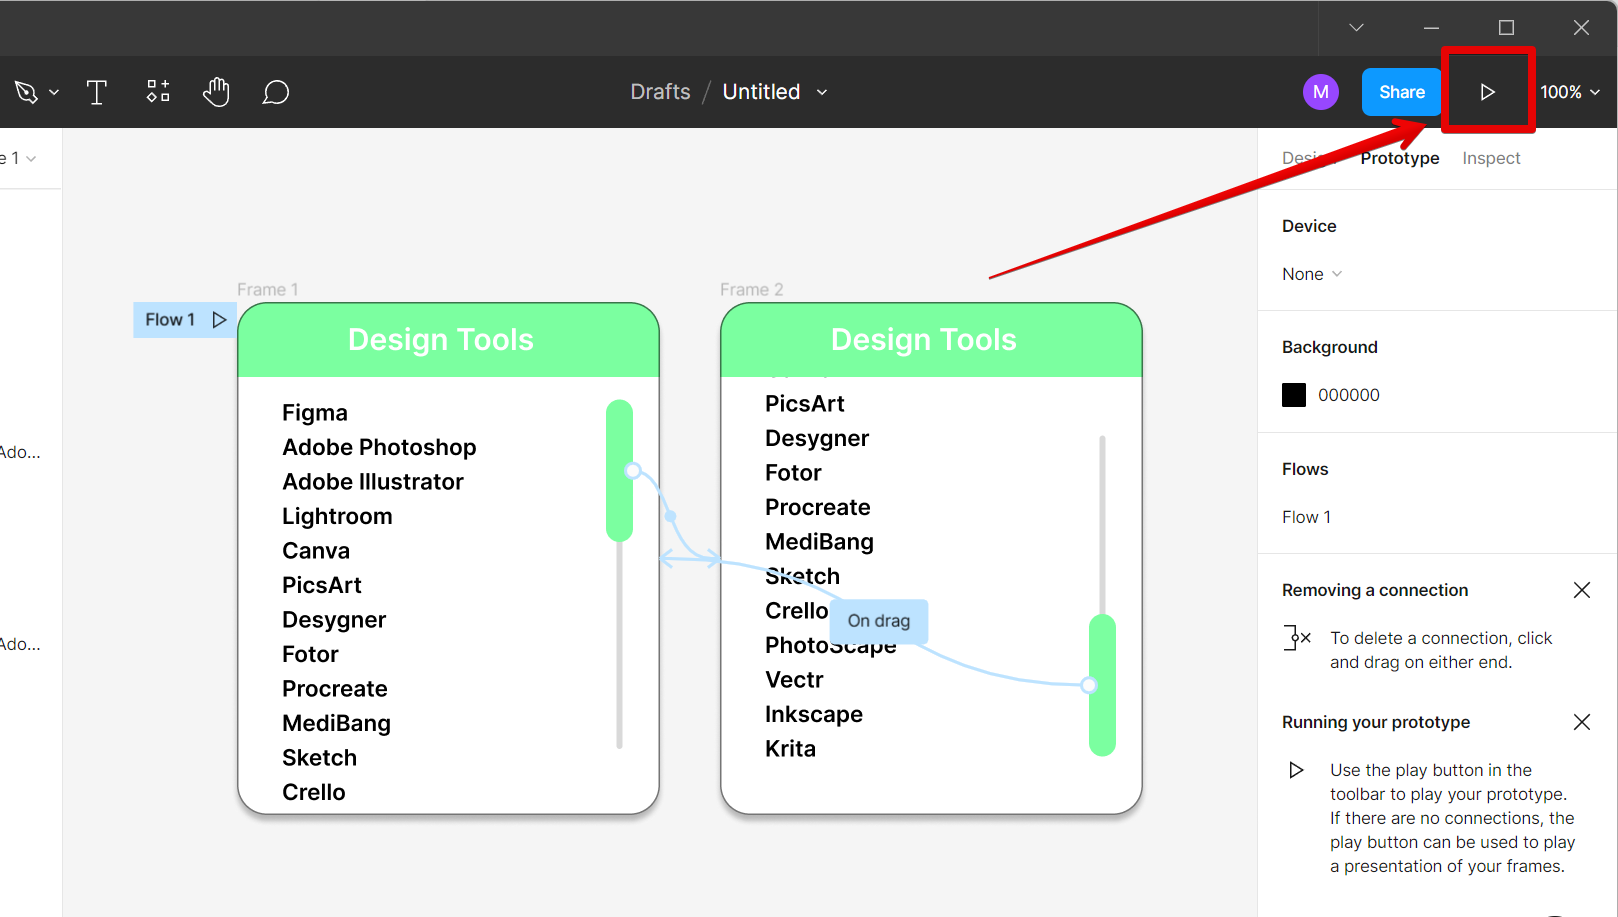
8. After that, you can now go to the “Prototype” tab at the upper-right corner of the screen to manage the flow of your scroll bar’s animation.
9. To create your flow, click on the “+” of the scroll bar in the first frame and connect it to the second frame.
NOTE: This is where we will set up the scroll-down action of the scroll bar.
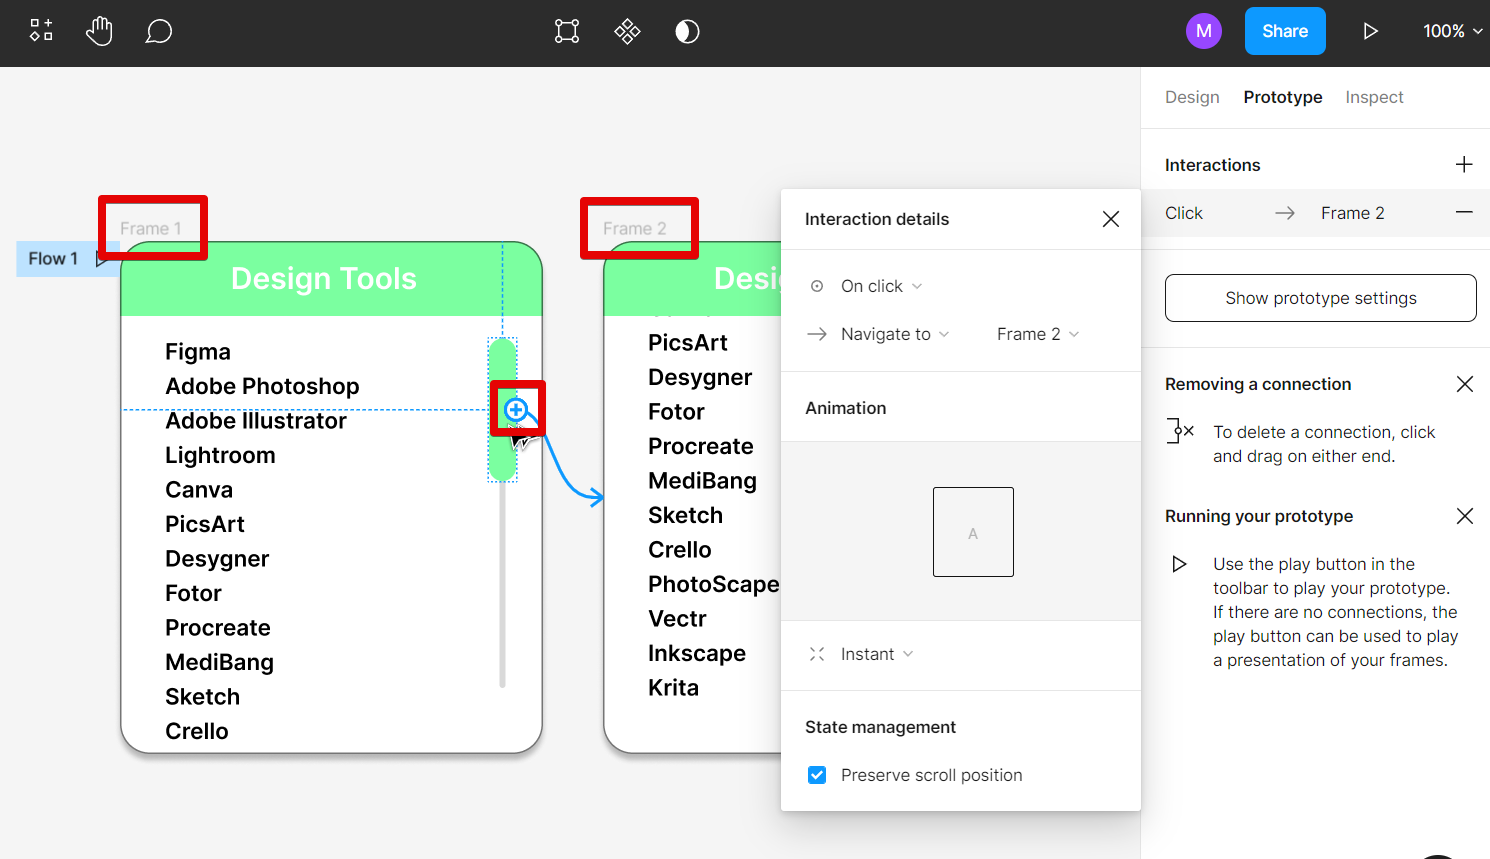
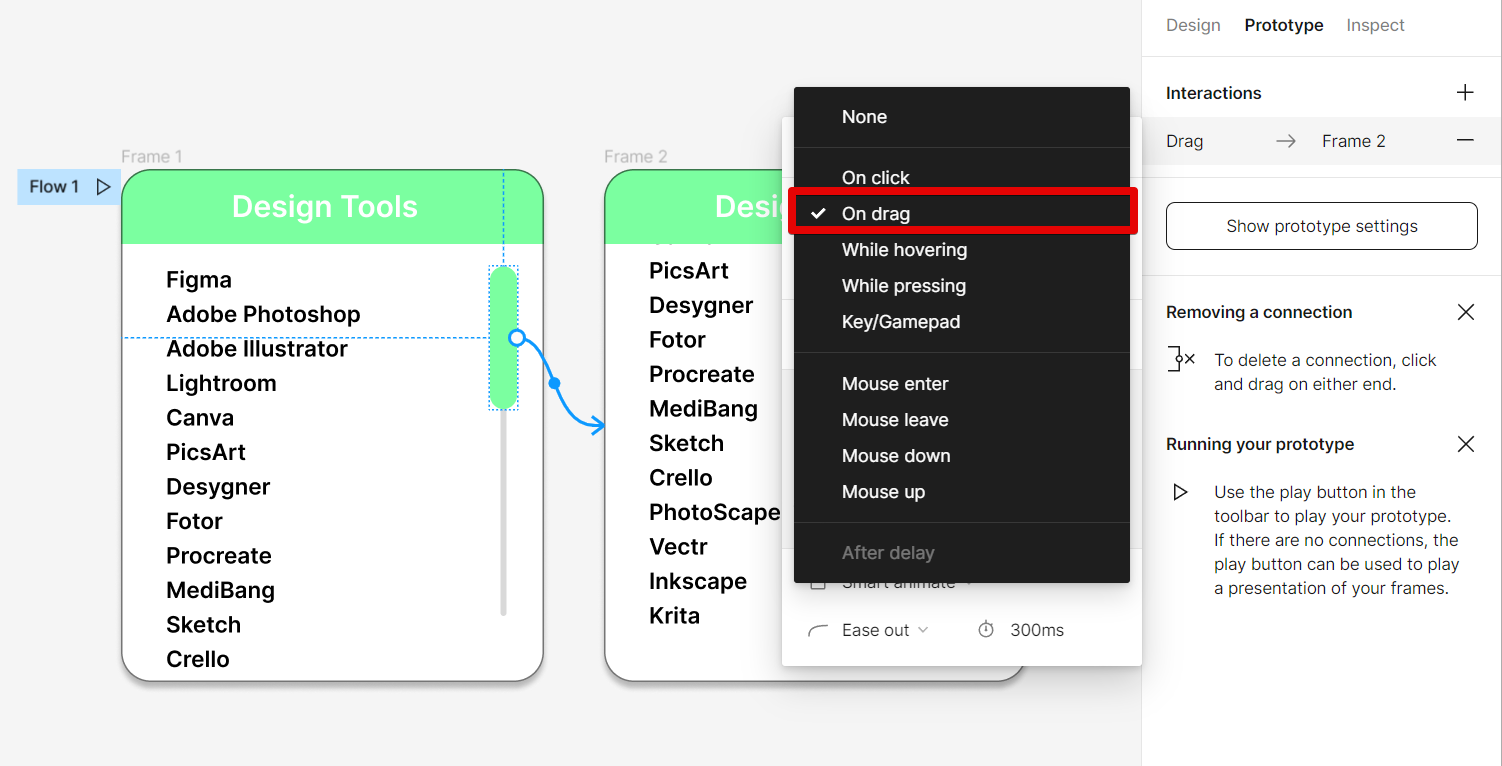
10. In the pop-up window of Interaction details, select the “On drag” option.
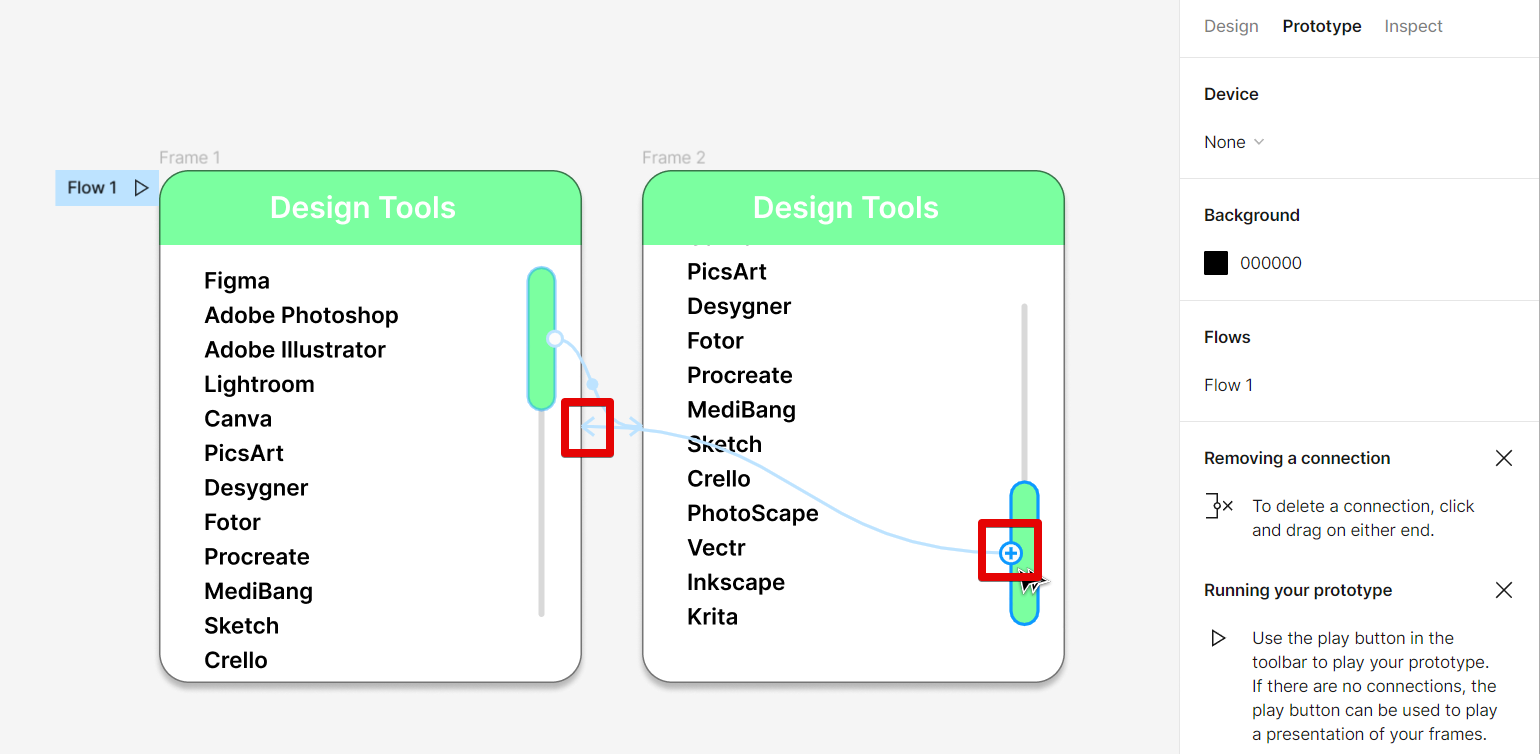
11. Next, click on the “+” of the scroll bar in the second frame and connect it to the first frame.
NOTE: This is where we will set up the scrolling up action of the vertical scroll bar.
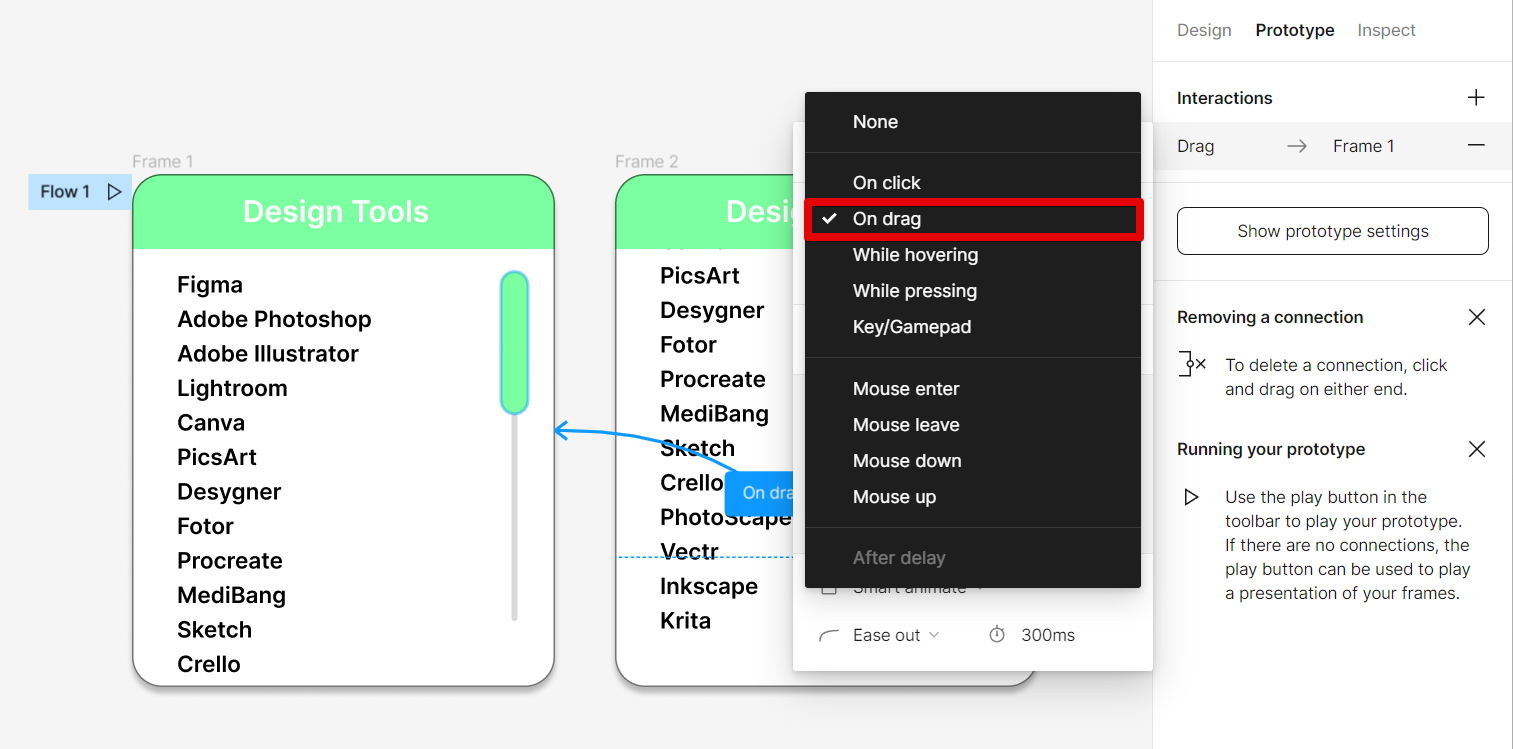
12. In the pop-up window of Interaction details, select “On drag”.
13. Once done, you can see the preview of your vertical scroll bar working by clicking on the “Play” button found in the upper-right corner of the screen.
14. This will open a new window and you can see your vertical scroll bar in action!

Conclusion:
How Do You Do a Scroll Animation in Figma? To create a scroll animation in Figma, simply create a scrollbar in your design and custom animations using the Interactions feature in the Prototype tab.
7 Related Question Answers Found
Scroll animation is a great way to add some visual interest to your web pages and make them more engaging for your visitors. There are a few different ways to create scroll animation in Figma, and each has its own advantages and disadvantages. One popular method is to use the Scrollable Frame tool.
Scroll animations are a great way to add some extra flair to your web designs. In this article, we’ll show you how to create scroll animations in Figma. First, let’s take a look at how to create a basic scroll animation.
Animations in Figma are a great way to add some additional flair and interactivity to your designs. Scrolling animations can be used to add some extra interest to a design, or to help the user navigate through a design. There are a few different ways that you can scroll an animation in Figma.
Interactive scrollbars can be a great way to add some flare to your website or web application. They can also be a great way to improve the user experience by providing some feedback on where the user is on the page. In this article, we’ll show you how to make an interactive scrollbar in Figma.
There are a few different ways that you can animate scrolls in Figma. One way is to use the built-in scroll animation features. To do this, simply select the layer that you want to animate and then click the “Animate” button in the top bar.
There are a few different ways that you can move the scroll bar in Figma. The first way is to click and hold on the scroll bar, then drag it to the desired location. The second way is to use the arrow keys on your keyboard.
There are a few different ways that you can make a scroll in Figma. You can use the scrollbars that are built into the software, or you can create your own custom scrollbars. If you want to use the built-in scrollbars, all you need to do is click on the “View” menu and then select “Show Scrollbars”.