If you’re working with Figma on a project, there are times when you may want to remove constraints from an object. This can be helpful if you need to make changes to the object that can’t be done with the existing constraints. In this article, we’ll show you how to remove constraints in Figma.
To remove constraints in Figma, first, select the object that you want to remove constraints from.
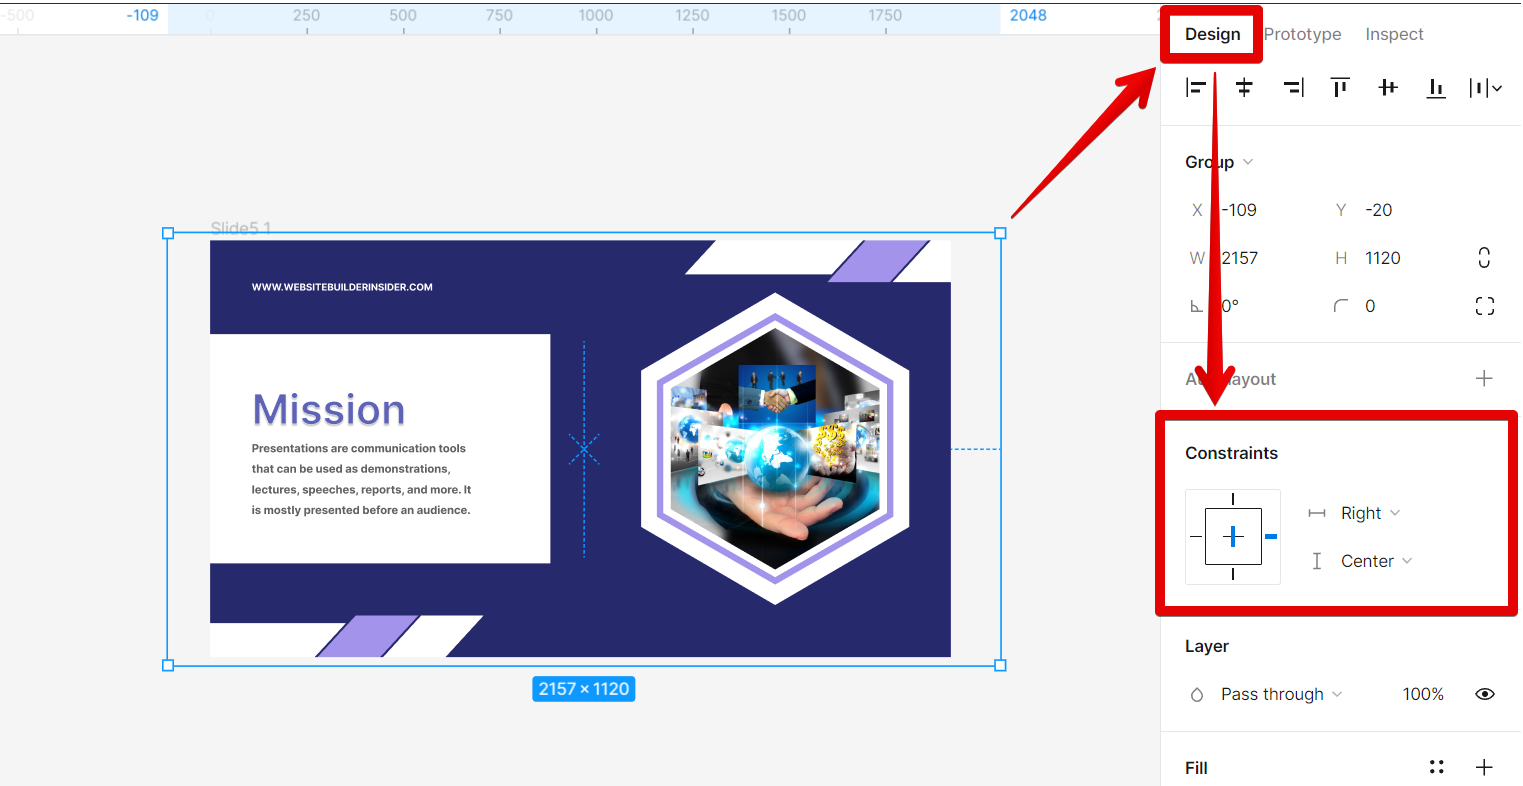
Then, in the right sidebar, click on the “Design” tab and go to the Constraints section. Here, you will see a list of all the constraints that are applied to the selected object.
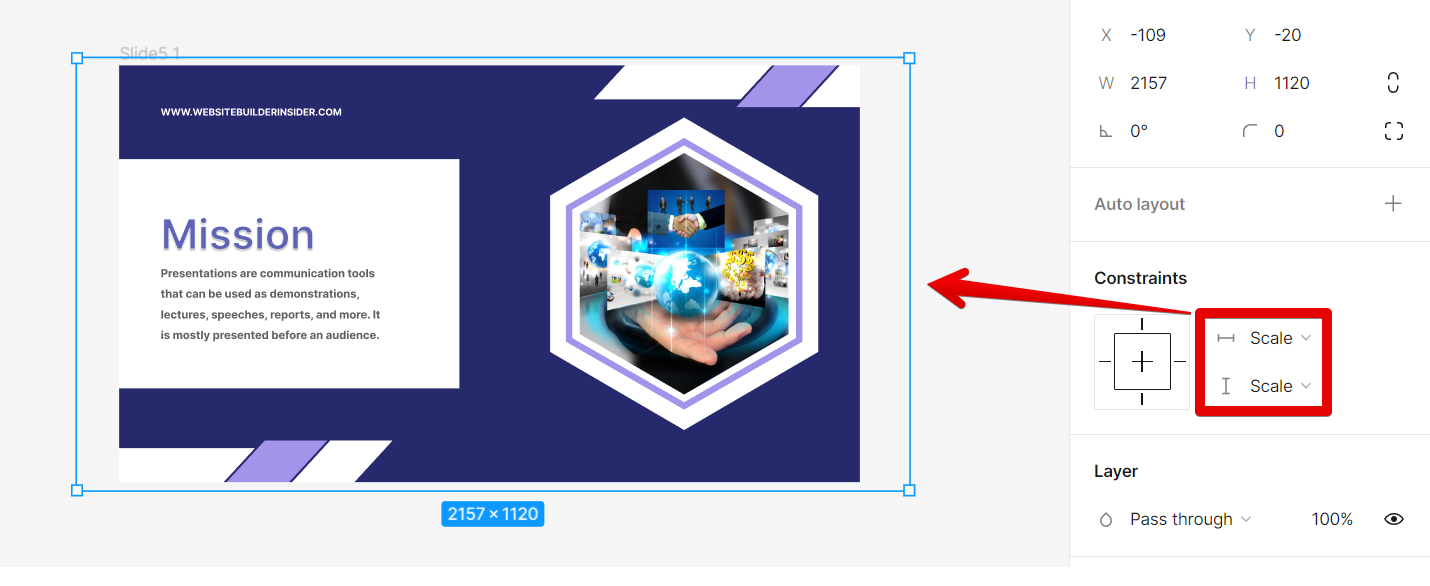
To remove a constraint, simply select the “Scale” option for both fields.
NOTE: Make sure to check your design’s constraints before removing them. Removing constraints may lead to distortion of your design once you resize it.
PRO TIP: When removing constraints in Figma, be careful not to accidentally delete any critical objects or artwork in your design. If you are unsure about what you are doing, it is always best to ask for help from a more experienced Figma user.
Once you’ve removed the constraints that you don’t want, you can then add new constraints or adjust the existing ones to suit your needs. To learn more about how to use constraints in Figma, check out our constraints tutorial.
Conclusion:
Removing constraints in Figma is a simple process that can be done by selecting the object and then selecting the “Scale” option next to the constraints box. Once you’ve removed the constraints that you don’t want, you can then add new constraints or adjust the existing ones to suit your needs. However, remember to check your design before removing the constraints since this might cause distortion if improperly used.
8 Related Question Answers Found
If you’re using Figma to design your website or application, you may find yourself wondering how to delete guidelines. Luckily, it’s a pretty straightforward process. Here’s a quick guide on how to do it:
First, open up the project that you want to delete the guidelines from.
In Figma, deleting a component is simple. Right-click on the component in the Layers panel and select Delete from the menu that appears. The component will be deleted from your project.
When you delete a component in Figma, it is removed from your library and any instances of it on your canvas. To delete a component:
1. Select the component in the canvas or your library
2.
Have you ever made a change in Figma that you later regretted? Maybe you accidentally deleted a layer or changed the wrong property. Or maybe you just want to go back to a previous version of your design.
If you’re done with a Figma flow or want to start from scratch, you can delete all the frames in your file at once. Here’s how:
1. In the left sidebar, select the frame you want to delete.
2.
If you need to remove a component from Figma, or simply convert the component to a frame to open more editing options, then there are a few steps you need to follow to do so:
1. Use the Layers section to select the component that you want to remove. Then, press “Delete” on your keyboard.
Figma is a vector drawing and animation software that is used by web designers and developers to create high-quality graphics. It is also possible to style text in Figma using the Text tool. In this article, we will show you how to detach all components in Figma so that you can style them individually.
If you’re working on a design in Figma and want to remove all the prototype link points, there are a few ways you can do this. First, you can select all the objects on the canvas and then delete the link points one by one. Or, you can use the “Unlink All” option in the Prototype tab.