Making a mockup in Illustrator is simple.
To create a mockup in Illustrator, you need to:
1. Place a bottle photo and then trace half part of the bottle using the Pen Tool just like the image below.  2. Select the outline you made and then click Effect > 3D > Revolve.
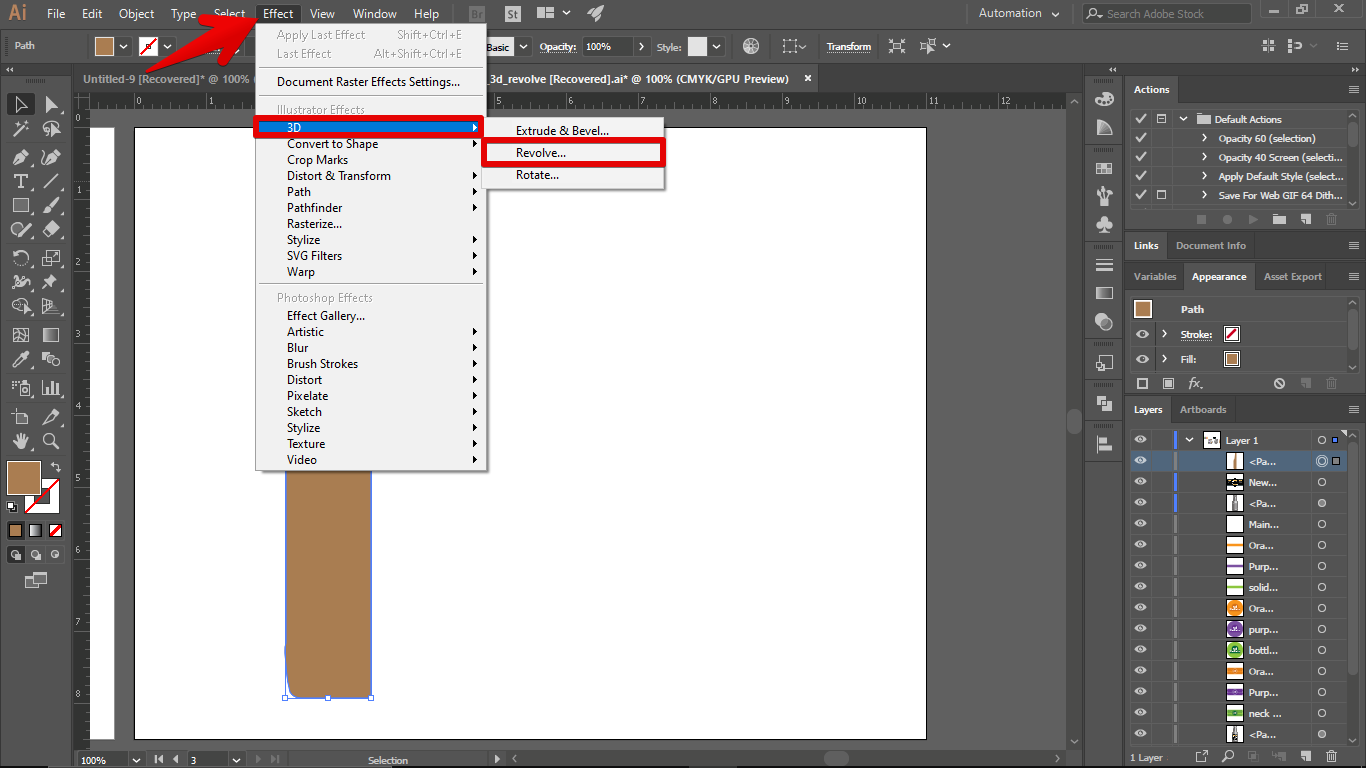 3. Make sure you select the “Right Edge” option and tick the preview box to view the changes in real-time. You change the rotation of the mockup by dragging the 3D box. You could also modify the angle, lighting, blending, etc. After you’re satisfied with the initial mockup look, you can now click Map Art.
 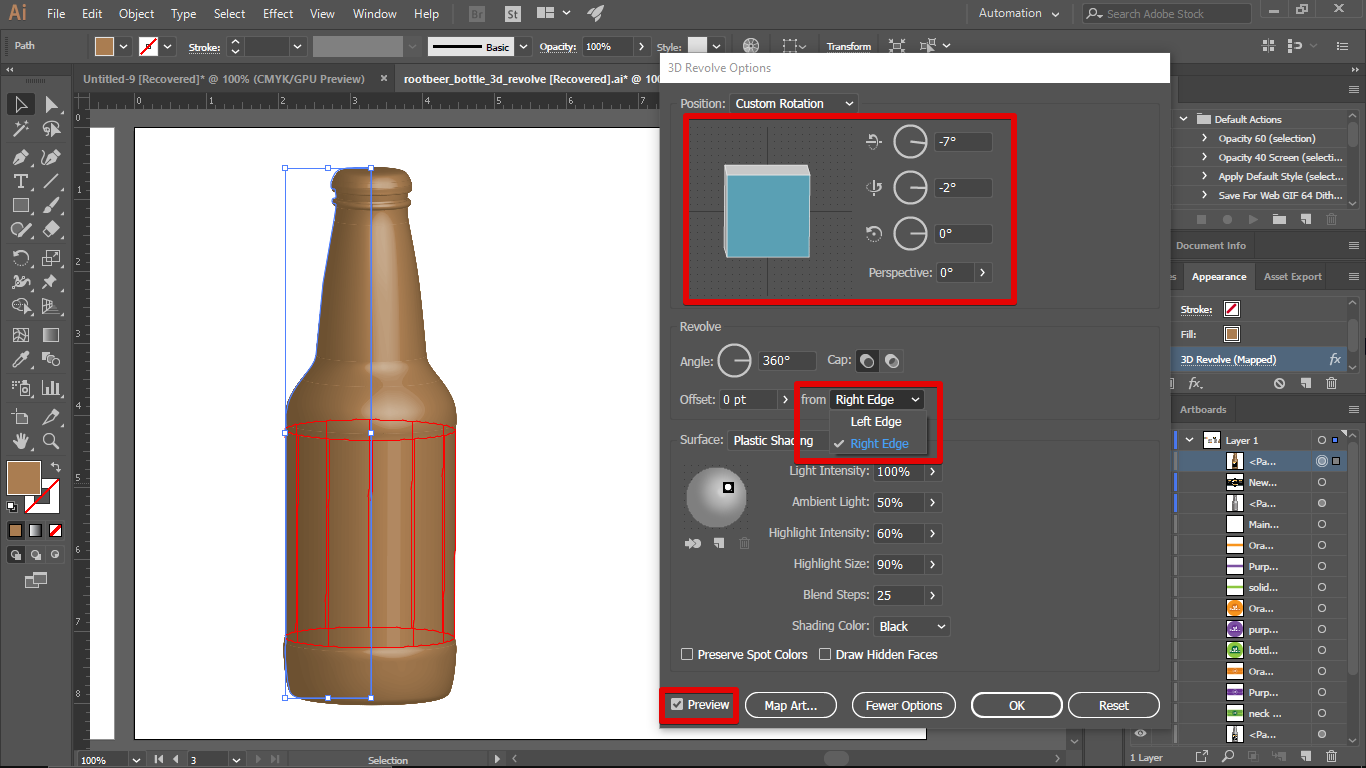 4. Select which surface and symbol you will use then press OK.
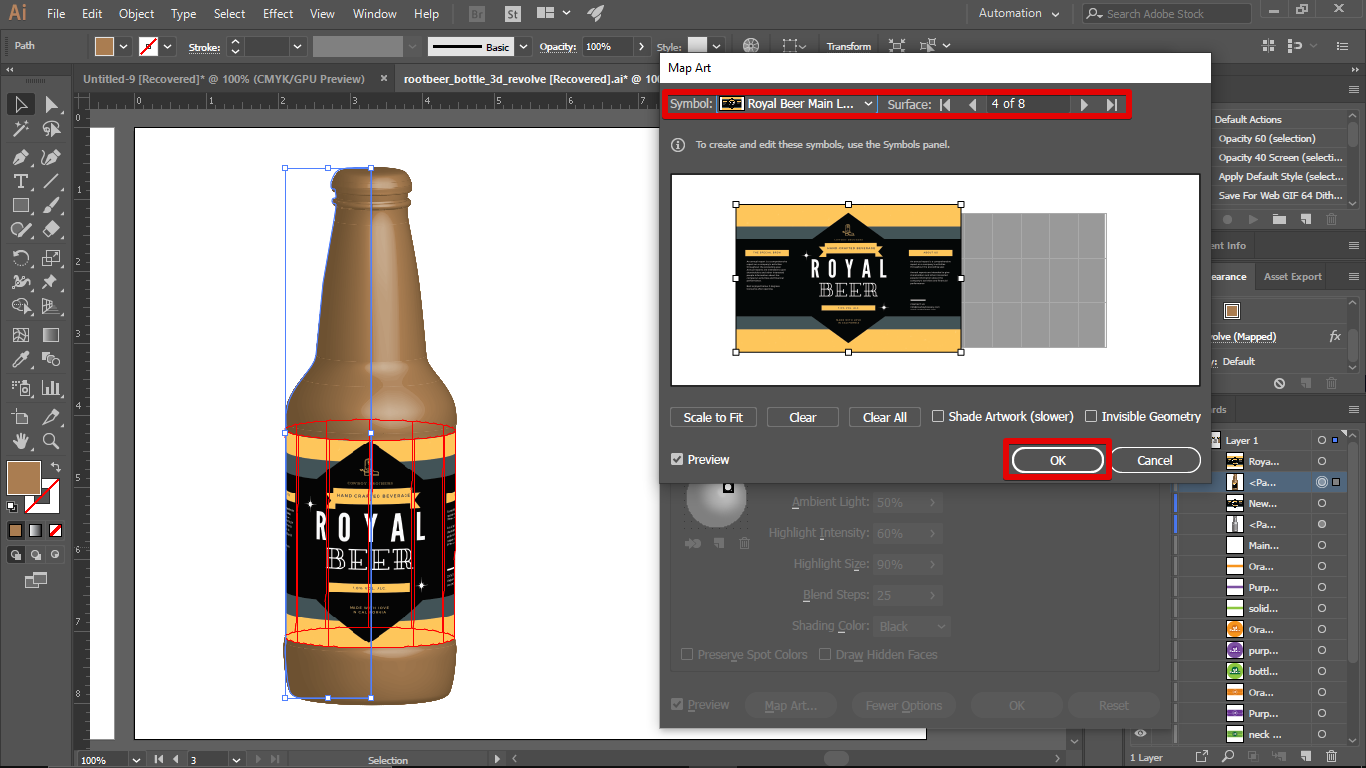 5. Click OK again to see the changes in your Mockup.
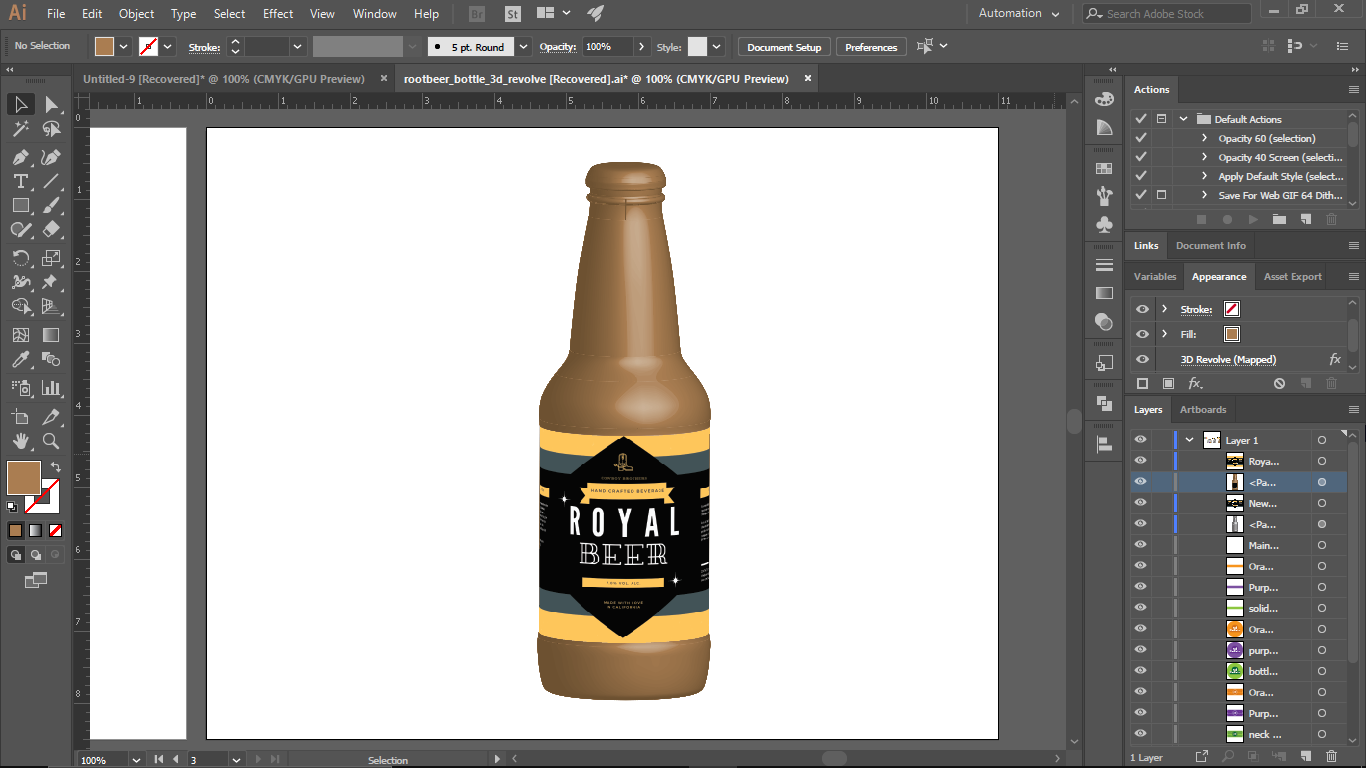
PRO TIP: Please be advised that making a mockup in Illustrator can be dangerous. If not done correctly, it can lead to serious injury or even death.
How to add symbols to Illustrator?
Paste your image in illustrator then click “Embed”. Press ctrl + shift +F11 for the symbol tab to appear. Click “New Symbol”.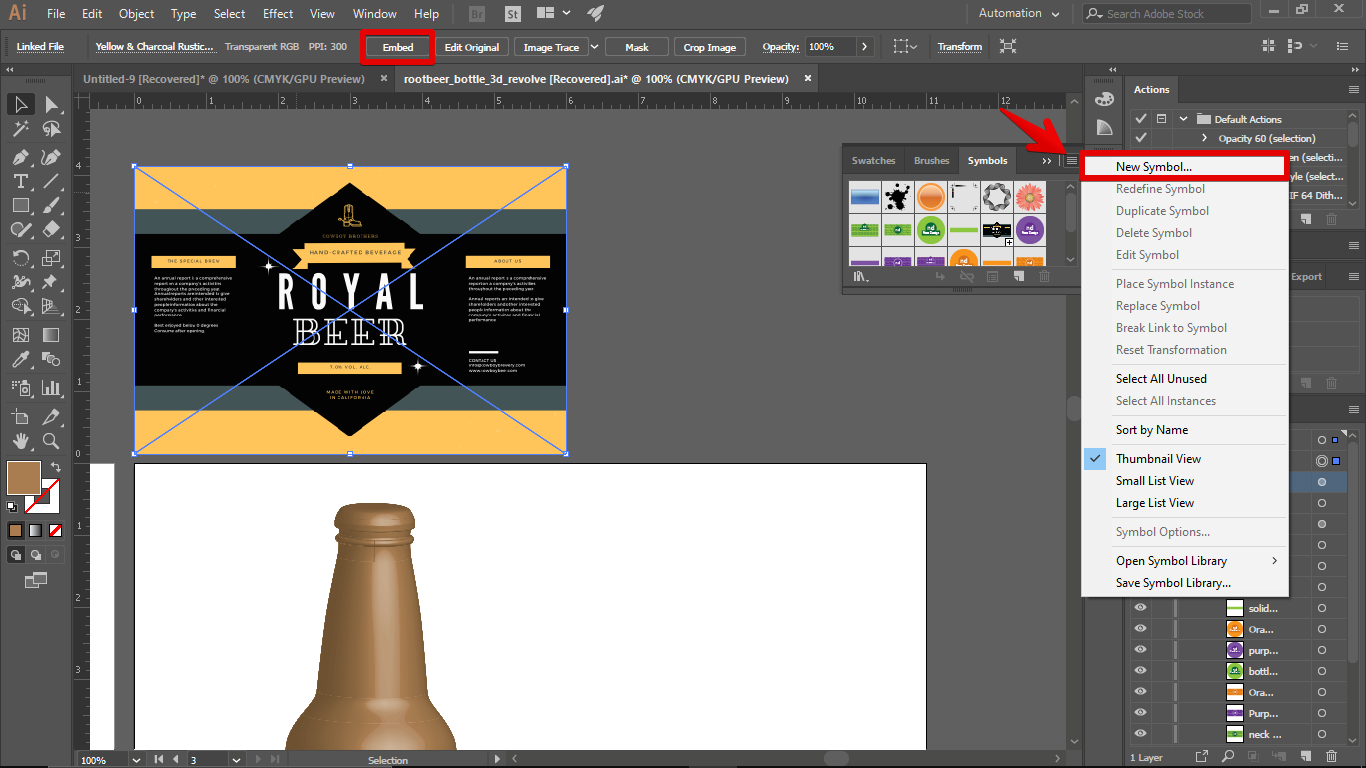 2. Edit the name of your symbol. Choose the correct export and symbol type then click “OK”.
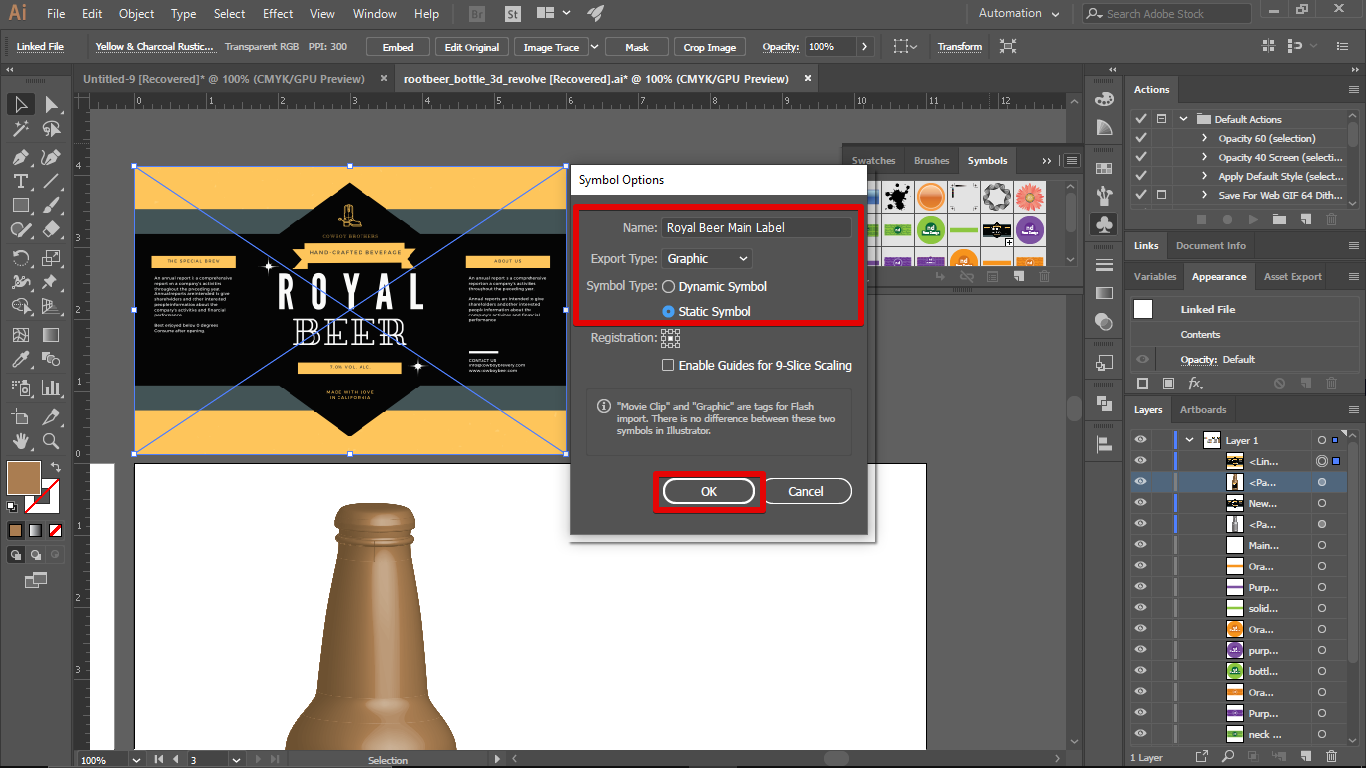
9 Related Question Answers Found
Making a business card mockup in Illustrator can be a quick and easy way to get a layout for your card ready. There are a few different ways to create a mockup, but the easiest is to use the built-in tools in Illustrator. To create a mockup in Illustrator, first open the file you want to create a mockup for.
If you’re new to Illustrator, or if you’re looking to improve your skills, you might be wondering how to emboss text or shapes. In this article, we’ll show you how to emboss text and shapes in Illustrator, step-by-step. Before we get started, it is important to know a few things about Illustrator’s embossing features.
Making Faces in Illustrator
If you’re looking to create faces in Illustrator, there are a few different ways you can go about it. One way is to use the Pen tool and draw facial features on a new layer. You can then use the Pathfinder tool to edit and shape the features.
Embedding an image in Illustrator means inserting it into a document as if it were a graphic object. Once the image is embedded, you can use the Object tools to manipulate it, the Properties panel to set properties, the Paths and Expressions tools to create paths and text, and the Layer tools to add or delete layers. You can also use the Drawing Tools panel to draw on the image.
Embedding an image in Illustrator is easy. First, open the image in Illustrator. Next, use the Image Tools Options menu to open the Image Properties dialog box.
Illustrator is an amazing program for creating graphics, illustrations, and animations. It is a versatile program which allows you to create virtually any type of graphic you can imagine. However, if you want to embed graphics in your website or document, there are a few steps you need to follow.
Making a postcard in Illustrator can be done in a few simple steps. The first step is to create a new document in Illustrator and set the size to the desired card size. The next step is to add some basic shapes to the document.
Making a postcard in Illustrator is a relatively easy process. First, open up Illustrator and create a new document. Next, select the Rectangle tool and draw a rectangle on your document.
Making a playing card in Illustrator is a fairly simple process. First, open up Illustrator and create a new document. Next, select the Playing Card tool from the Illustrator toolbar.