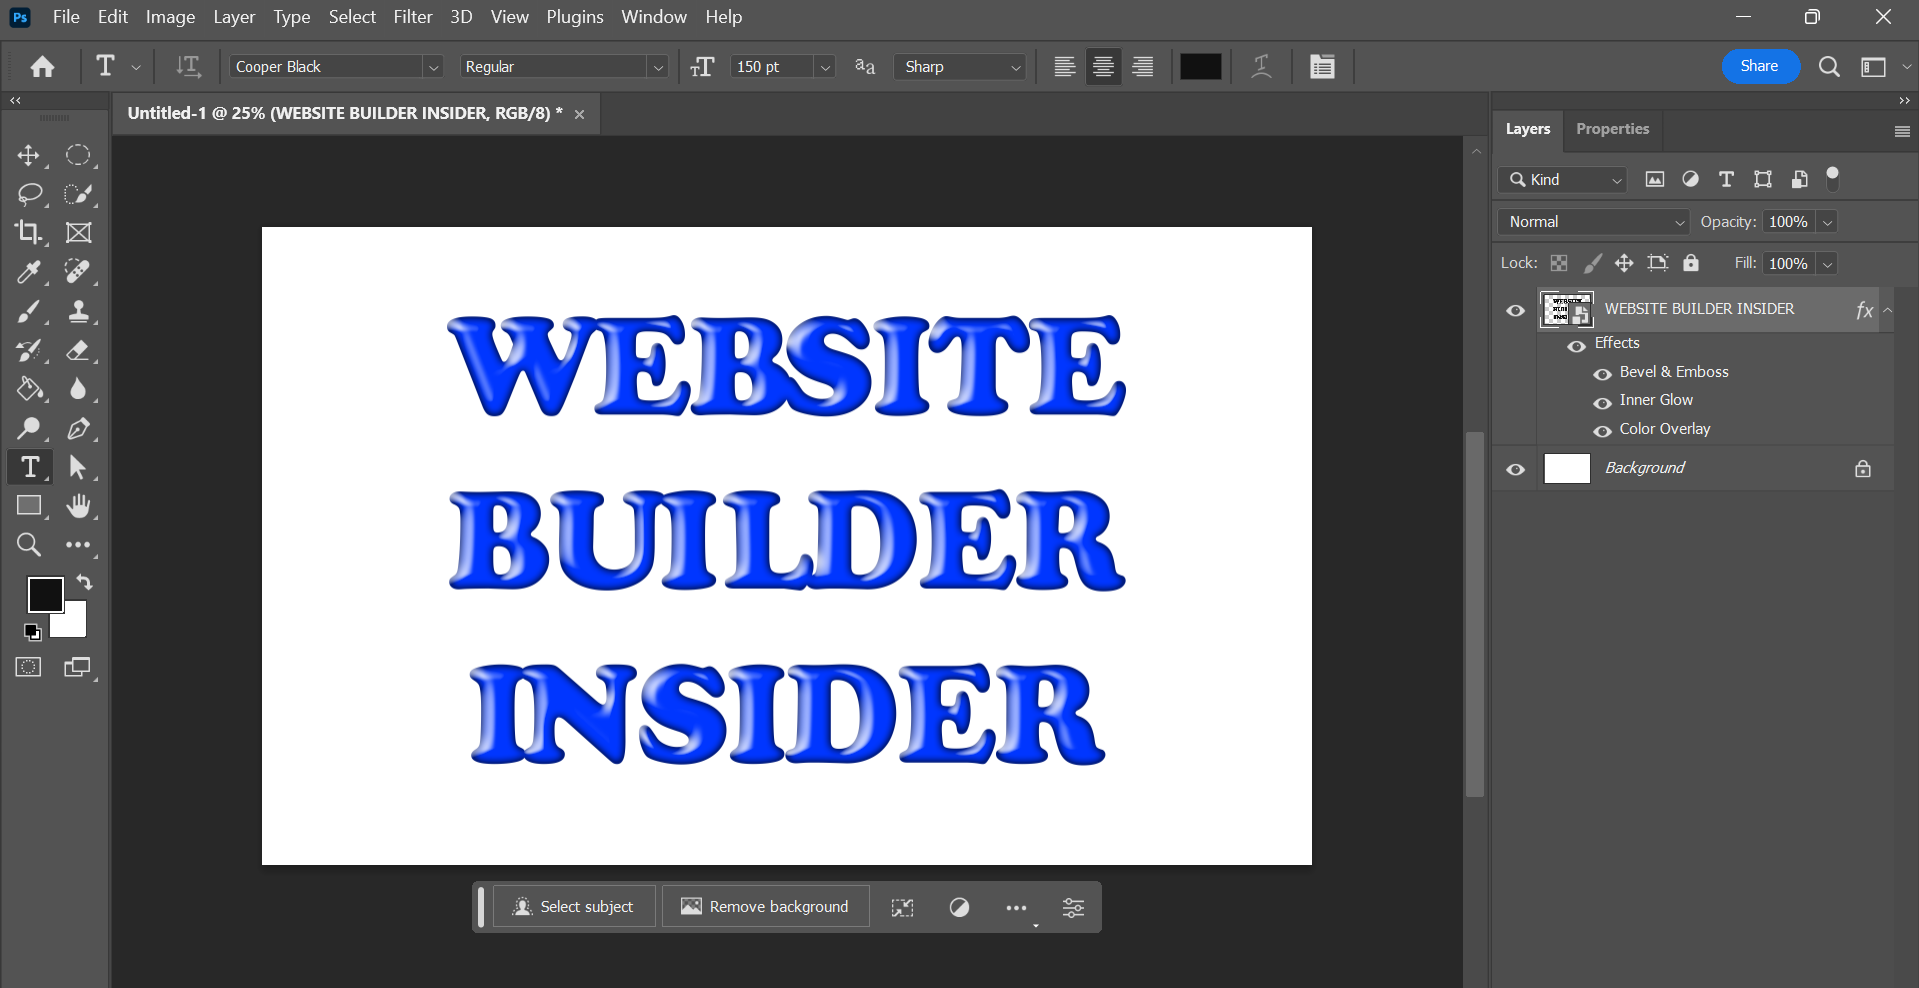
There is one simple way that you can create a glossy effect in Photoshop. That is to use the Layer Style window.
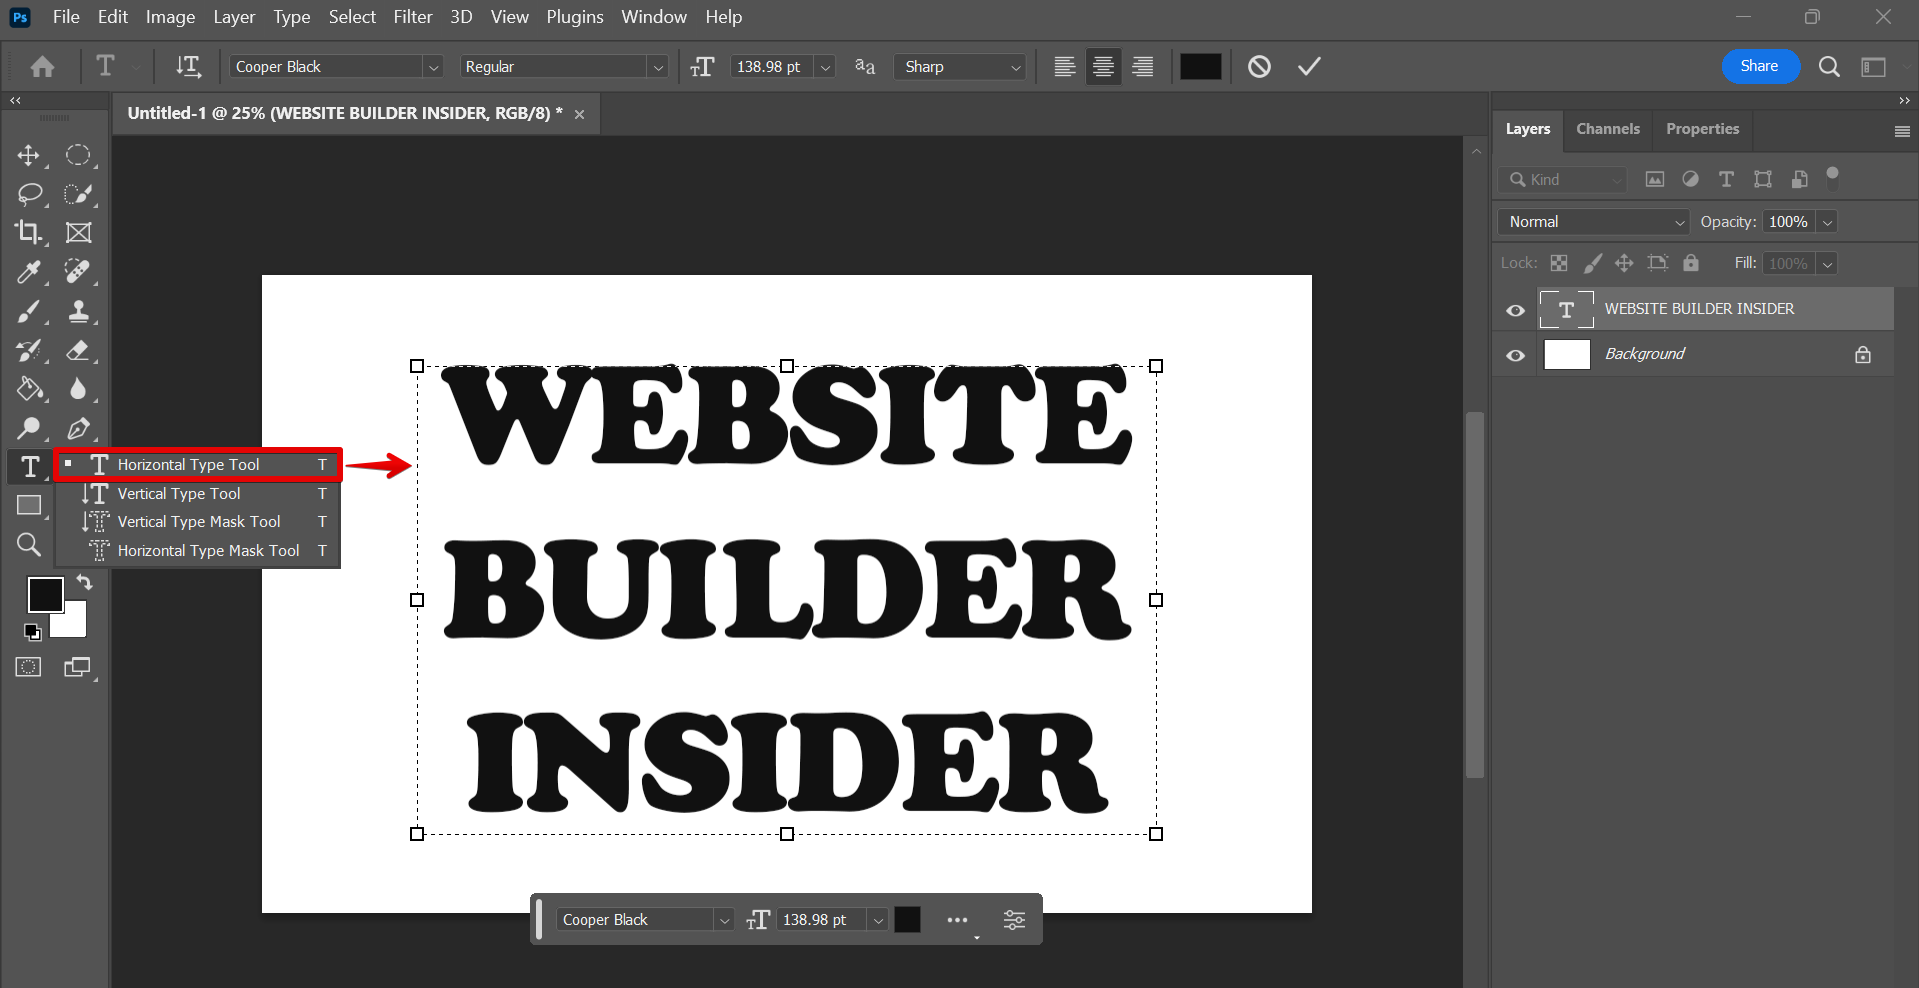
To do this, open a new design file in Photoshop, then add the object you want to have a glossy effect. In this tutorial, we will be adding a glossy effect to a text. To do this, first, select the “Horizontal Type Tool” from the left toolbar and type in your text on the canvas.
NOTE: It is recommended to use a thick font style for the glossy effect to see the best results.

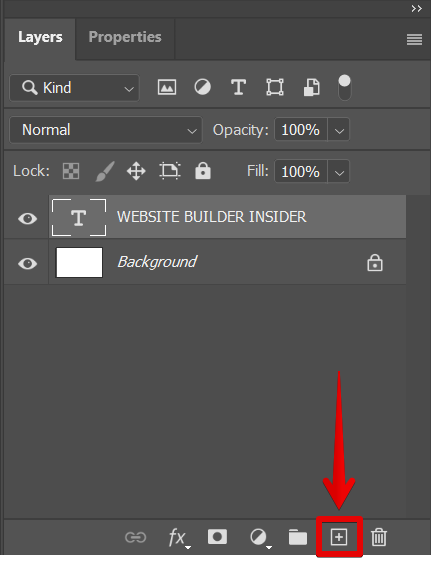
Next is to create a new layer. To do this, simply go to the Layers window and click on the plus icon at the bottom.

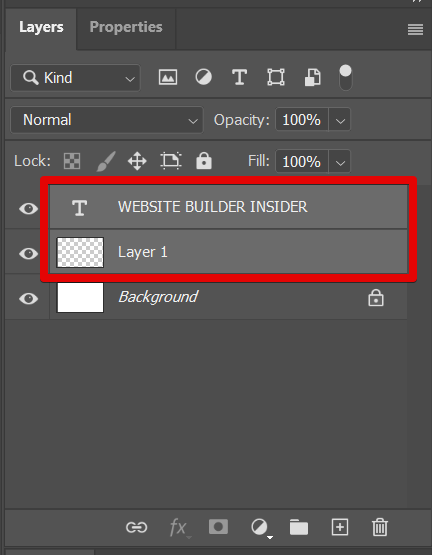
After that, we need to merge the new layer and the text layer and convert them into a Smart Object first before applying the glossy effect. To do this, select both of the layers.
NOTE: Converting layers into a Smart Object in Photoshop before adding effects allows for non-destructive editing, ensuring that the original graphic remains unaltered.

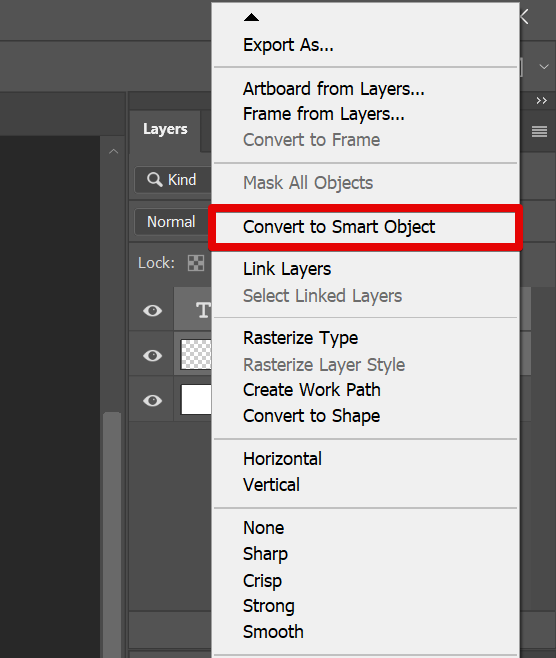
Then, right-click on them and select the “Convert to Smart Object” option from the menu that will appear.

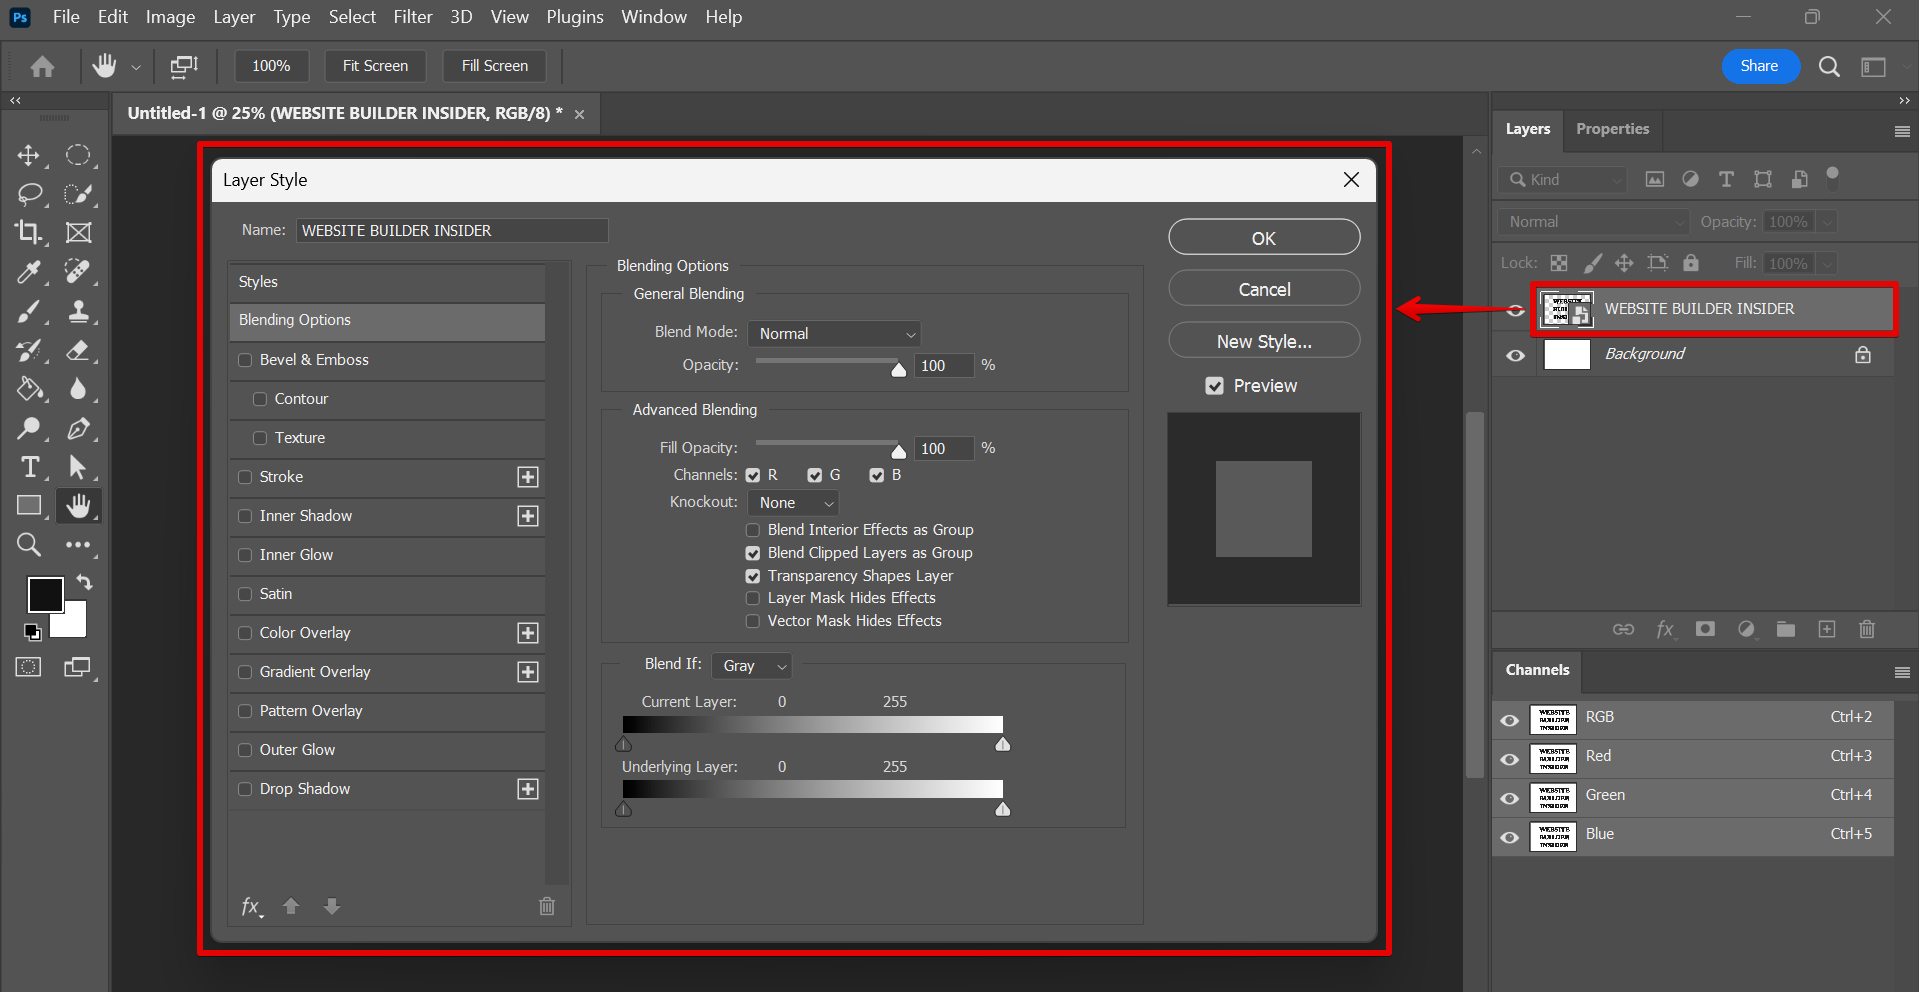
Once done, we can now add effects to our text. To do this, double-click on the Smart Object that was created to open up the Layer Style window. You can also right-click on the layer and select “Blending Options” from the menu.

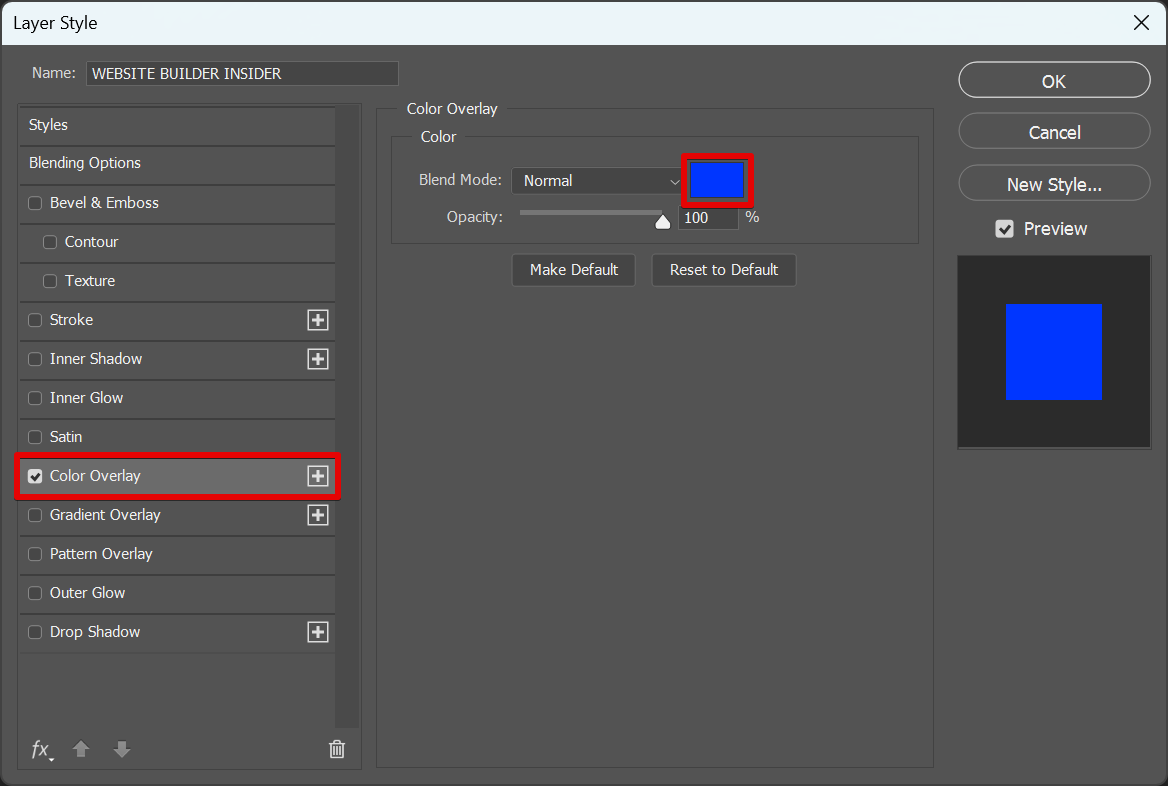
Select the “Color Overlay” option from the list of effects on the left panel in the Layer Style window. After that, go to the settings section on the right panel and select the color that you want to apply to your text.
NOTE: The Color Overlay effect provides a uniform color to a layer’s content, which, when paired with effects like “Gradient Overlay” or “Bevel & Emboss”, can help achieve a glossy appearance.

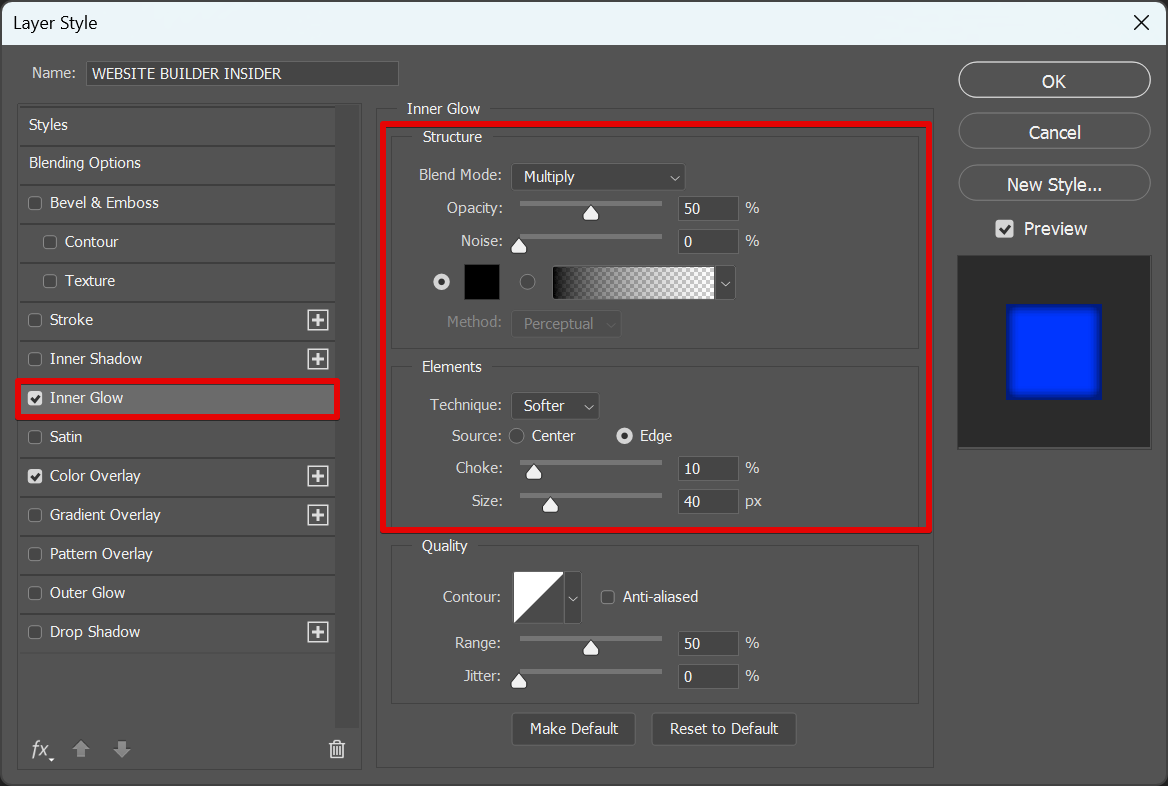
The next step is to apply the “Inner Glow” effect. You can refer to the details below for the settings used in this tutorial. However, remember that you can still adjust these to your preference.
NOTE: The Inner Glow effect is used to add a soft luminescence to the edges or center of an object, enhancing the illusion of depth or glossiness.
Structure
- Blend Mode: Multiply
- Opacity: 50%
- Noise: 0%
- Color of glow: Black
Elements
- Technique: Softer
- Source: Edge
- Choke: 10%
- Size: 40%

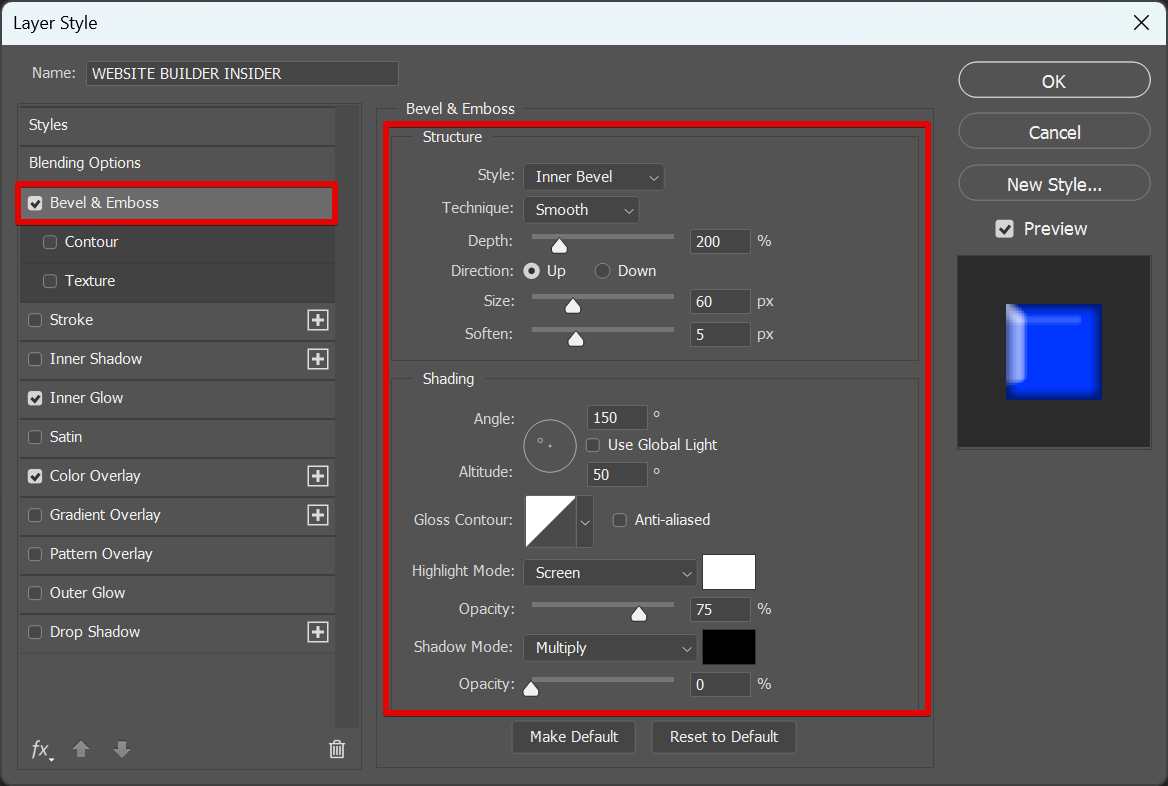
Finally, click on the “Bevel & Emboss” effect and customize its Structure and Shading settings. You can refer to the details below for the settings used in this tutorial. However, remember that you can still adjust these to your preference. Once you are done adjusting the settings, click on the “OK” button to apply your changes.
NOTE: The Bevel & Emboss effect creates a three-dimensional appearance by adding highlights and shadows to the edges of an object, contributing to a glossy or raised effect.
Structure
- Style: Inner Bevel
- Technique: Smooth
- Depth: 200%
- Direction: Up
- Size: 60 px
- Soften: 5 px
Shading
- Use Global Light: Uncheck
- Angle: 150 degrees
- Altitude: 50 degrees
- Gloss Contour: Linear
- Highlight Mode: Screen
- Opacity: 75%
- Shadow Mode: Any
- Opacity: 0%

And there you have it! You can now make a glossy effect in Photoshop!

PRO TIP: This article provides instructions on how to create a glossy effect in Photoshop. However, it is important to note that this effect can only be achieved if you have the proper software and skills. Additionally, this effect may not be suitable for all images and can create an unnatural look.
In conclusion, achieving a glossy effect in Photoshop can enhance the visual appeal of your graphics, giving them a stylish and polished look. By utilizing layer styles like Color Overlay, Inner Glow, and Bevel & Emboss, designers can simulate depth, shine, and luminescence effects, making results stand out more than others.
9 Related Question Answers Found
In order to create a print effect in Photoshop, there are a few steps that need to be followed. First, open the image that you would like to use and select the layer that you want to apply the print effect to. Next, go to Filter > Pixelate > Mosaic and select a cell size that you are happy with.
There are many ways to style text in HTML, but the most common ways are to use the < p >, < b >, and < u > tags. The < p > tag is used to create a paragraph, the < b > tag is used to create bold text, and the < u > tag is used to underline text. To make text glossy in Photoshop, you first need to create a new layer.
There are many ways to create shiny effects in Photoshop, but one of the most popular and effective ways is to use the “Lens Flare” filter. This is found in the “Filter” menu, which is accessed in the top menu bar. To apply a shiny effect to your design in Photoshop, first, select the layer where you want to add the filter in the Layers window.
Making a paper effect in Photoshop is simple. First, create a new document. Next, choose the “Paper” effect from the Effects menu.
There are a few ways to make things look shiny in Photoshop. One way is to use the “glow” filter. Go to Filter > Blur > Glow.
There are a few different ways that you can create an embossed effect in Photoshop. One way is to use the layer style options. Go to the layer you want to emboss and double click on it.
Paper is one of the most versatile mediums in the world. You can use it to communicate a message, to make art, or to simply add texture to a design. While there are many ways to create the appearance of paper in Photoshop, one of the easiest is to use the Paper Texture filter.
There are a few different ways that you can create a ripped paper effect in Photoshop. One way is to use the Lasso tool to create a jagged edge on the paper. To do this, follow the steps below:
1.
In Photoshop, there are many ways to enhance colors. One way is to use the vibrance setting. Vibrance will make colors more saturated without making skin tones look unnatural.
