PRO TIP: If you are not familiar with Photoshop, please be aware that changing the color of a logo can be a complex process. There are many different ways to change the color of a logo, and each method has its own advantages and disadvantages. Before you attempt to change the color of a logo, please familiarize yourself with the various methods and choose the one that best suits your needs.
There are a few different ways that you can change the color of a logo in Photoshop. One way is to use the “Hue/Saturation” Adjustment Layer.
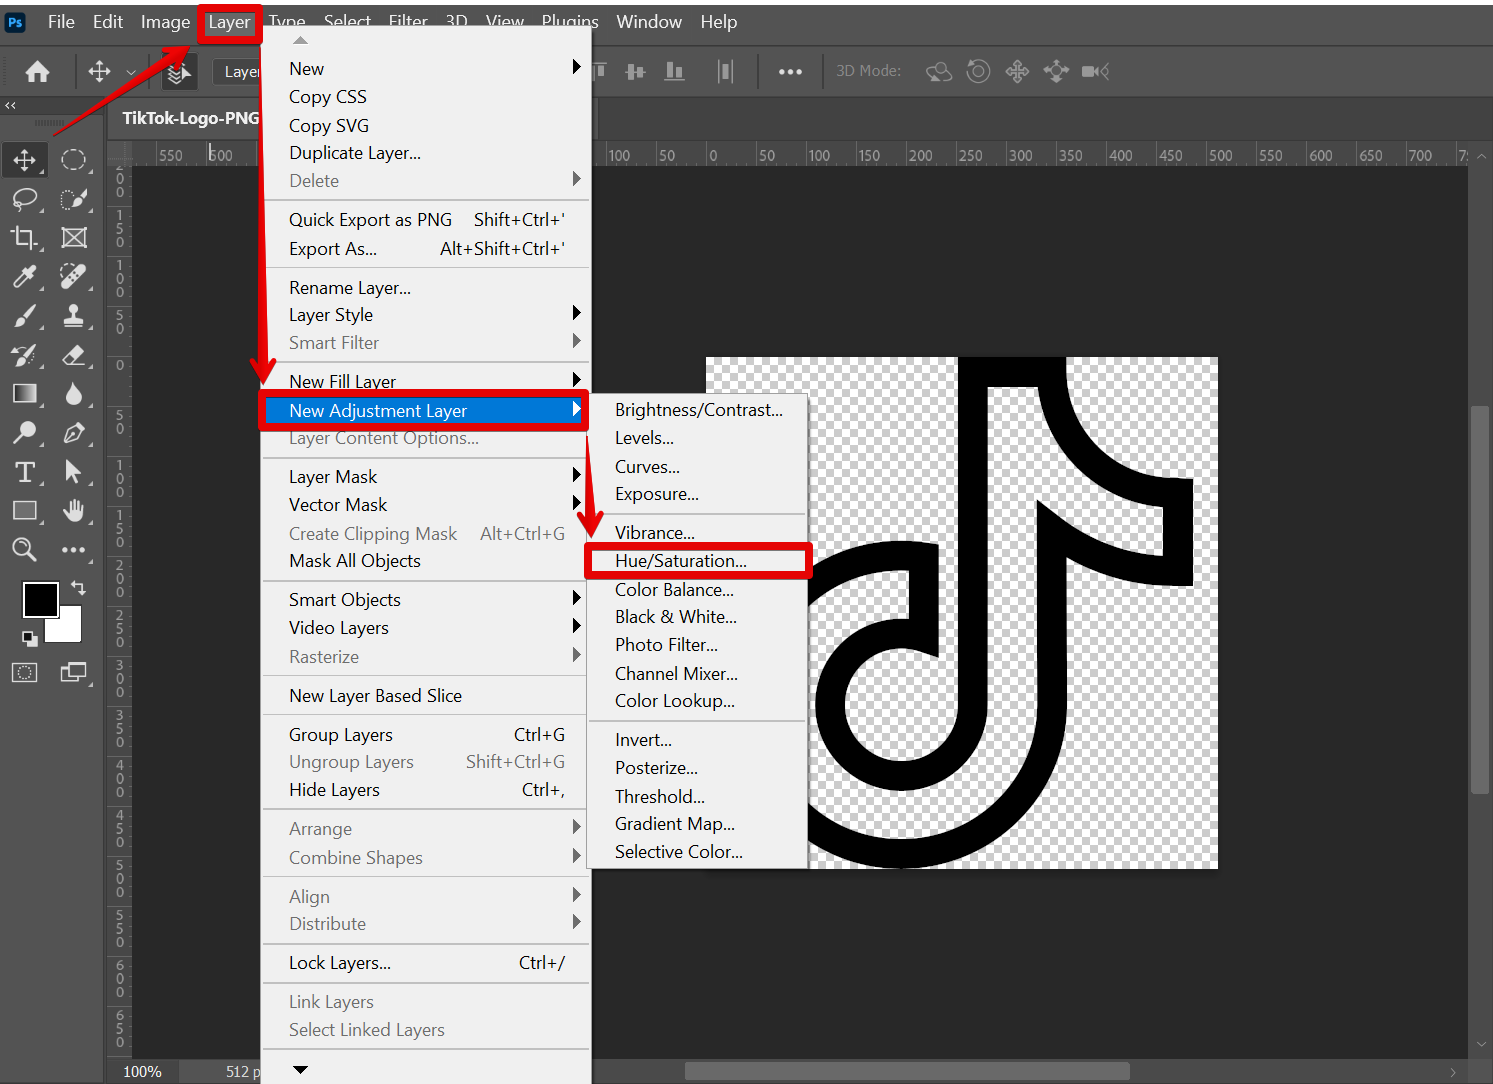
To do this, go to Layer > New Adjustment Layer > Hue/Saturation.
NOTE: The Hue/Saturation adjustment layer in Photoshop allows you to adjust the hue, saturation, and lightness of the entire image or a specific range of colors within the image.
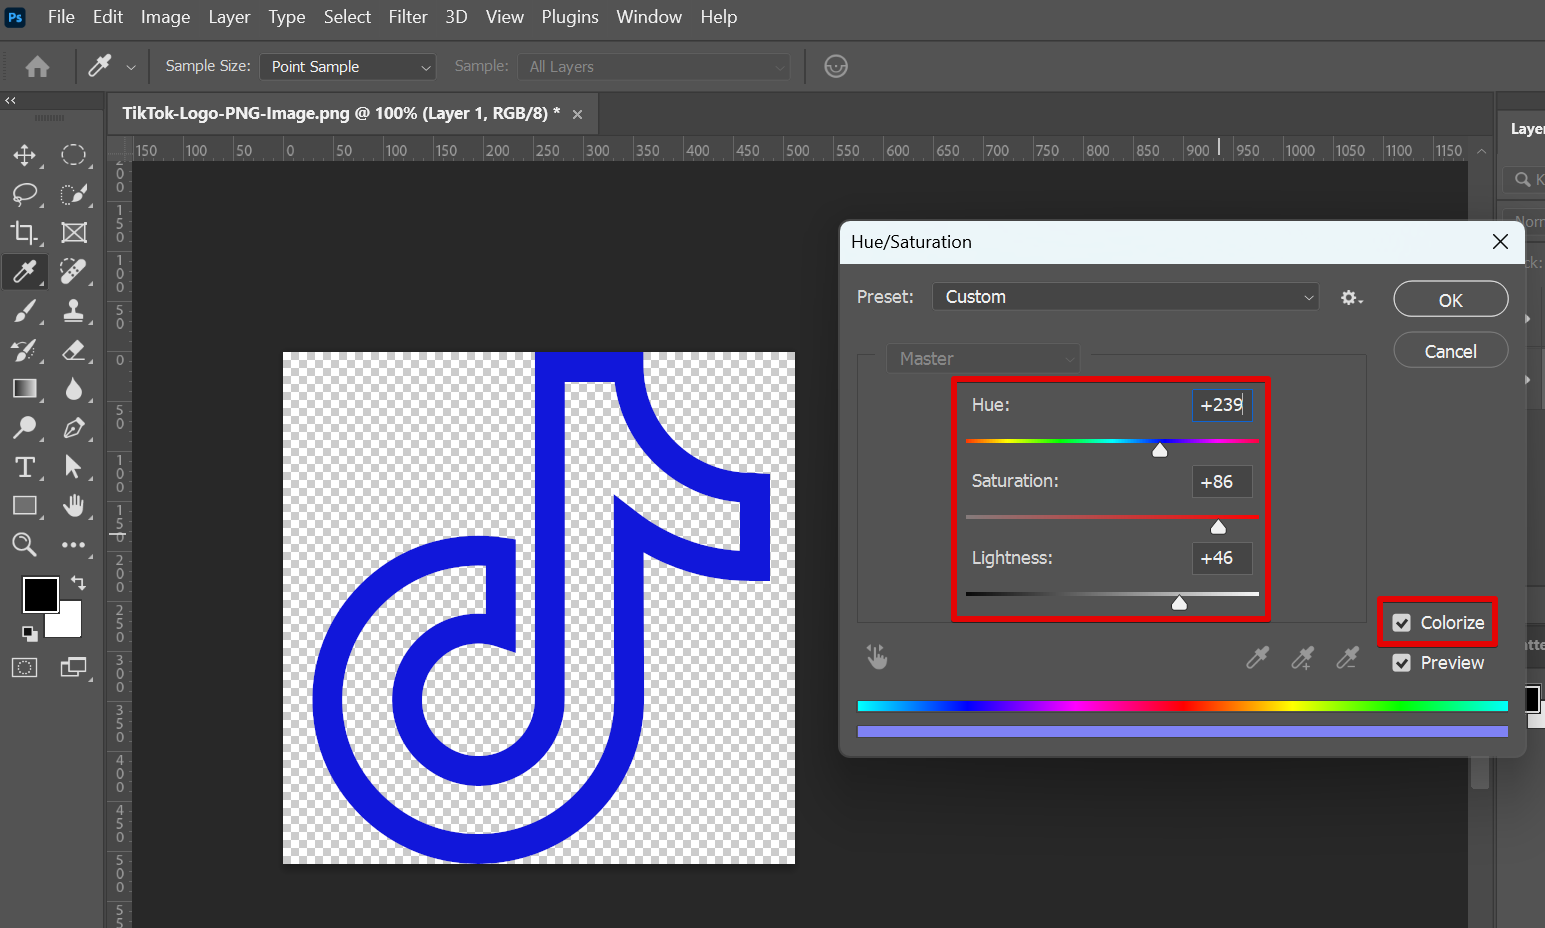
A new window will pop up and you can adjust the “Hue,” “Saturation,” and “Lightness” sliders to change the color of your logo.
NOTE: Make sure to tick the checkbox beside the Colorize option if you want to apply a solid color tint to your image. This allows you to adjust the hue, saturation, and lightness of the entire image with a single color.
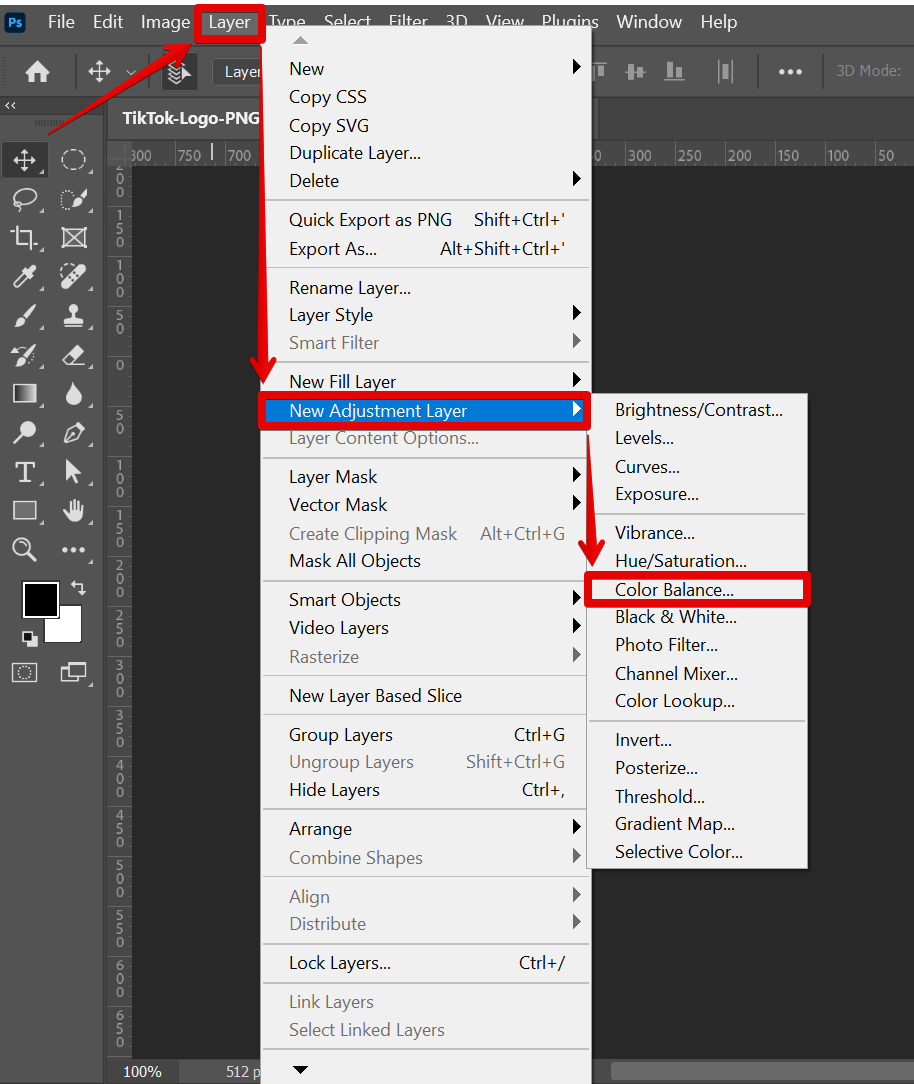
Another way to change the color of your logo is to use the “Color Balance” Adjustment Layer. To do this, go to Layer > New Adjustment Layer > Color Balance.
NOTE: The Color Balance adjustment layer in Photoshop can be used to adjust the color balance of an image or a specific area of an image. This adjustment layer allows you to modify the balance between the colors in the shadows, midtones, and highlights of the image.
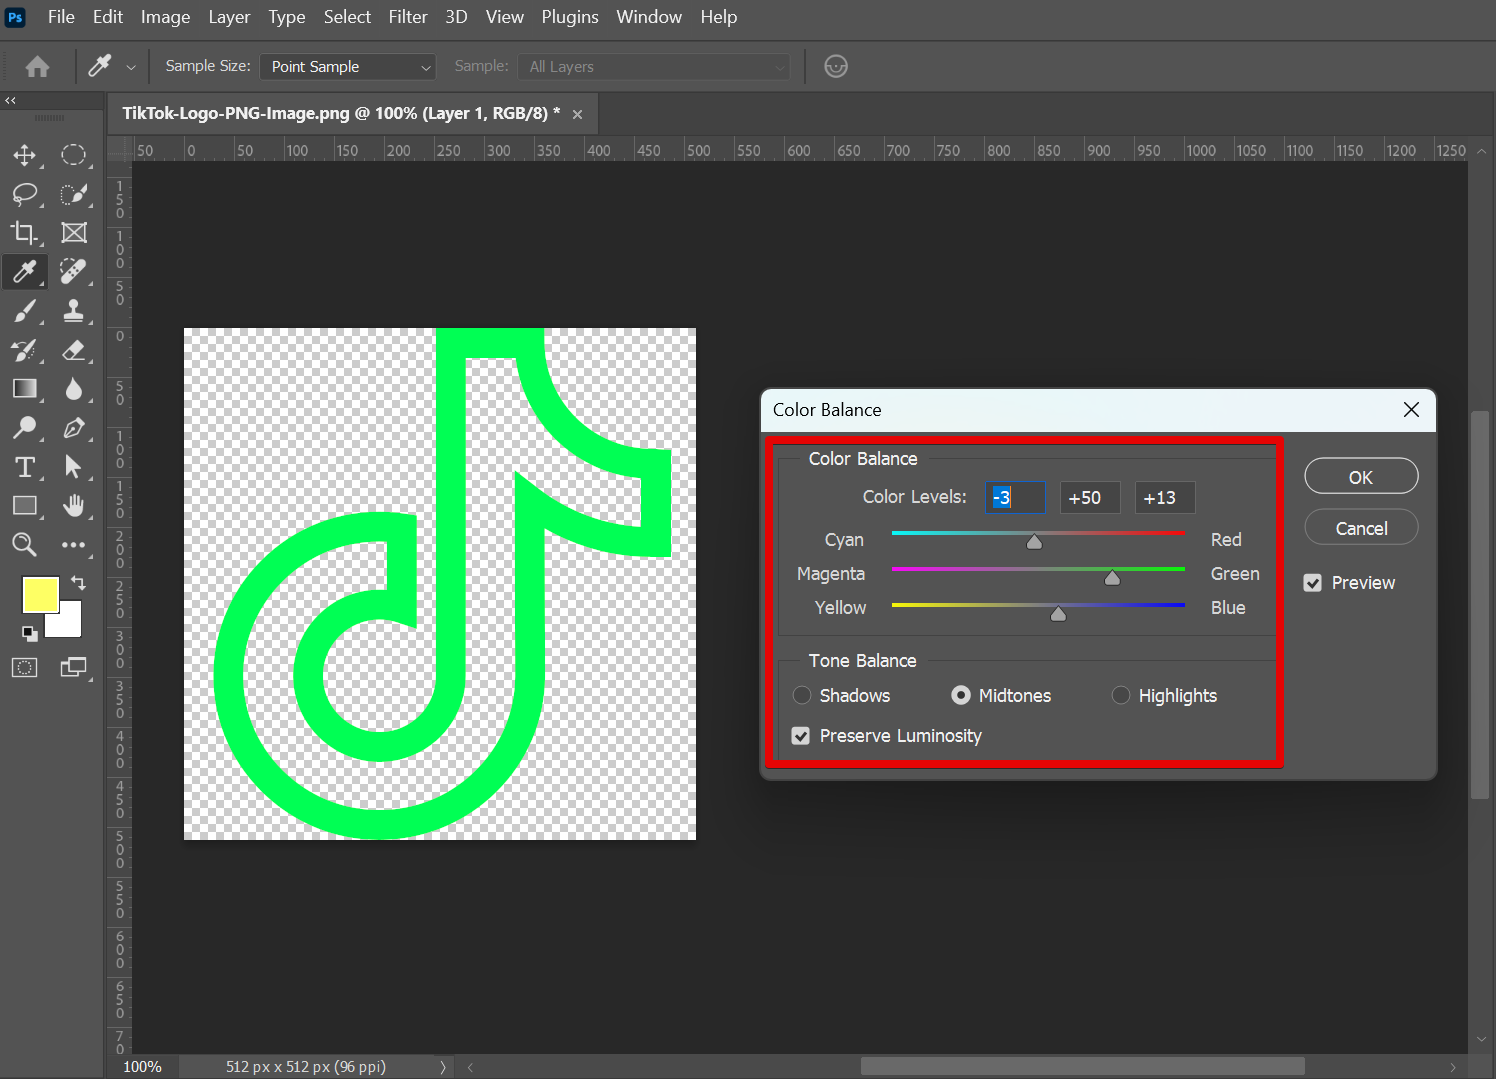
A new window will pop up and you can adjust the “Midtones,” “Shadows,” and “Highlights” sliders to change the color of your logo.
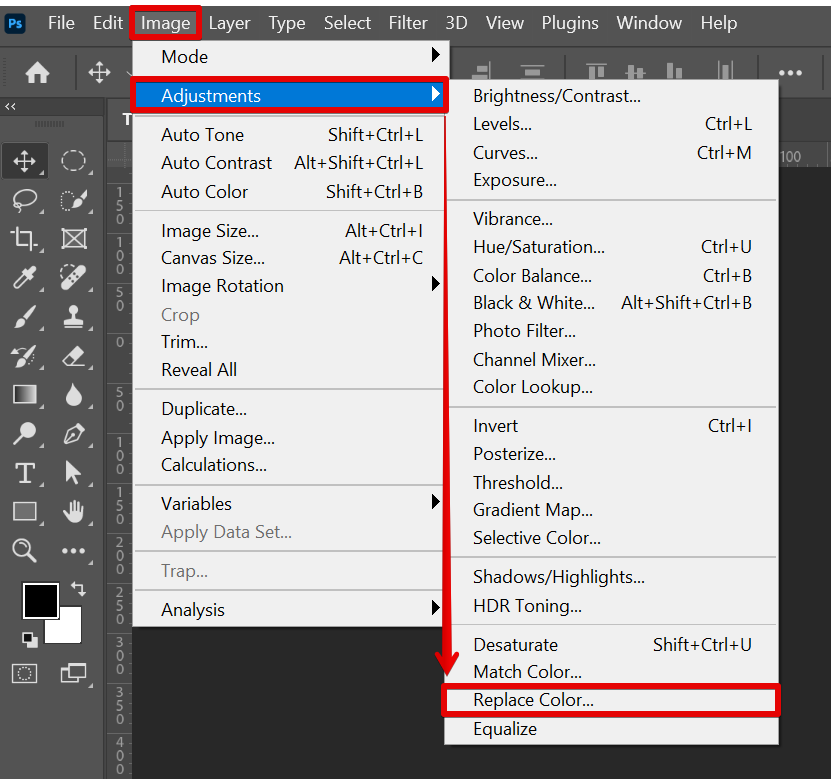
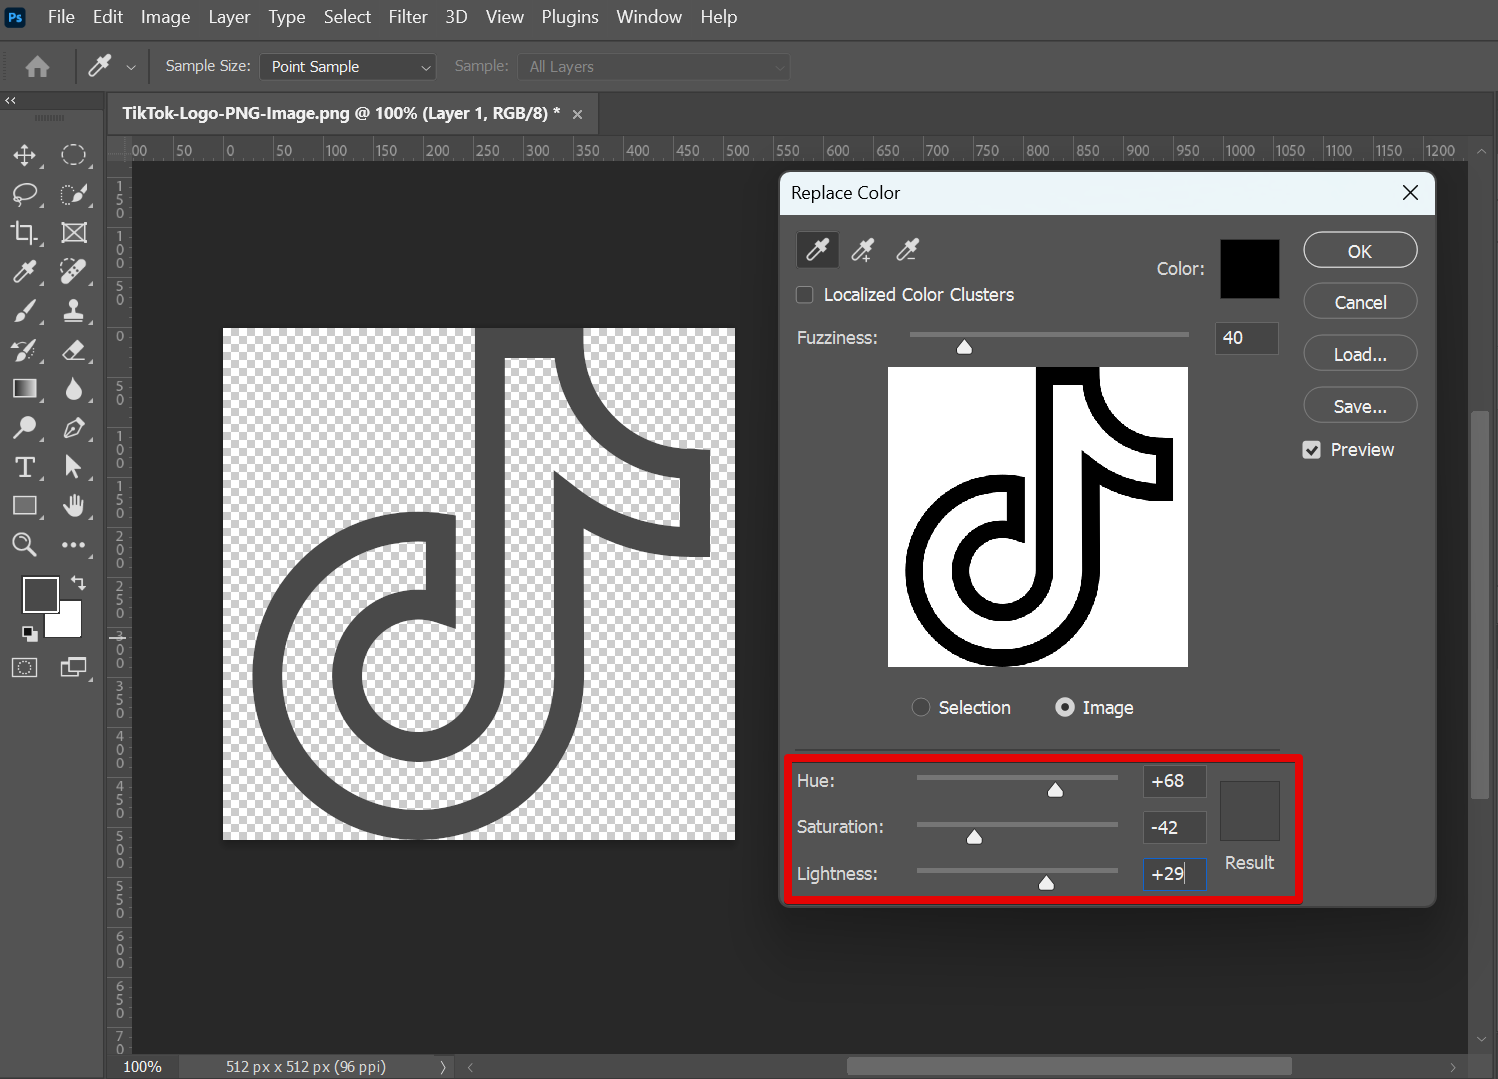
You can also use the “Replace Color” tool to change the color of your logo. To do this, go to Image > Adjustments > Replace Color.
NOTE: The Replace Color tool in Photoshop allows you to replace a specific color in an image with a different color.
Once the Replace Color dialog box appears, you can use the Eyedropper tool to select the color in the logo that you want to replace. You can also use the Fuzziness slider to adjust the range of colors that will be affected by the replacement.
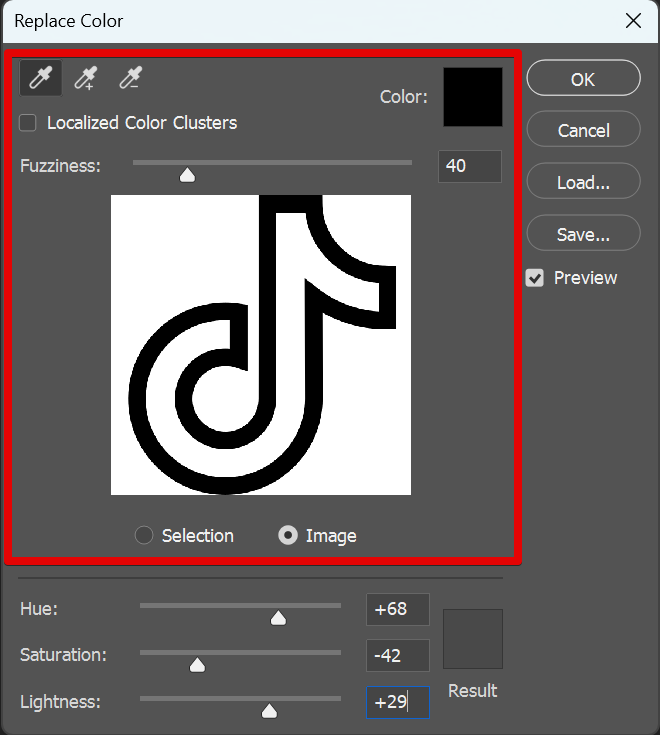
After selecting the color to be replaced, you can use the Hue, Saturation, and Lightness sliders to adjust the color of the replacement. You can also use the Preview option to see how the new color will look in the logo.
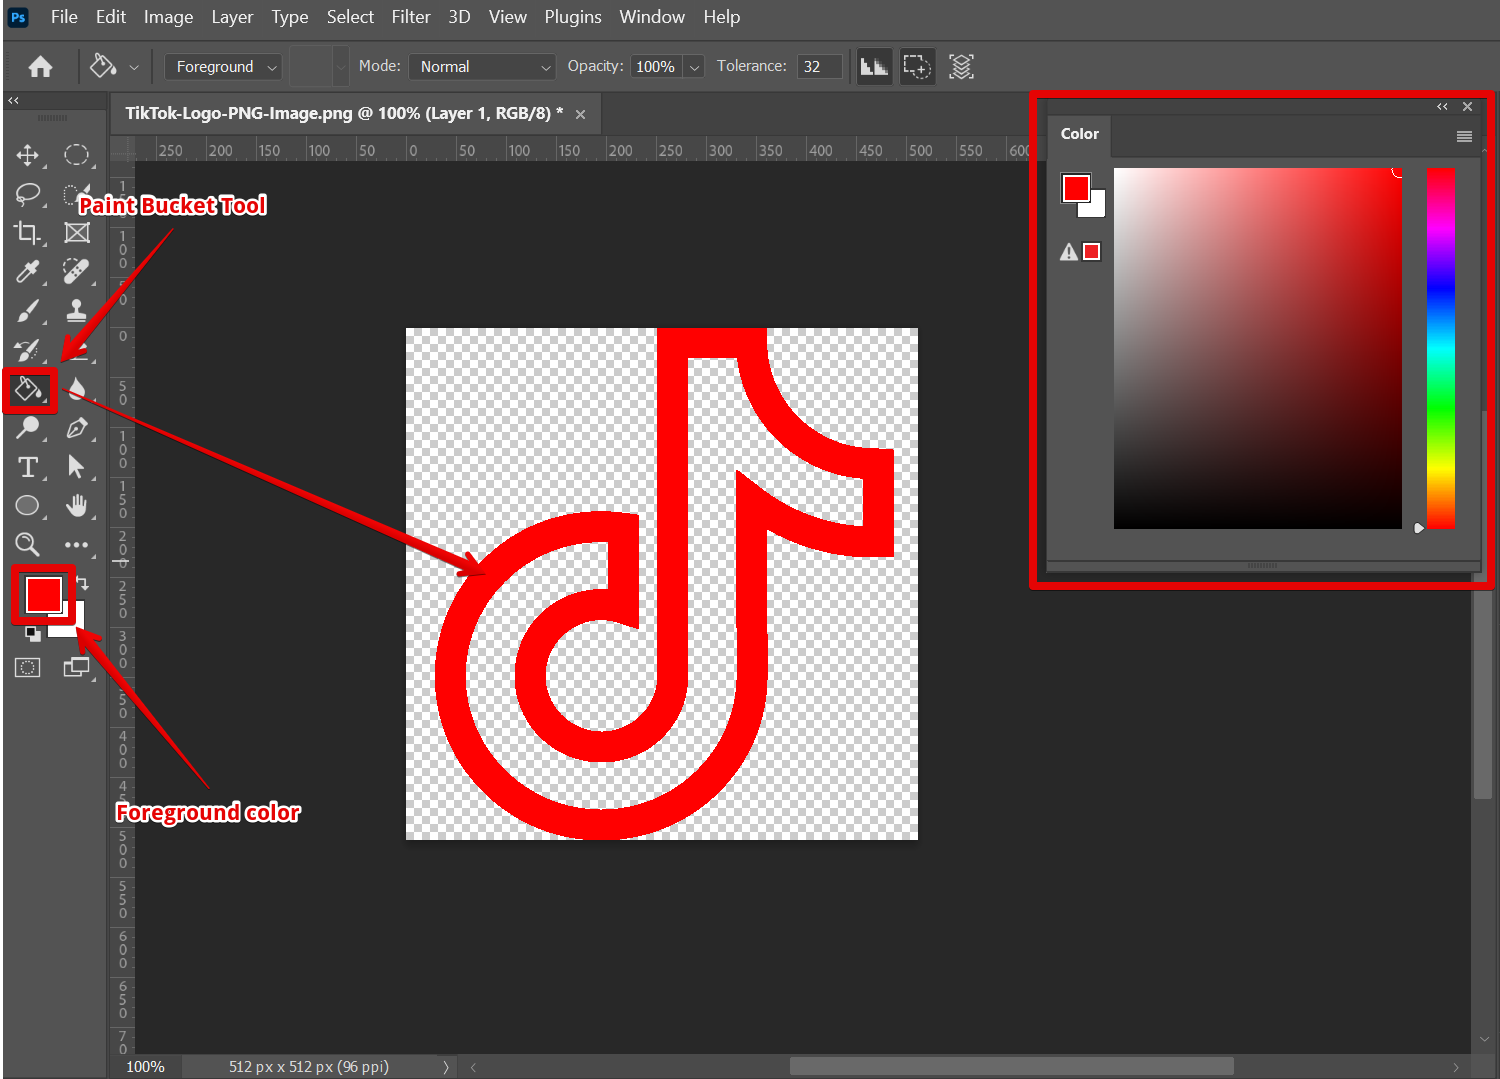
Finally, you can use the Color panel to change the color of your logo. A new panel will open up where you can choose a new color for your logo. This will automatically be reflected as your foreground color. To apply this to your logo, simply select the “Paint Bucket Tool” from the left toolbar and click on the part of your logo that you want to change.
Conclusion:
These are all great methods for changing colors in Photoshop for logos! Have fun experimenting with all of them until you find what works best for you and your project!
9 Related Question Answers Found
There are a couple different ways that you can change colors in Photoshop. One way is to use the color picker tool. To do this, first make sure that the color picker tool is selected in the toolbox.
If you’re working with text in Photoshop, there may be times when you want to change the color of the text. Thankfully, this is a relatively easy process. Here’s a step-by-step guide on how to do it.
The easiest way to change the color of a shirt in Photoshop is to use the Hue/Saturation tool. With this tool, you can quickly and easily adjust the colors in an image. To change the color of a shirt using the Hue/Saturation tool, first open the image in Photoshop.
There are many ways to change the color of an image in Photoshop. The most basic way is to use the color picker tool. With this tool, you can click on any color in the image and change it to another color.
Photoshop is a powerful image editing program that gives users a great deal of control over the appearance of their images. One of the things you can do in Photoshop is change the color of part of an image. This can be useful for drawing attention to a particular area, or for changing the overall tone of an image.
If you’re a graphic designer, chances are you’ve been asked to design a logo or two in your career. If you’re not a graphic designer, you may have been asked to do the same thing. Regardless of your level of experience, turning a picture into a logo is not as difficult as it may seem.
A logo is a graphical representation of your brand that can be used on your website, business cards, letterhead, and more. You can create a logo in Photoshop by starting with a blank document and using the text, shape, and color tools to design your logo. To make a logo in Photoshop, you’ll need to open a new document and use the text, shape, and color tools to design your logo.
There are a few different ways that you can change colors in Photoshop. You can use the color picker, the color replacement tool, or you can change the hue/saturation. To use the color picker, simply click on the color you want to change and then click on the “new” color you want to use.
In Photoshop, there are a few ways to change the color of something. One way is to use the Color Picker. Another way is to use the Hue/Saturation tool. .