Portraiture is a plugin for Adobe Photoshop that eliminates the tedious manual labor of selective masking and pixel-by-pixel treatments to help you achieve perfection in portrait retouching. It intelligently identifies skin tones and creates masks that isolate the skin from the rest of the image. With a few simple sliders, you can then fine-tune the mask to ensure optimum results.
To install Portraiture, simply download the ZIP file from our website and unzip it to your Photoshop plugins folder.
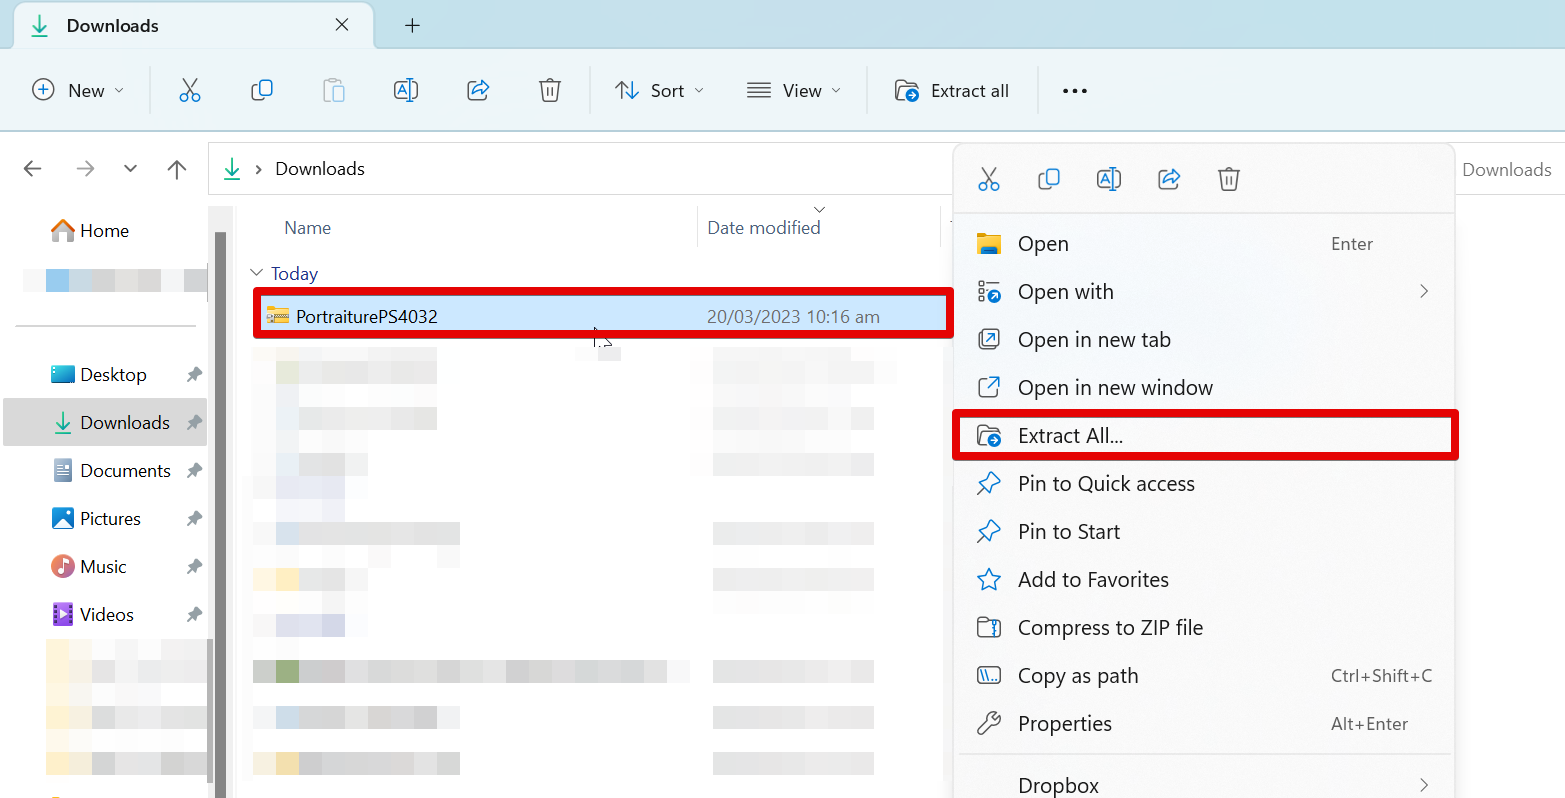
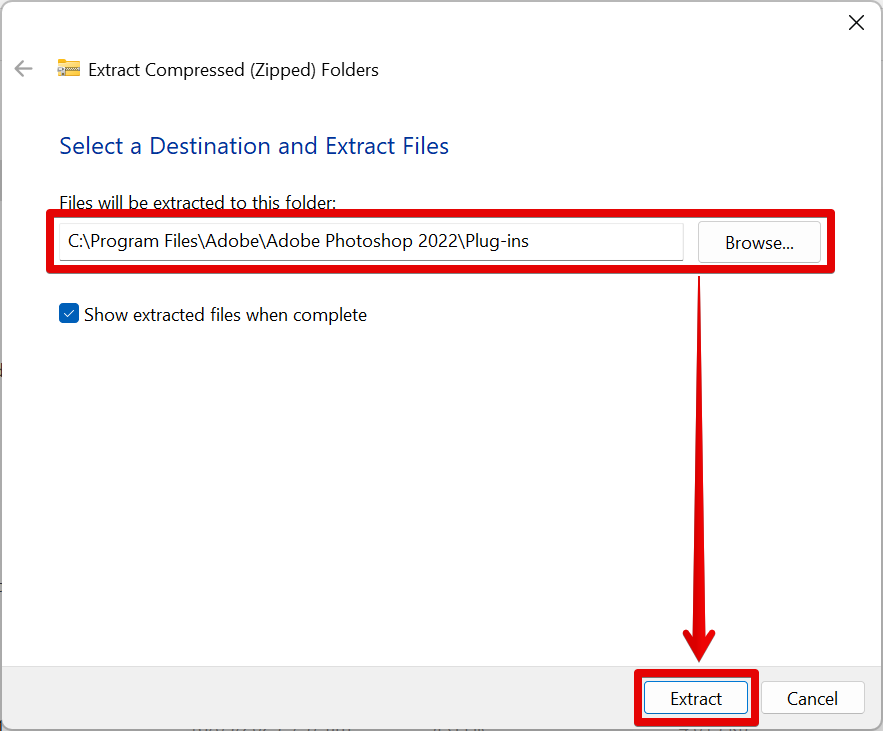
Extract the file into your Photoshop plugins folder (usually C:\Program Files\Adobe\Adobe Photoshop [version]\Plug-ins). If you’re using a 64-bit version of Photoshop, you will also need to copy these files into your Program Files (x86) folder as well (usually C:\Program Files (x86)\Adobe\Adobe Photoshop [version]\Plug-ins).
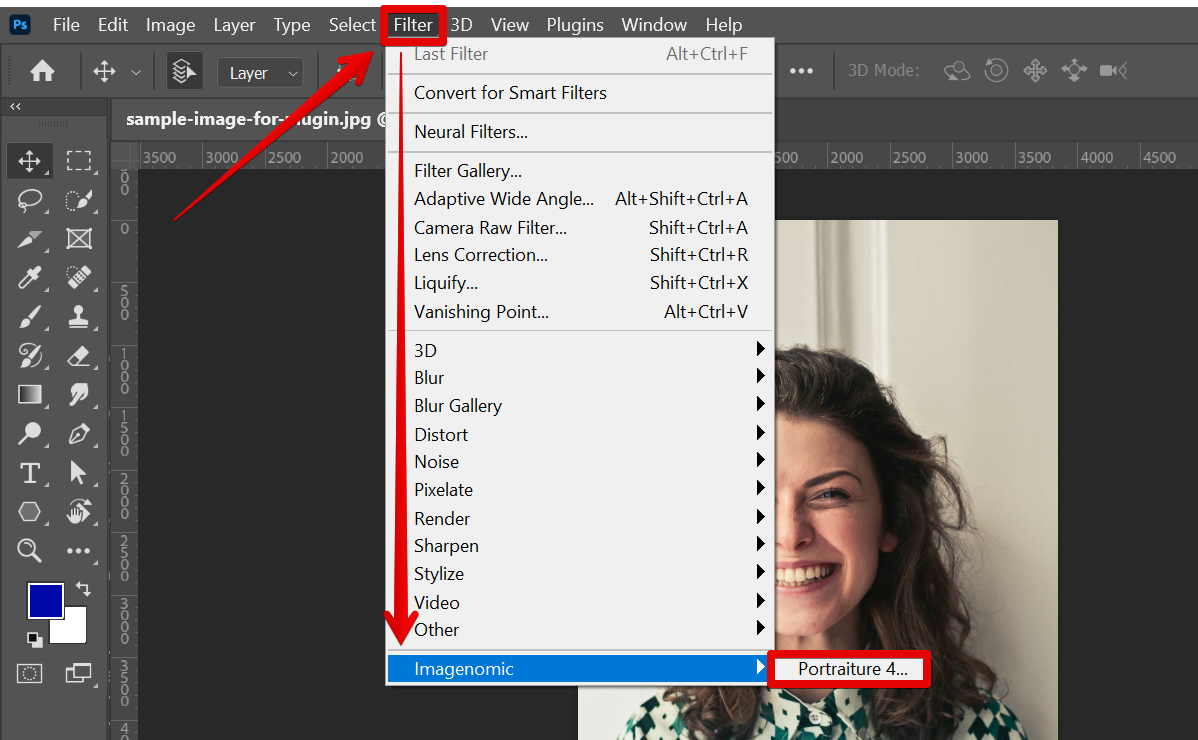
Once you have copied the files into your Photoshop plugins folder, launch Photoshop and go to the Filter menu. You should now see “Imagenomic Portraiture” listed under the “Filter” menu. If you don’t see these plugins listed, try restarting Photoshop.
Now that you have installed Portraiture, let’s take a look at how to use it.
PRO TIP: Please note that the Portraiture Plugin for Photoshop is not a free plugin. You will need to purchase a license in order to use it. Additionally, we do not recommend installing plugins from unknown sources. If you do choose to install this plugin, please be sure to do so from a trusted source.
To use Portraiture:
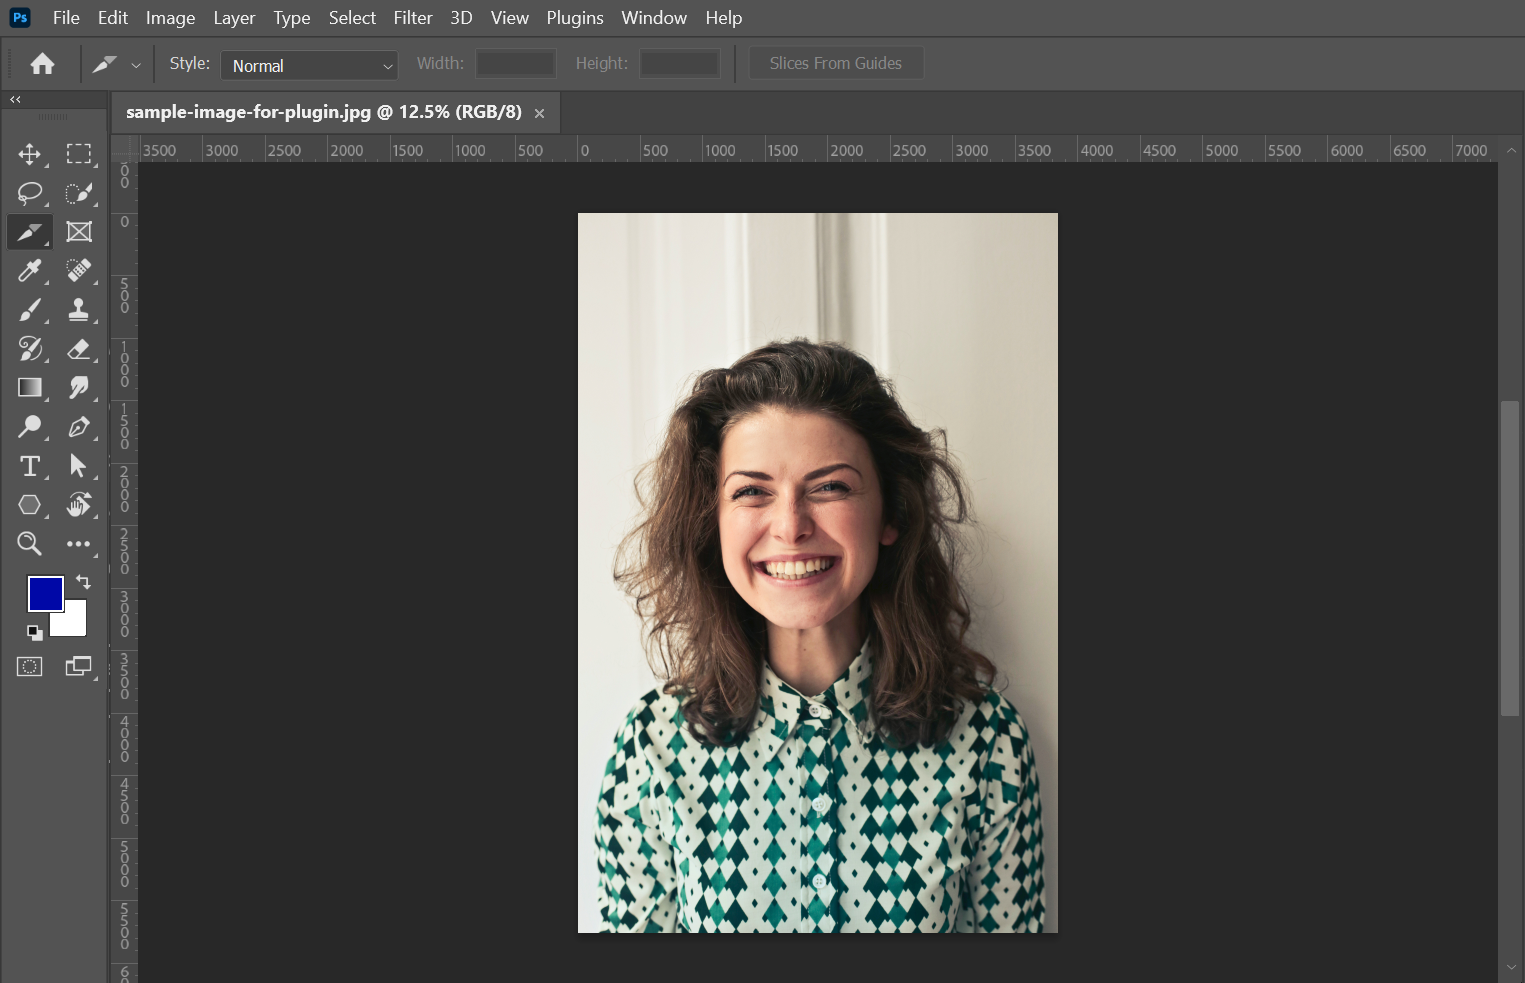
1. Open an image in Photoshop.
2. Go to Filter > Imagenomic > Portraiture. This will open up the Portraiture interface.
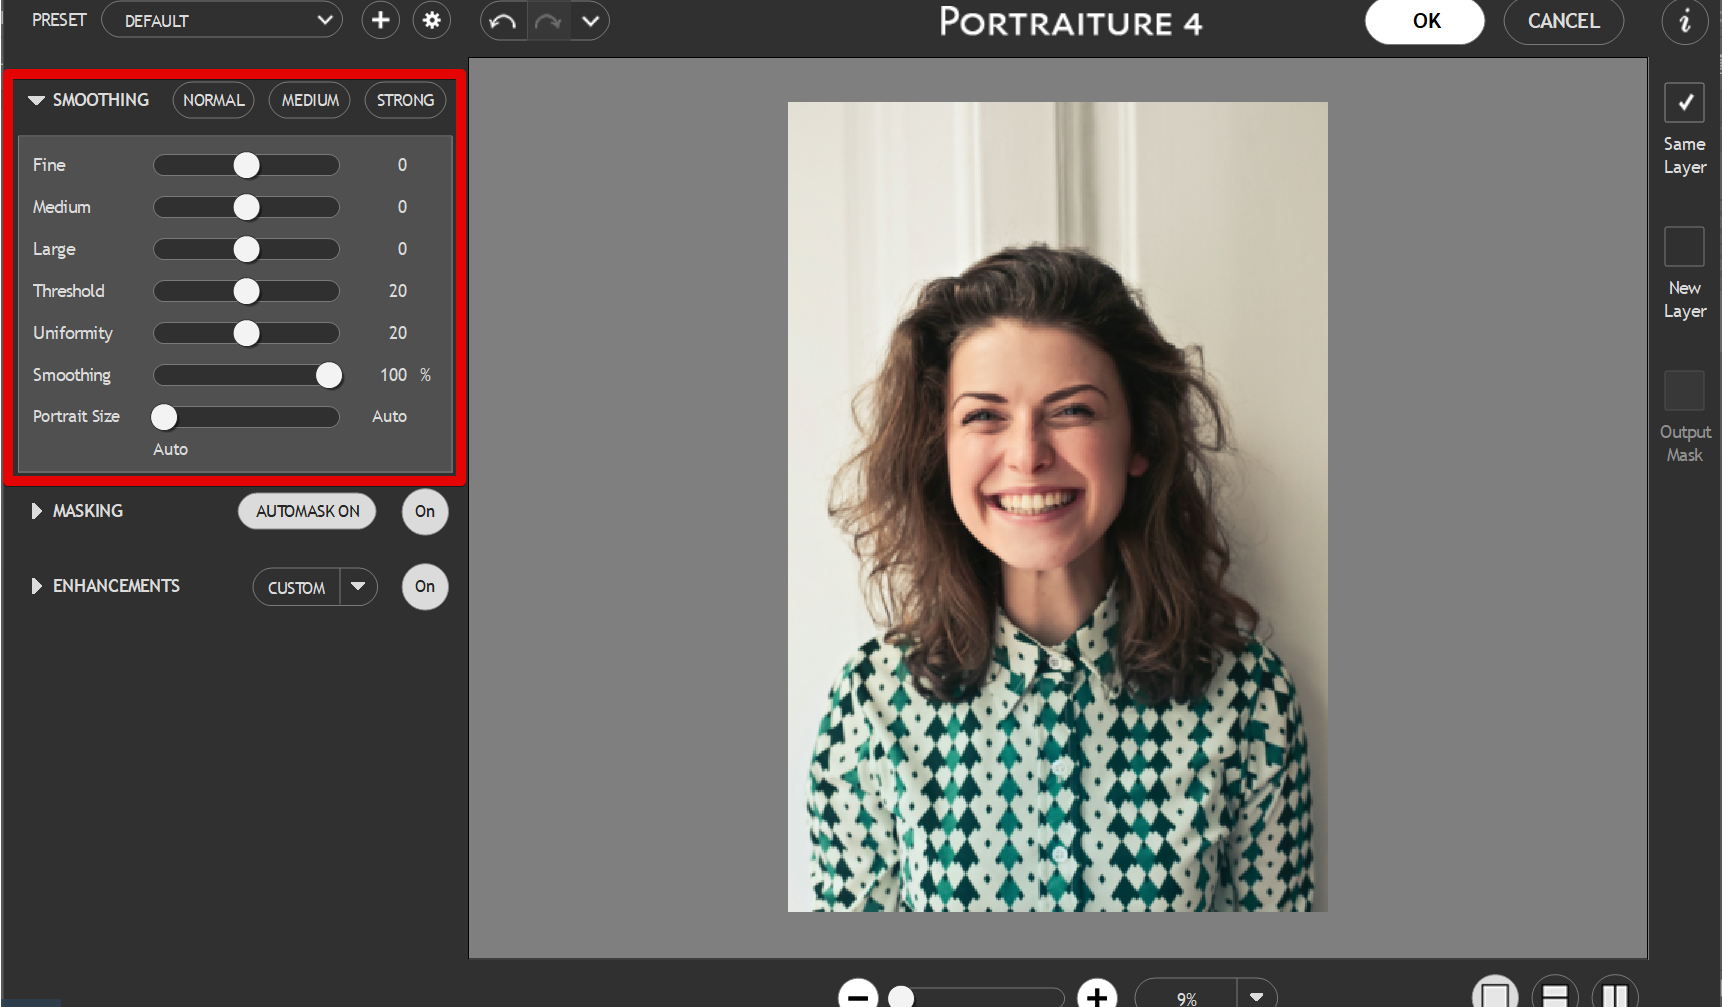
3. Smoothing Settings. In the “Smoothing Settings” tab, you can choose whether you want to retouch just the skin tone or both the skin tone and background. You can also choose how much smoothing you want to apply to the image.
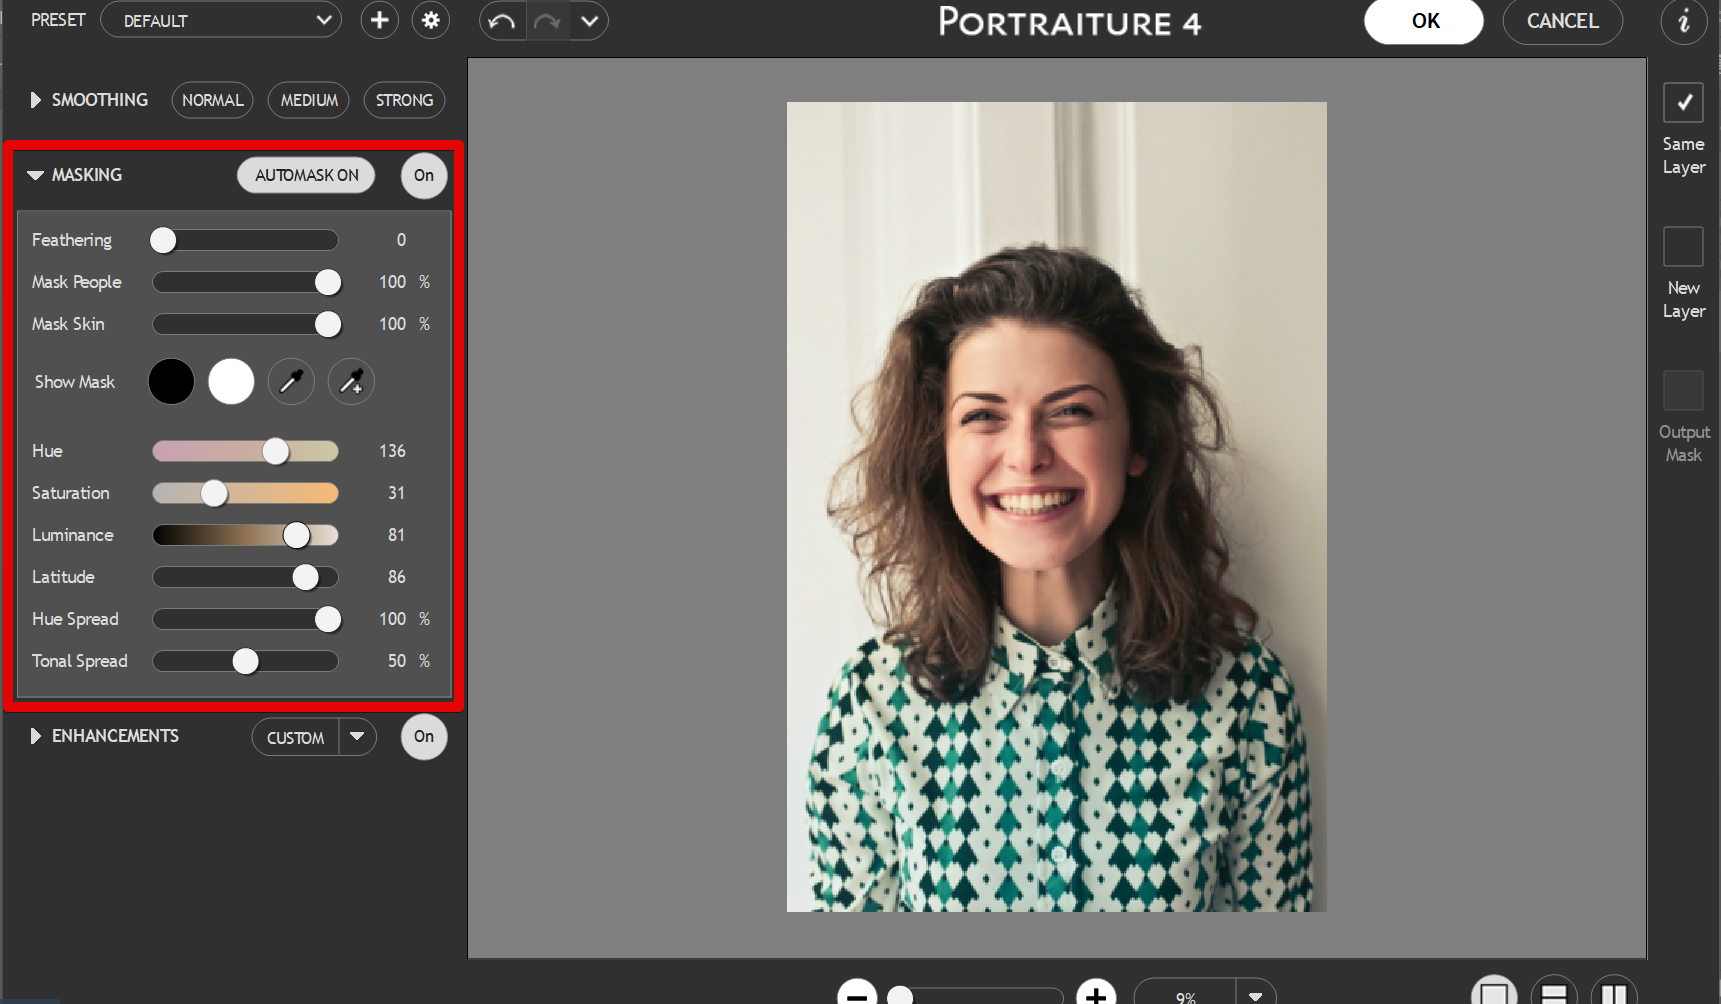
4. Masking Settings. In the “Masking Settings” tab, you can adjust the sensitivity of the skin tone detection. You can also choose to adjust the Hue, Saturation, Luminance, Latitude, Hue Spread, and Tonal Spread settings.
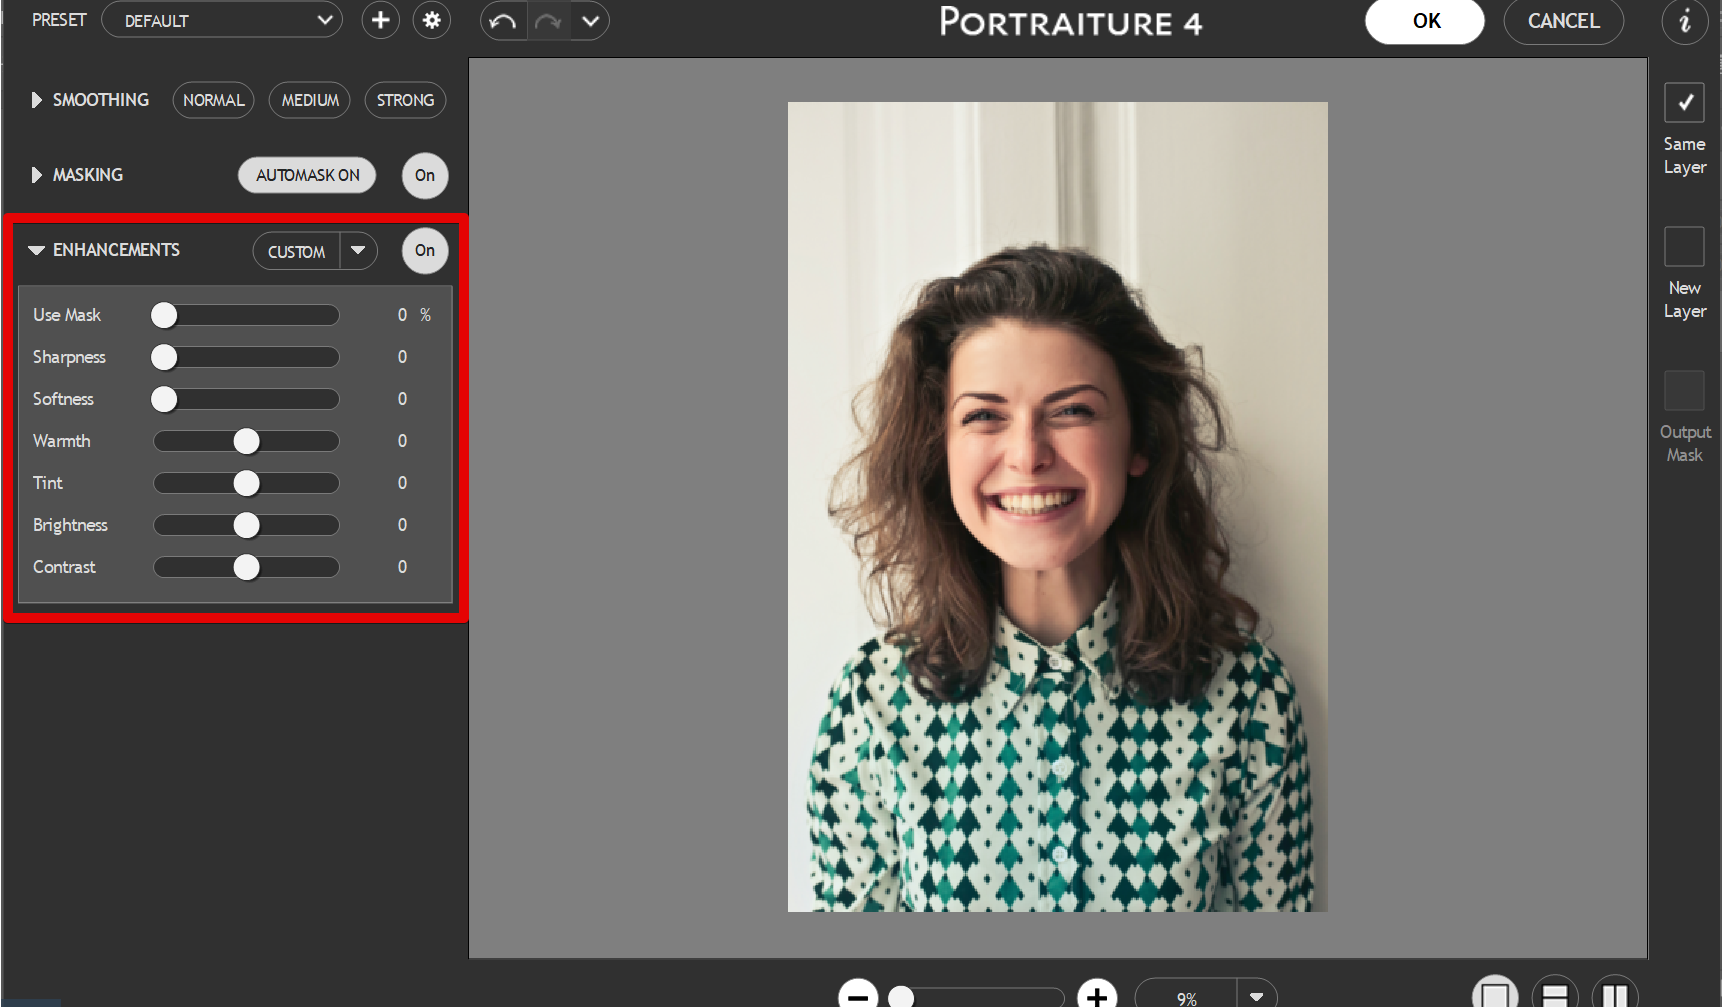
5. Enhancement Options. In the “Enhancement Options” tab, you can choose how much blemish removal and wrinkle reduction you want to apply by adjusting the Sharpness, Softness, Warmth, Tint, Brightness, and Contrast settings.
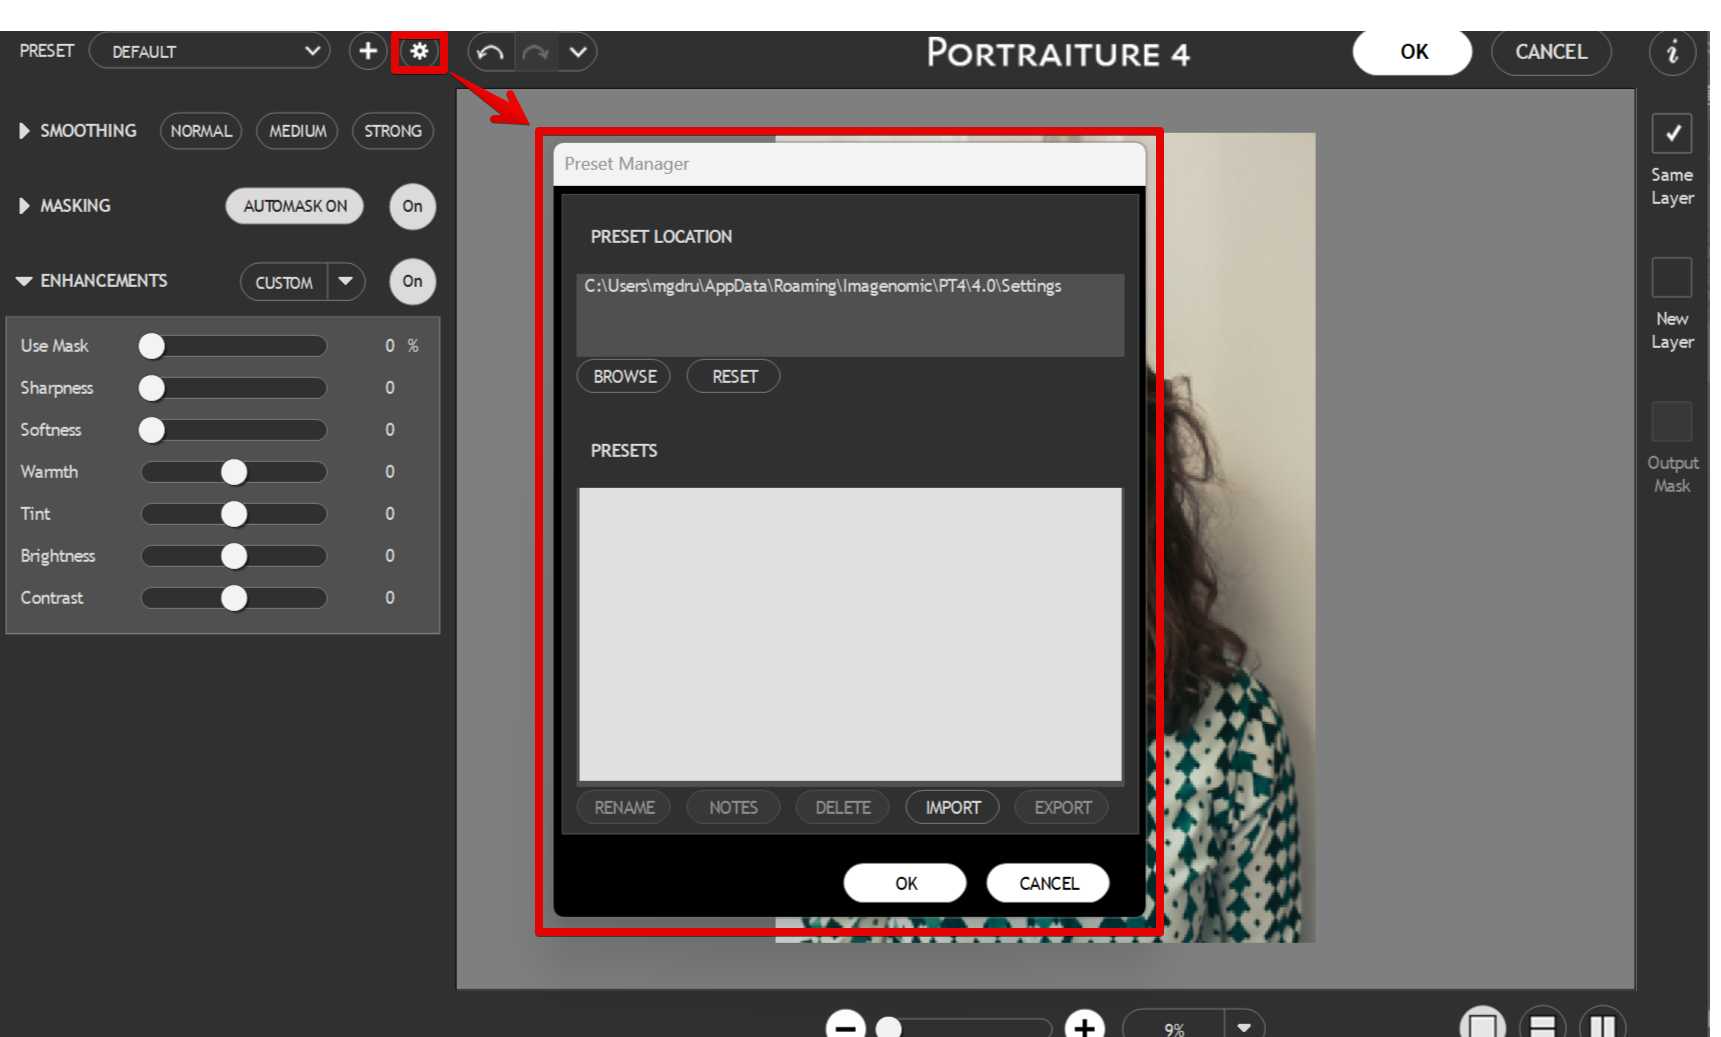
6. Preset Settings. In the “Preset Settings” tab, you can choose to import your own presets.
Conclusion:
Portraiture is a great plugin for Adobe Photoshop that eliminates the tedious manual labor of selective masking and pixel-by-pixel treatments. To install Portraiture, download the ZIP file from their website and unzip it to your Photoshop plugins folder. Once unzipped, copy the file into your Photoshop plugins folder (usually C:\Program Files\Adobe\Adobe Photoshop [version]\Plug-Ins).
If using a 64-bit version of Photoshop, also copy these files into your Program Files (x86) folder as well (usually C:\Program Files (x86)\Adobe\Adobe Photoshop [version]\Plug-Ins). Launch Photoshop and go to Edit > Plugins.
10 Related Question Answers Found
Portraiture is a plugin for Photoshop that eliminates the tedious manual labor of selective masking and pixel-by-pixel treatments to help you achieve perfection in your portrait retouching work. When using the plugin, simply select the layer containing the image you wish to retouch, then click on the “Portraiture” button in the “Edit” menu. The plugin’s interface will appear as a separate window.
How Do I Install Portrait Pro in Photoshop? Portrait Pro is a software that can be used to edit images in Adobe Photoshop. It is a plugin that can be installed into Photoshop, and it provides users with a set of tools that can be used to improve the quality of their photos.
There are many ways to make a portrait effect in Photoshop. You can use the filters, or you can use the brush tool. You can also use the eraser tool to create a portrait effect.
Self-portraits are a great way to practice your photography and Photoshop skills. They can be a fun and creative way to express yourself, and you can make them as simple or as elaborate as you want. You can use props, backdrops, and even special effects to create a one-of-a-kind self-portrait.
When it comes to Photoshop, there are a lot of different ways to make a portrait. But here are five easy steps on how to make a portrait in Photoshop.
1) Open up Photoshop and create a new document. The first thing you need to do is set the width and height of the document.
Digital painting is a new media art form where traditional painting techniques are applied to a digital canvas using software on a computer. The term can also refer to the final product of the process, which is a digital image. The first step in creating a digital painting is to choose the right software.
High Dynamic Range (HDR) photography is a technique where you take multiple photos of the same scene at different exposures and then combine them into a single photo. The result is an image with a greater range of tones and colors than what you could capture in a single photo. Photoshop has a few different ways that you can create HDR images, and in this article, we’ll show you how to do it.
Digital painting is a process by which an artist creates images or paintings using digital tools and techniques. To create a digital painting, an artist begins by gathering the necessary tools and software. They will need a digital painting program such as Photoshop, which can be used to create images and paintings.
Artboards are a relatively new addition to Photoshop, first appearing in CS6. They provide a quick and easy way to create multiple layouts for different devices or different page sizes within the same document. You can add as many artboards as you like, and each one can have its own layers, colors, and design.
Making a family portrait in Photoshop can be a fun and easy project. Here are some tips to help you get started:
1. Choose a location for your portrait that is comfortable and scenic.
2.