There are a few different ways that you can change a logo from black to white in Photoshop. One way is to simply invert the colors of the logo.
To do this, first, open the logo image file in Photoshop.

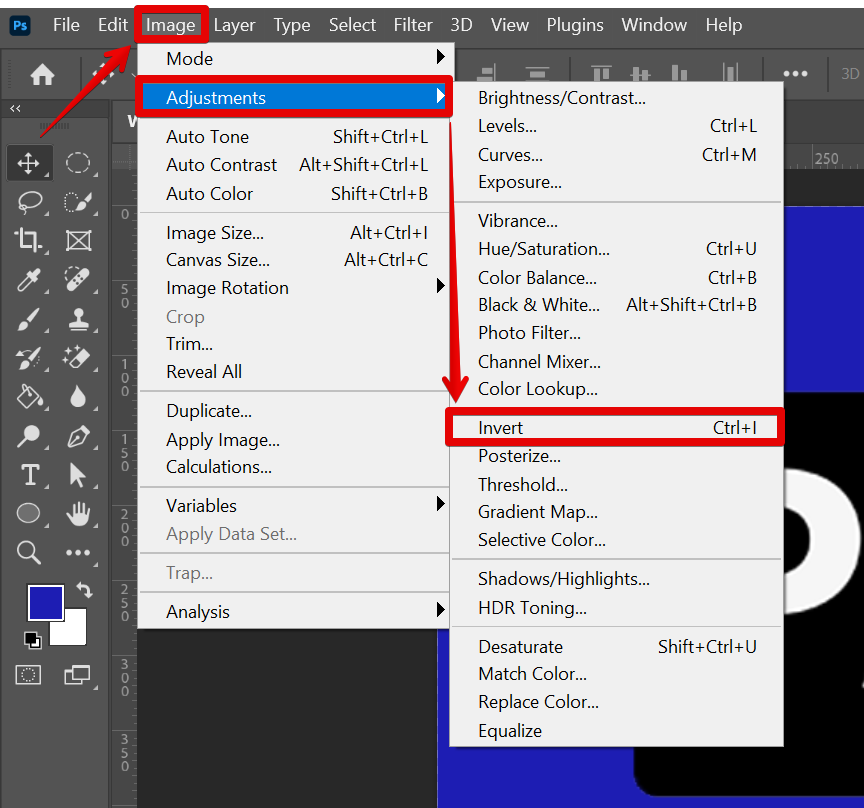
After that, go to Image > Adjustments > Invert.

This will change all of the black pixels to white and all of the white pixels to black.

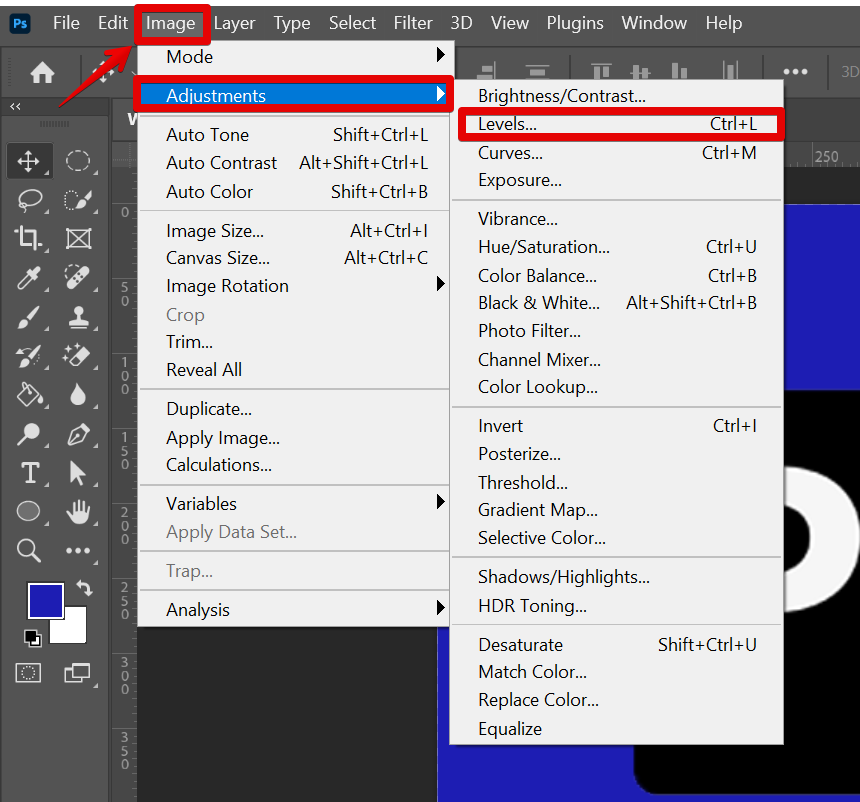
Another way to change a logo from black to white is to adjust the levels. To do this, go to Image > Adjustments > Levels.

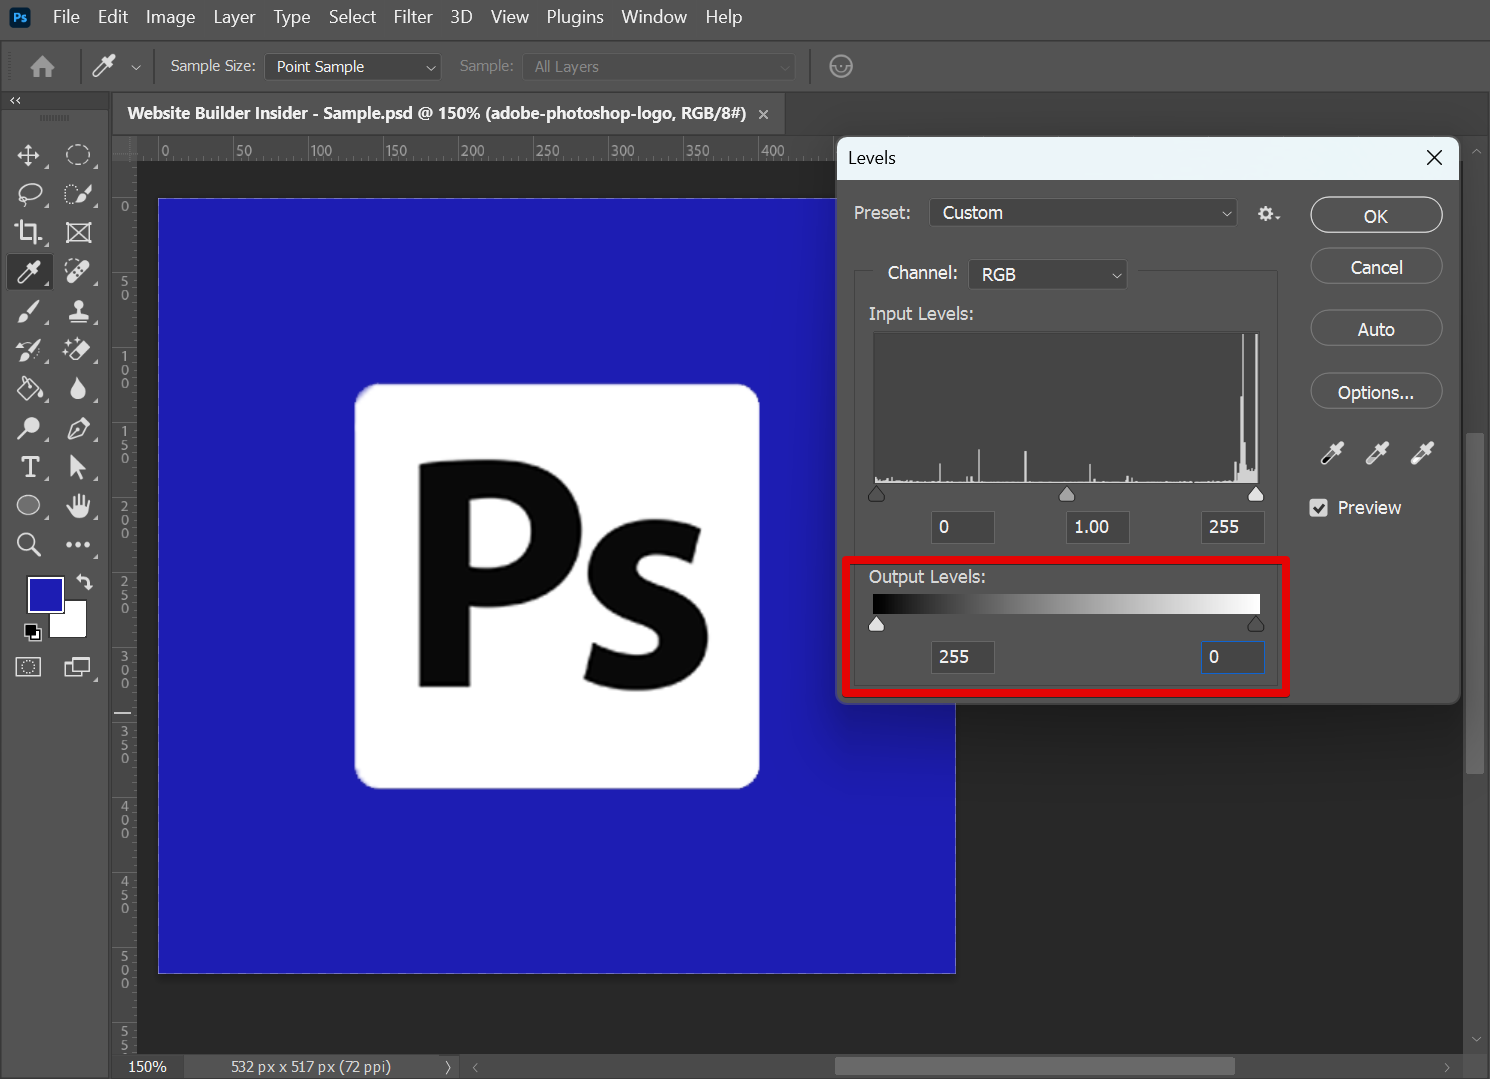
Move the Output Levels sliders until you achieve the appropriate colors. In this case, move the white slider to the darkest portion and the black slider to the whitest portion. This will make the dark pixels lighter and the light pixels darker. You can also try playing around with the other sliders to get the perfect balance of black and white.

If you want more control over how your logo looks, you can use the Eraser Tool to erase parts of the logo that you don’t want to be black or white. Simply select the Eraser Tool and start erasing away at the logo until you’re happy with the result.

Finally, you can use the Paint Bucket Tool to fill in areas of the logo in black or white. Simply select the paint bucket tool and then click on the area of the logo that you want to fill. You can also hold down the “Shift” key while you click to fill in multiple areas at once.

Conclusion:
There are a few different ways that you can change a logo from black to white in Photoshop. In most cases, simply inverting the colors or adjusting the levels will be enough to get the job done. However, if you want more control over how your logo looks, you can use the eraser tool or paint bucket tool to make custom changes.