Adding a custom button to a single product page in WooCommerce is easy. Here’s how:
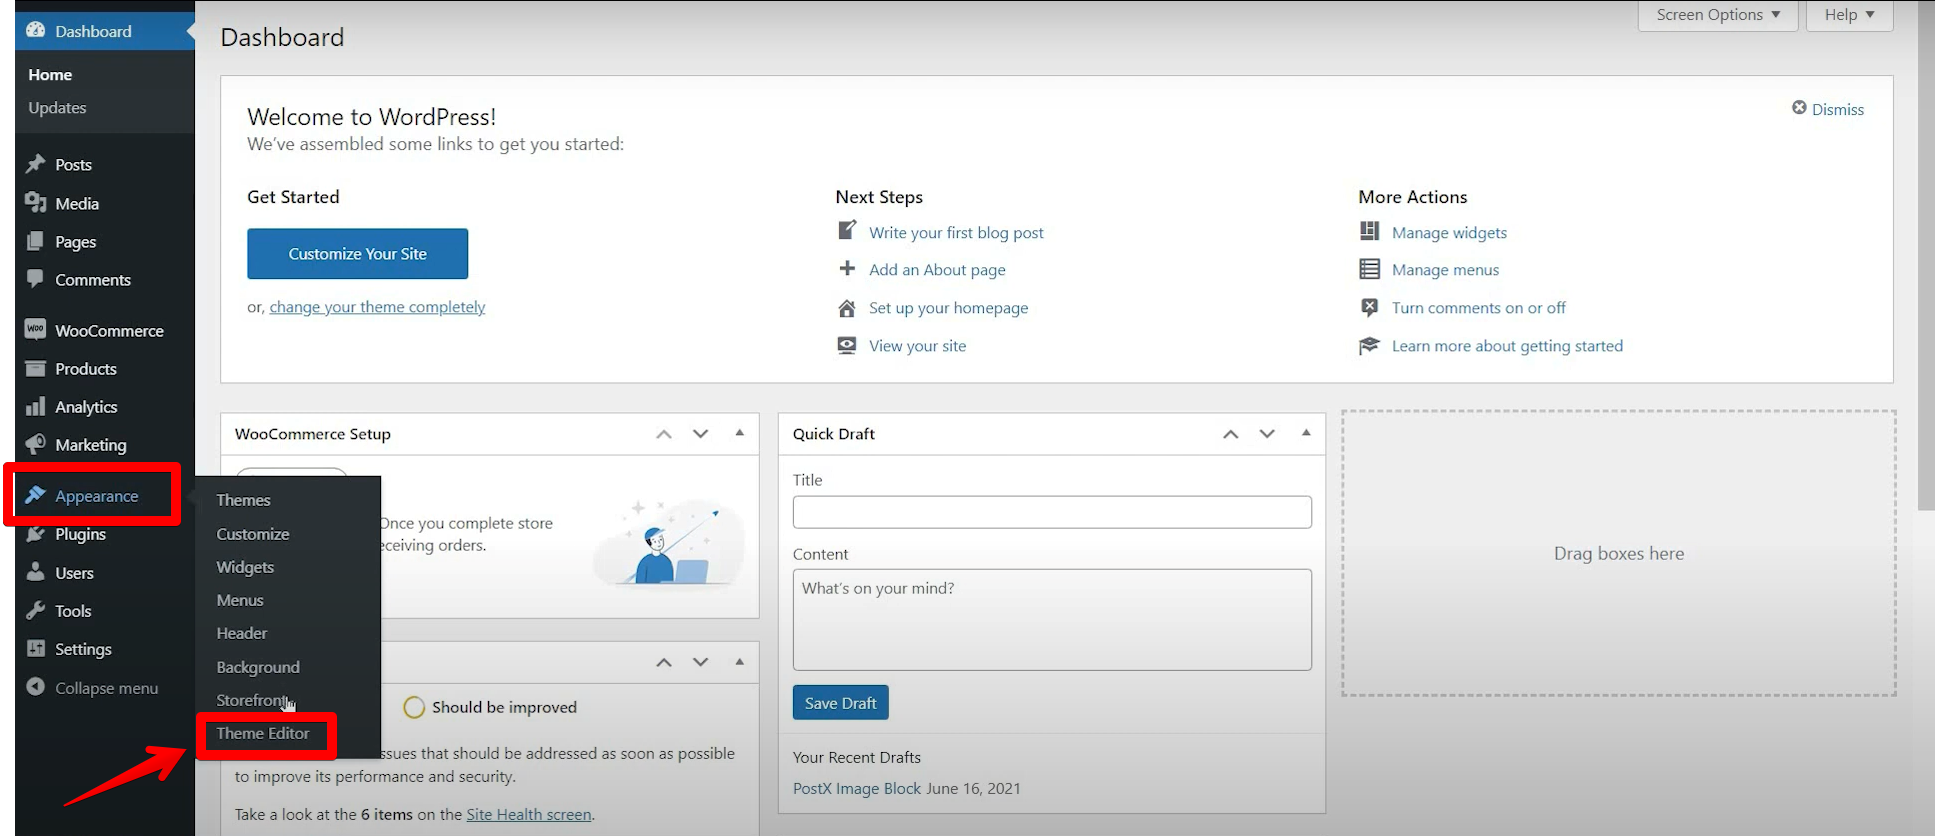
First, log into your WordPress site and go to the Dashboard. From there, hover over the “Appearance” menu item and select “Theme Editor.” From here, you can add a custom button to a single product page in WooCommerce.
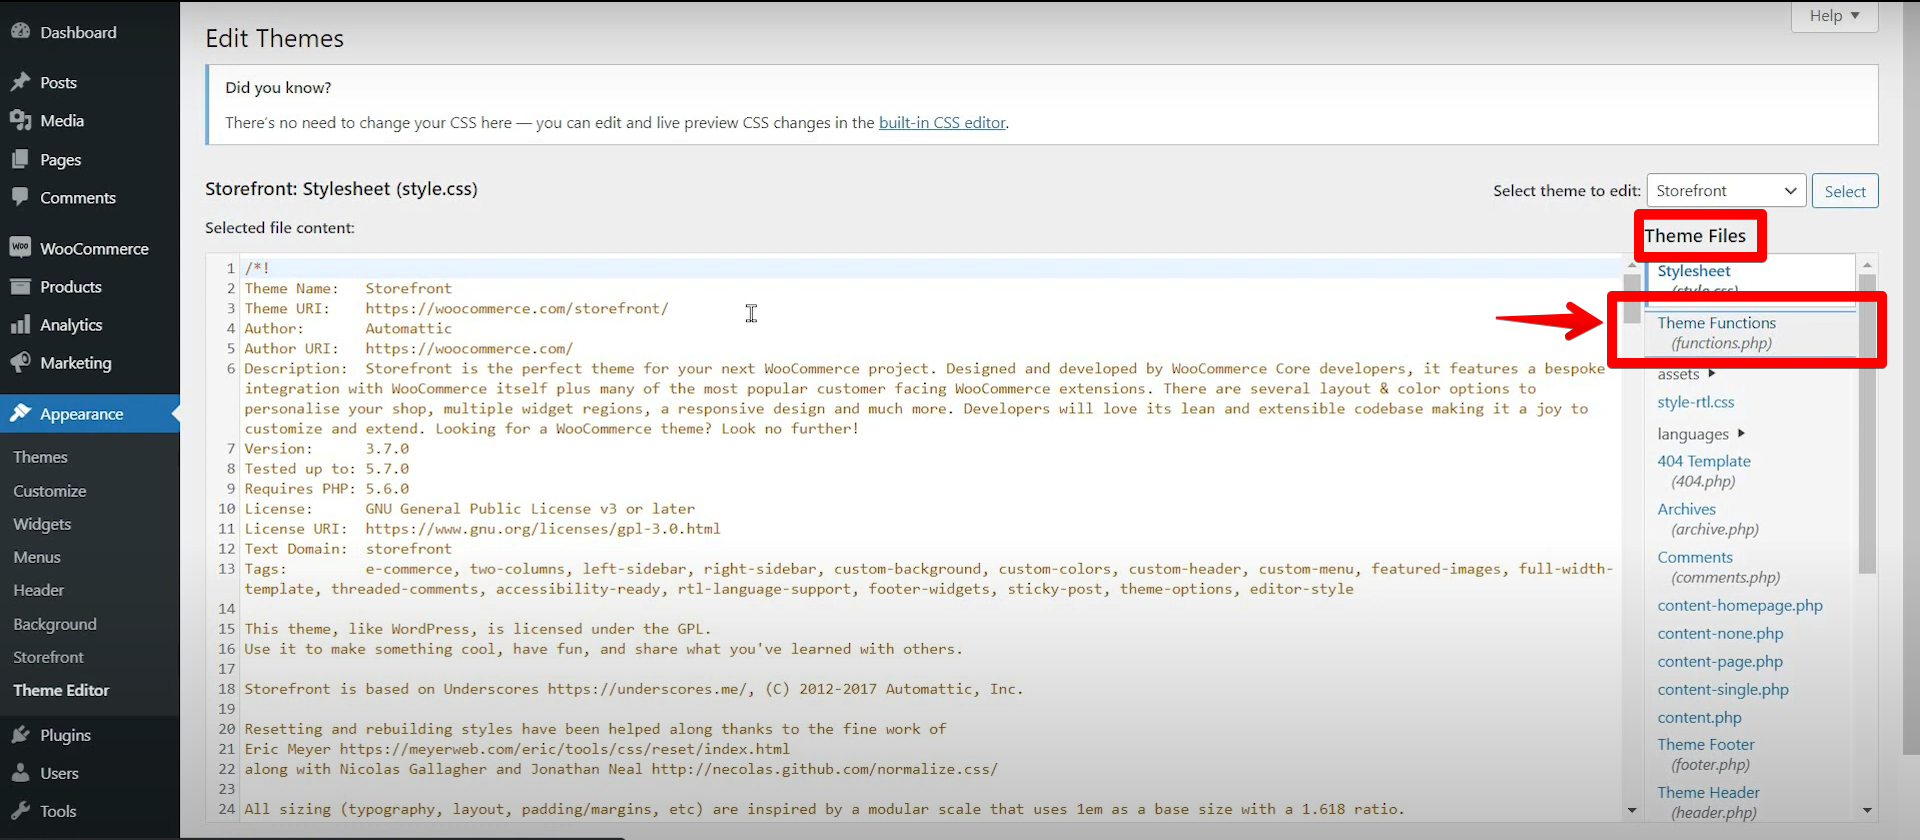
On the right-hand side, you will see “Theme Functions” under “Theme Files”; click on “Theme Functions”.
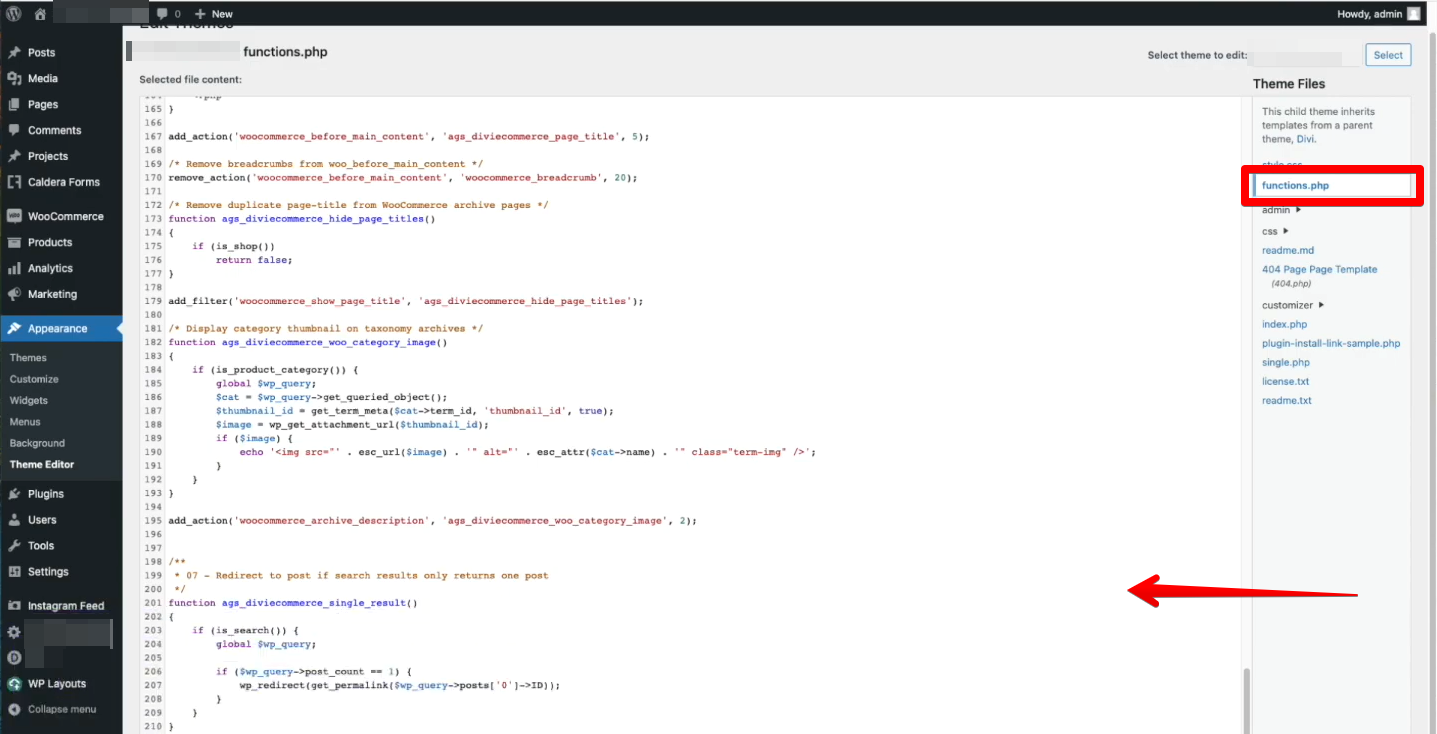
Simply add the code of your custom button to your “functions.php” file.
PRO TIP: Adding a custom button to a single product page in WooCommerce is a simple process, but it’s important to be aware of the potential consequences.
If you’re not careful, you could end up with a button that doesn’t work properly, or worse, breaks your entire site. So, make sure you test your button before you add it to your live site.
Make sure to click “Update File” to save changes.
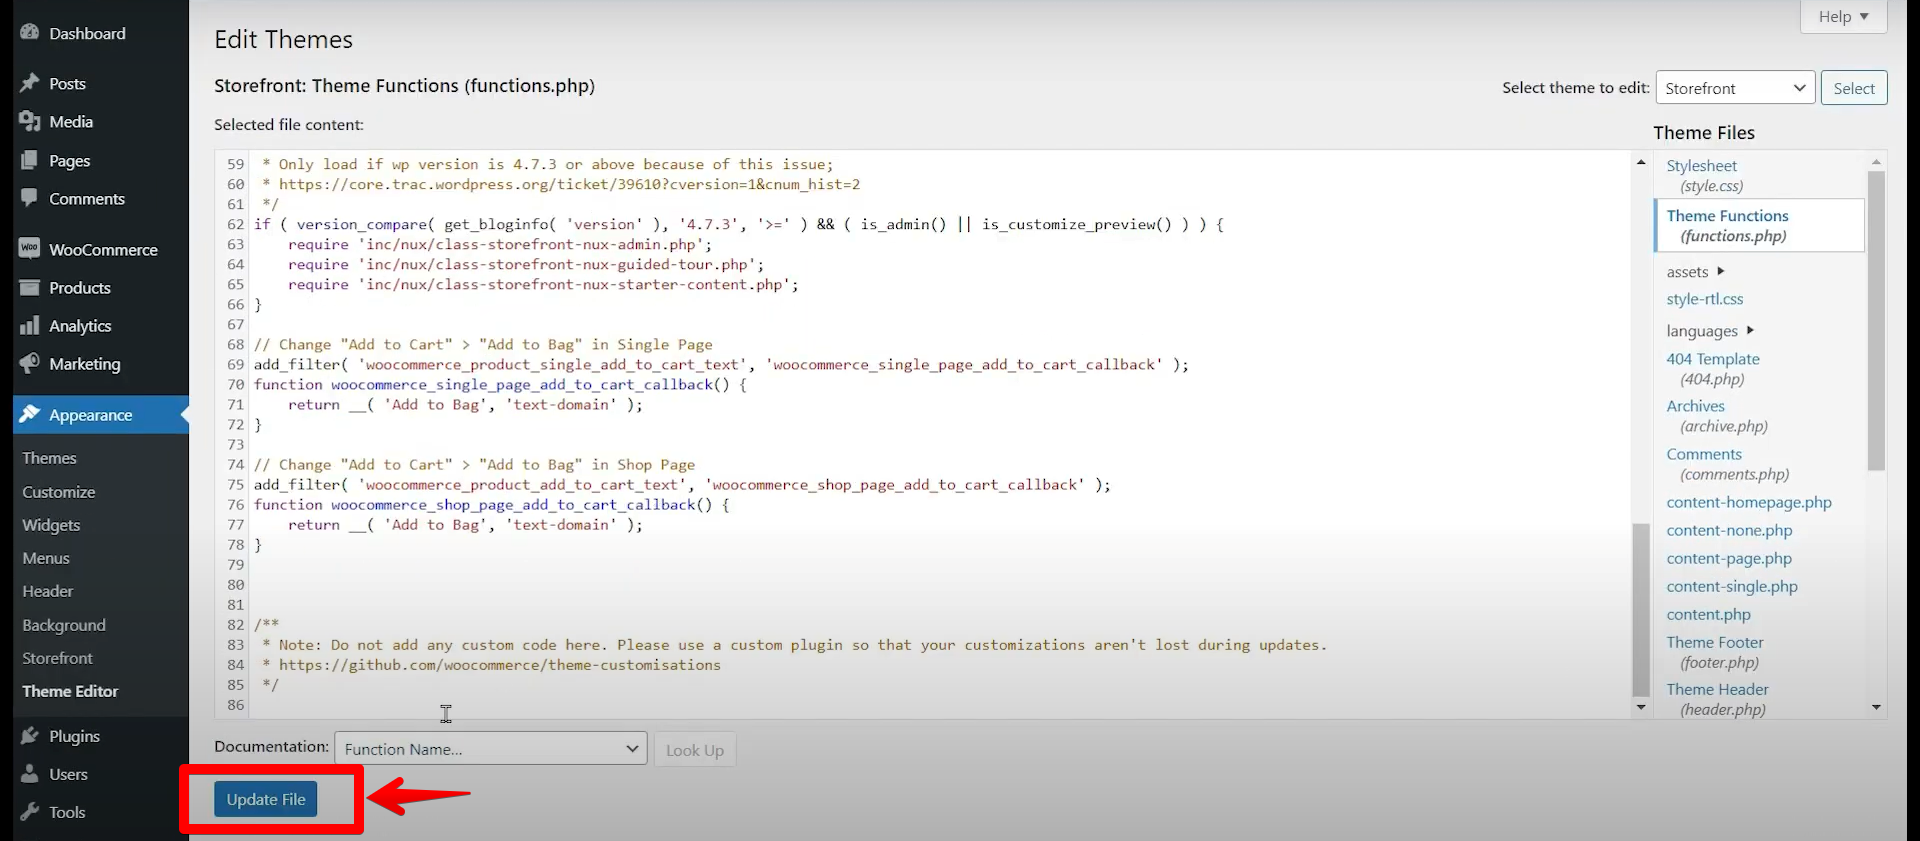
Your custom button will now appear on your product page!
Conclusion
In WooCommerce, you can easily change the text of the “Proceed to Checkout” button. Simply go to “Theme Functions”, enter your new text in the “Proceed to Checkout” field, and click “Save Changes”. You can also style the button using HTML by adding code to your “functions.php” file.
9 Related Question Answers Found
Adding a custom button in WooCommerce is easy. You can use the WooCommerce Customizer plugin to add a button to your product pages. Simply install and activate the plugin, then go to WooCommerce > Customizer and click on the Buttons tab.
Adding a button to your WooCommerce product page is a great way to make your products stand out and give your customers an easy way to purchase them. There are two ways to add a button to your product page: using the WooCommerce Product Page Builder or by manually adding the code to your product page. WooCommerce Product Page Builder
The WooCommerce Product Page Builder is a great way to easily add a button to your product page.
When it comes to eCommerce, WooCommerce is one of the most popular platforms available. It’s easy to use and has a lot of great features. One thing that it doesn’t have though, is a custom buy now button.
Adding a Buy Now button to your WooCommerce single product page is a great way to increase conversions and sales. There are a few different ways to do this, and each has its own advantages and disadvantages. One way to add a Buy Now button is to use a plugin.
Adding a custom button to your WooCommerce store can be a great way to make it more unique and stylish. There are a few different ways you can go about doing this, and we’ll walk you through each of them so you can choose the best method for your needs. The first way to add a custom button to WooCommerce is by using the WooCommerce Theme Developer Handbook.
Product variations are a great way to offer different options for the same product, and can be a useful tool for upselling and cross-selling. Button swatches offer a visual way to represent these variations, making it easy for customers to see what they’re getting. Adding product variations in WooCommerce with button swatches is easy to do from scratch.
If you’re running a WooCommerce store, you may want to add a button to your shop page. This can be used to promote a special offer, or simply to make it easier for customers to find the product they’re looking for. In this article, we’ll show you how to add a button to your shop page in WooCommerce.
Adding a quantity button in WooCommerce is a simple process that can be accomplished by following these steps:
1. Log into your WordPress Dashboard and go to Plugins > Add New.
2. Search for “WooCommerce Custom Add to Cart Button” and install the plugin.
3.
Adding a product to a page in WooCommerce is simple. Follow these steps:
1. Log in to your WordPress site and go to your Dashboard.
2.