Adding a custom field to your Shopify product page is a great way to show off your product’s unique features and ensure that customers have all the information they need to make a purchase. There are a few different ways to add custom fields to your product pages, so we’ll walk you through the process step-by-step.
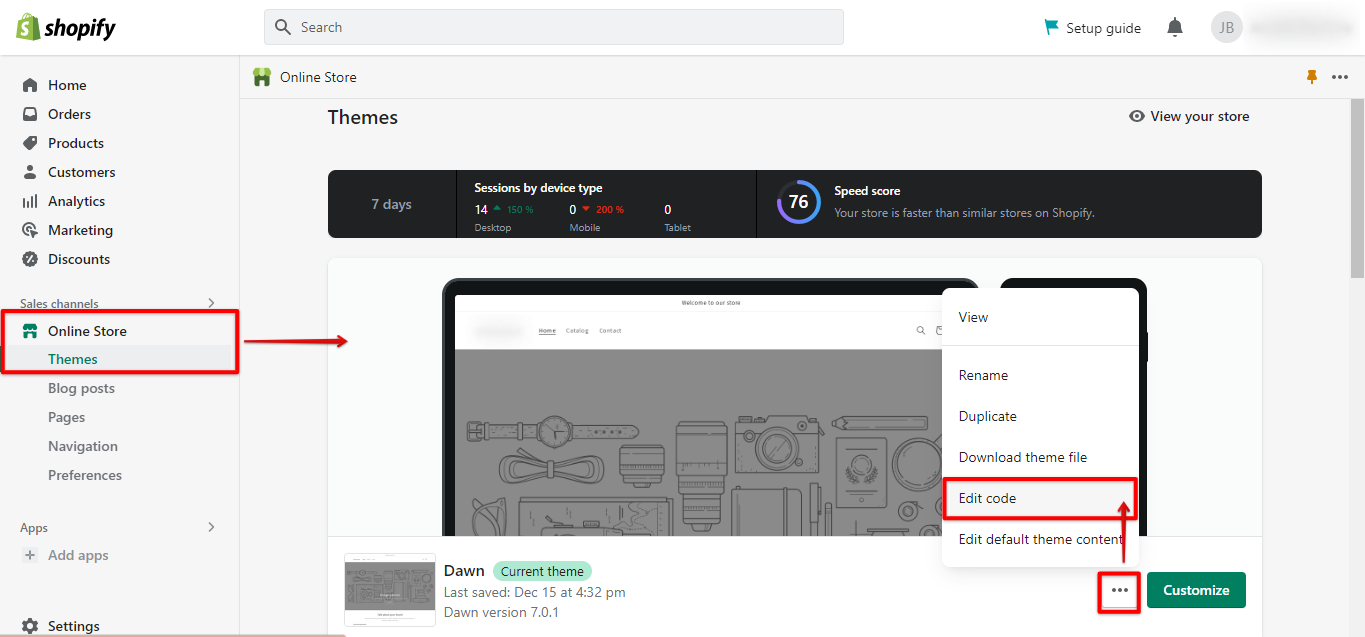
The first thing you’ll need to do is create a new product template. To do this, head to Shopify Admin > Online Store > Themes. Find the theme you’re currently using, and then click Actions > Edit code.
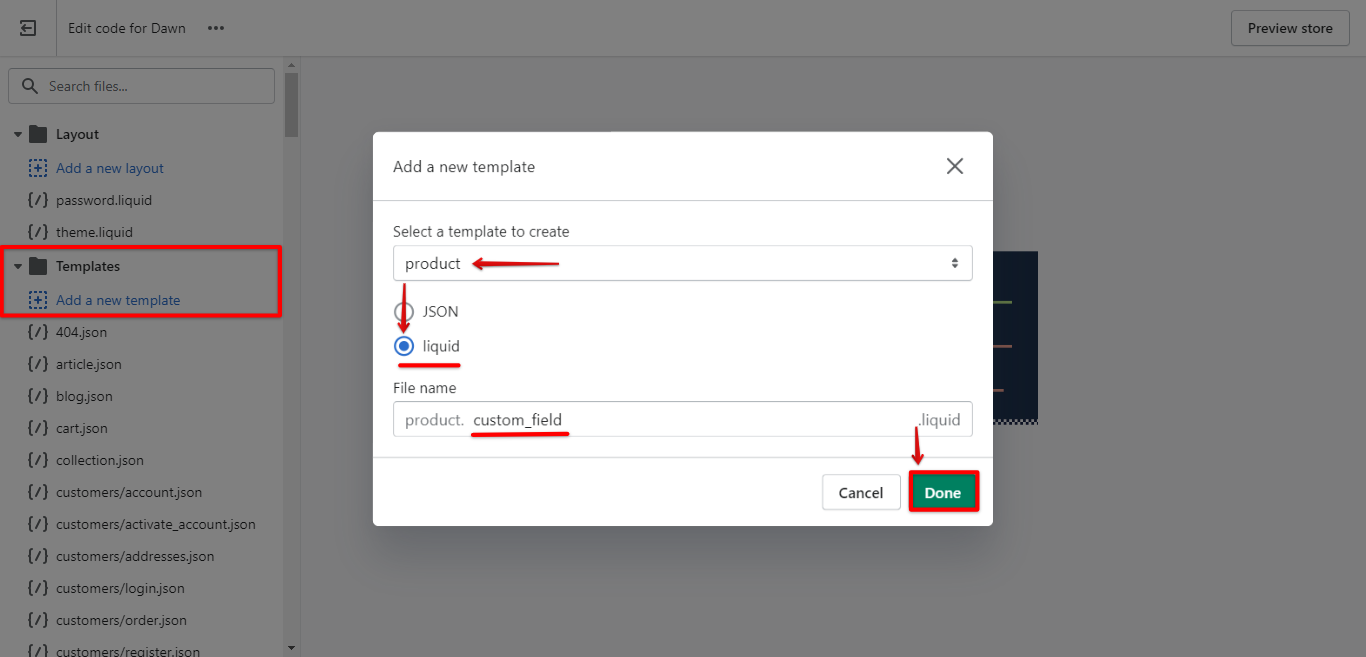
In the Templates directory, click on the product.liquid. If you don’t see this file, it means your theme doesn’t have one, and you’ll need to create one. To d this, click on the “Add a new template” drop-down menu and select “product.”
Once you’ve found or created your product template, look for the following line of code:
{{ product.description }}
This is where the default Shopify product description appears on your product pages. We’re going to replace this with our custom field.
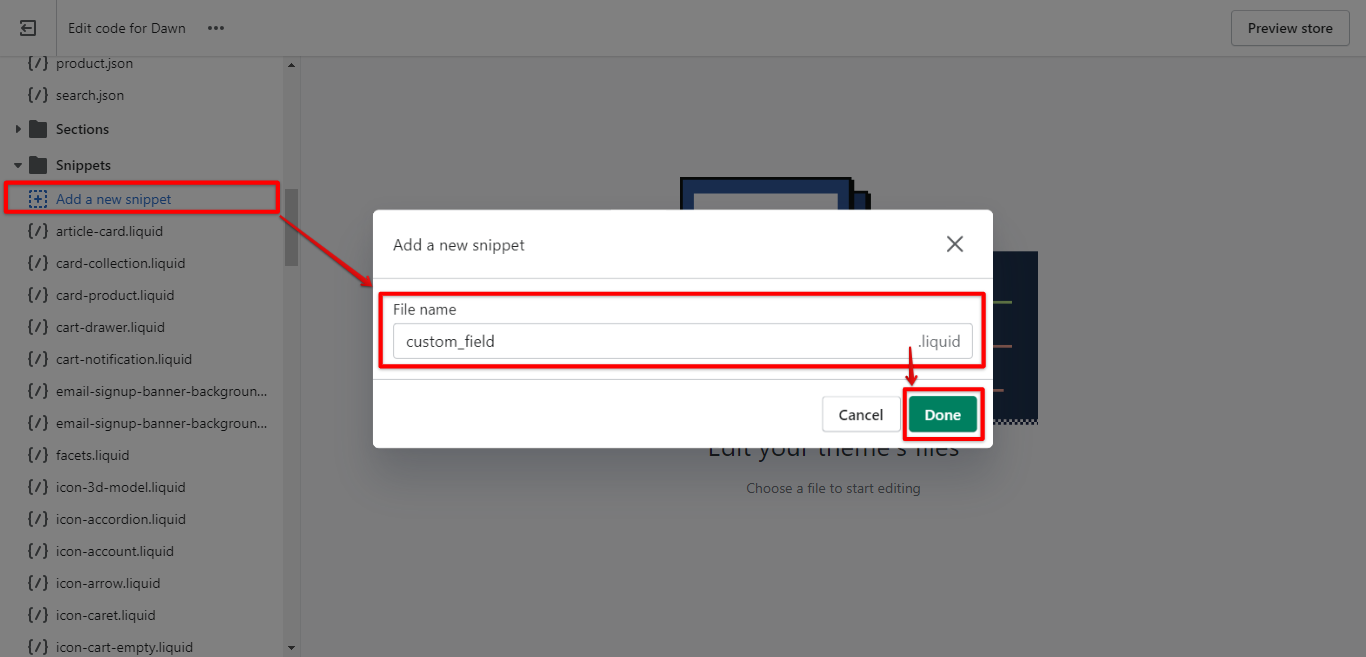
To do this, we’ll first need to create a new snippet. Snippets are small pieces of code that can be reused in multiple places throughout your theme.
To create a new snippet, head back to the Templates directory and click on “Add a new template”. This time, select "snippet".
Name your snippet something memorable like “custom-field” and then, click “Create snippet”.
Once you’ve created your snippet, paste the following code into it:
<div class=”custom-field”>
{{ product.custom_field }}
</div>
And then replace the {{ product.description }} on the product.liquid file with it too.
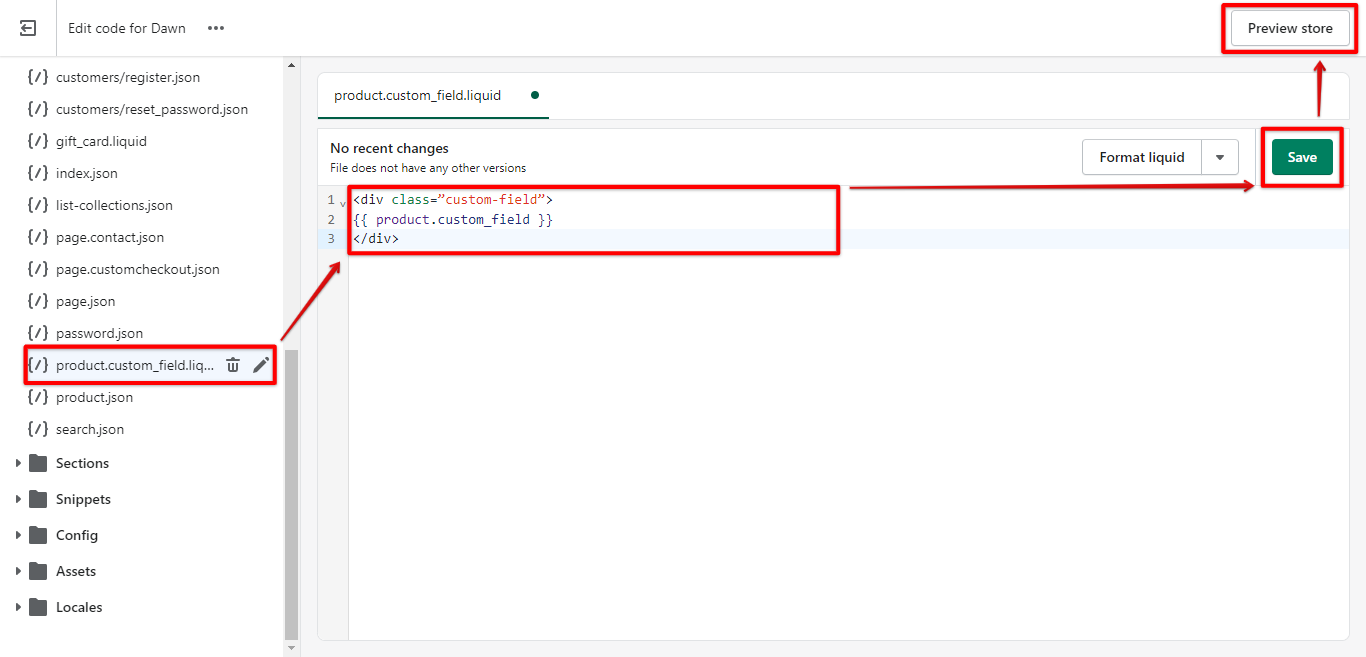
This code will display the contents of your custom field on the front end of your store.
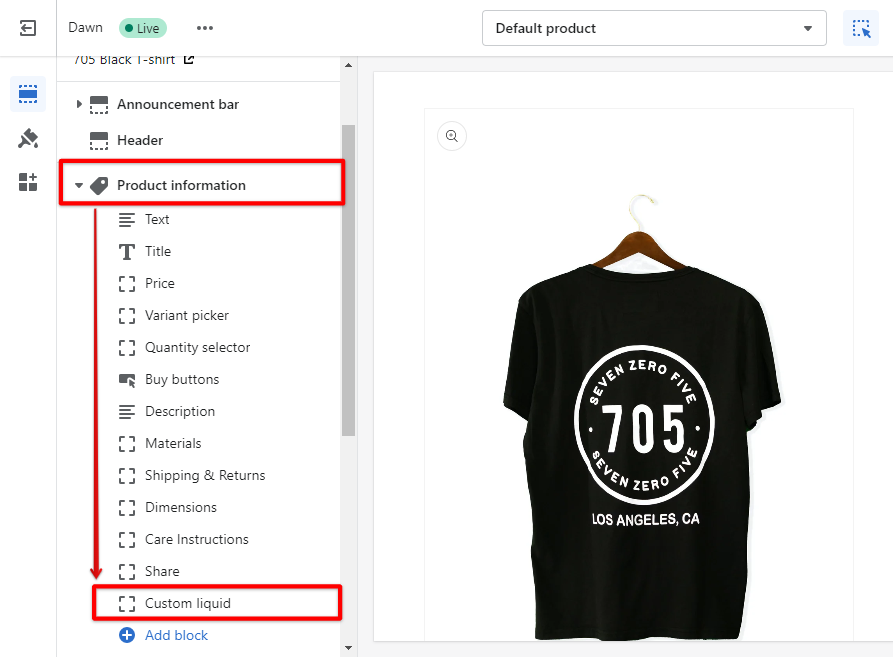
Alternatively, you can add a custom field directly in the Shopify “Customize” editor. Simply, go to the Product you wish to add a custom field and delete any block you wish to replace. Then, click the “Custom Liquid” block under the Product information section to add a new custom liquid field block.
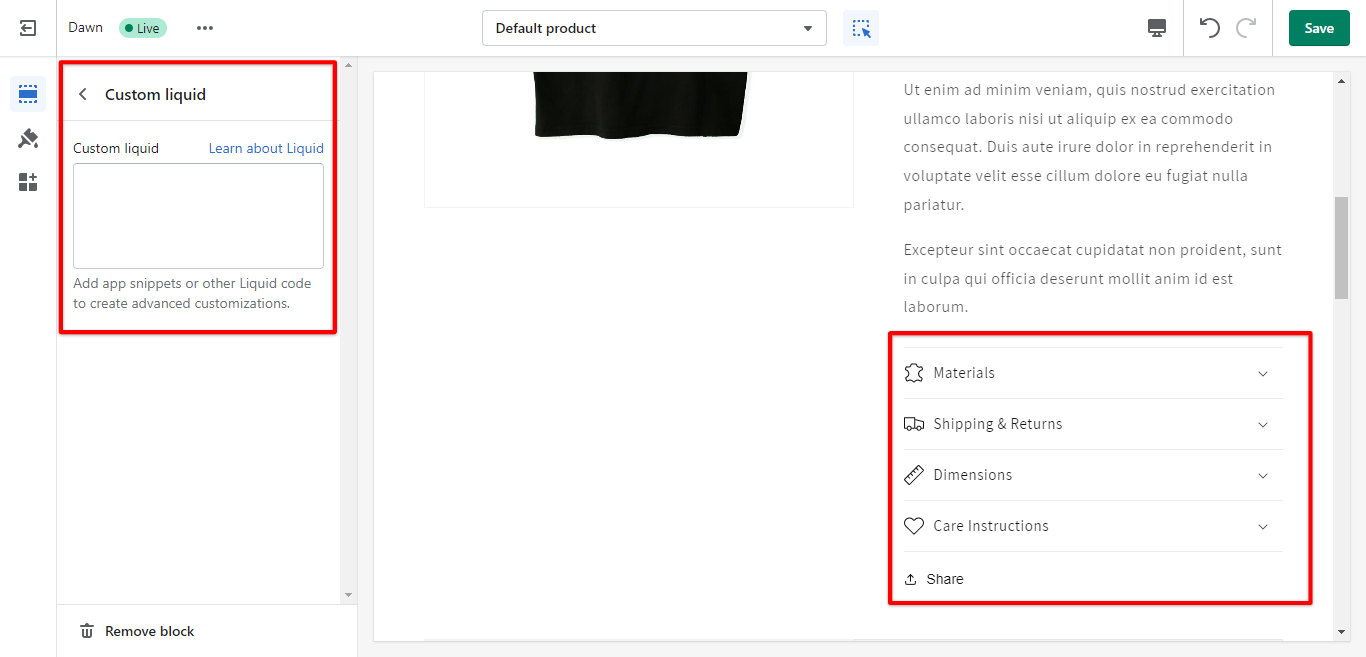
A custom liquid input field will appear allowing you to add custom codes.
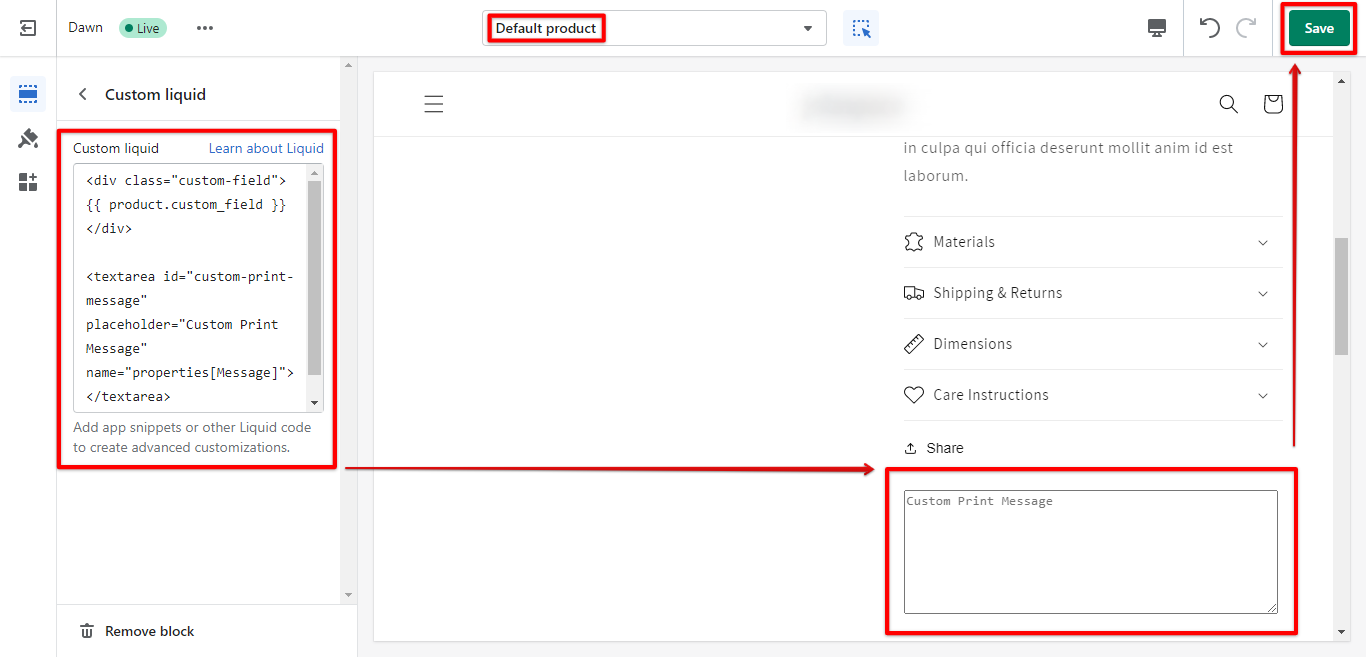
From here you can add the snippets and preview the changes live in your editor. Click “Save” once you’re satisfied.
Conclusion:
How Do I Add a Custom Field to My Shopify Product Page?
Adding a custom field to your Shopify product page is a great way to show off unique features about your product and ensure customers have all information they need before making a purchase. There are a few different ways to add custom fields, which vary depending on what type of field it is (text input, radio button, drop-down menu, etc.), but follow these steps as a general guide:
- From the Shopify admin panel, go to Online Store > Themes > choose the theme you want to edit
- Click “Actions” then “Edit Code.”
- Under “Templates” find the “product.liquid” file – if not visible, create one by selecting “Add New Template” from the drop-down menu and choosing the “Product” option.
- Once located/created, look for the line of code reading: {{ product.description }} and replace with following: <div class=”custom-field”> {{ product.custom_field }} </div>; This will display the contents of the custom field on the front-end store.