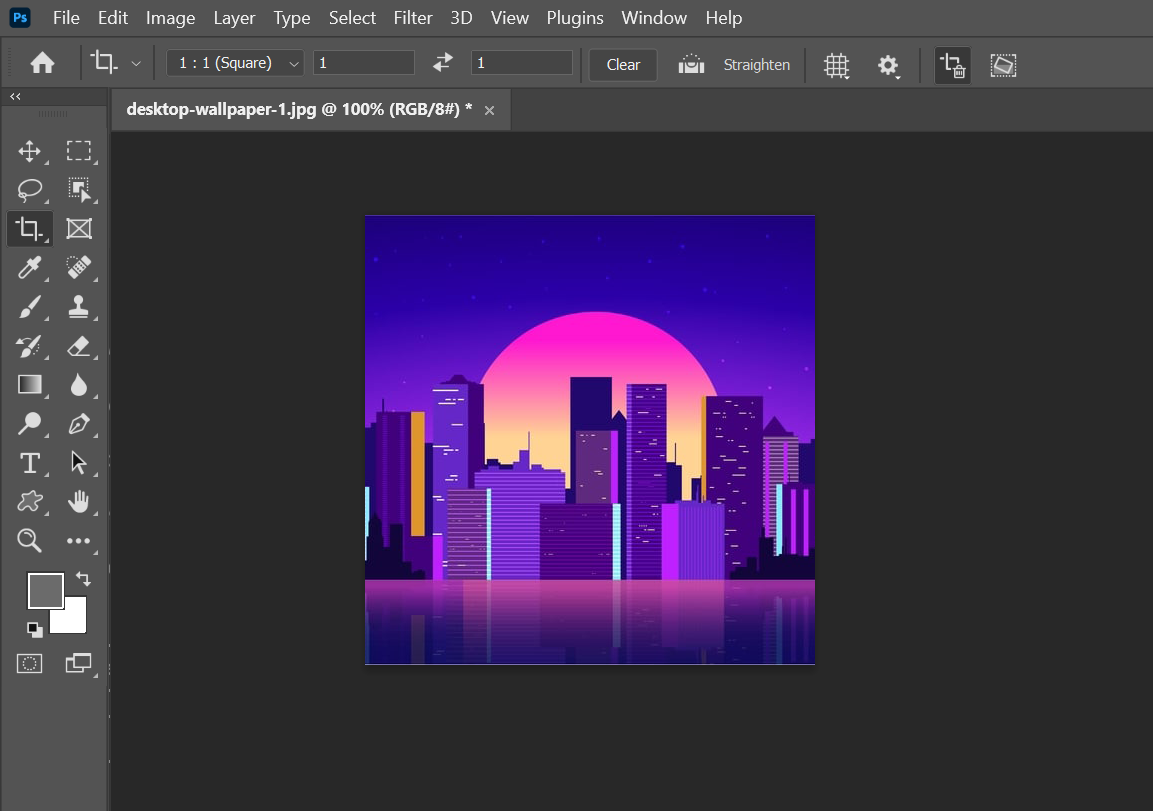
Aspect Ratio is the width-to-height ratio of an image. It’s expressed as two numbers separated by a colon, such as 4:3 or 16:9. The first number is the width and the second is the height.
You can change the aspect ratio of an image in Photoshop without distorting it by using the Crop tool.
To change the aspect ratio of an image in Photoshop, follow the steps below:
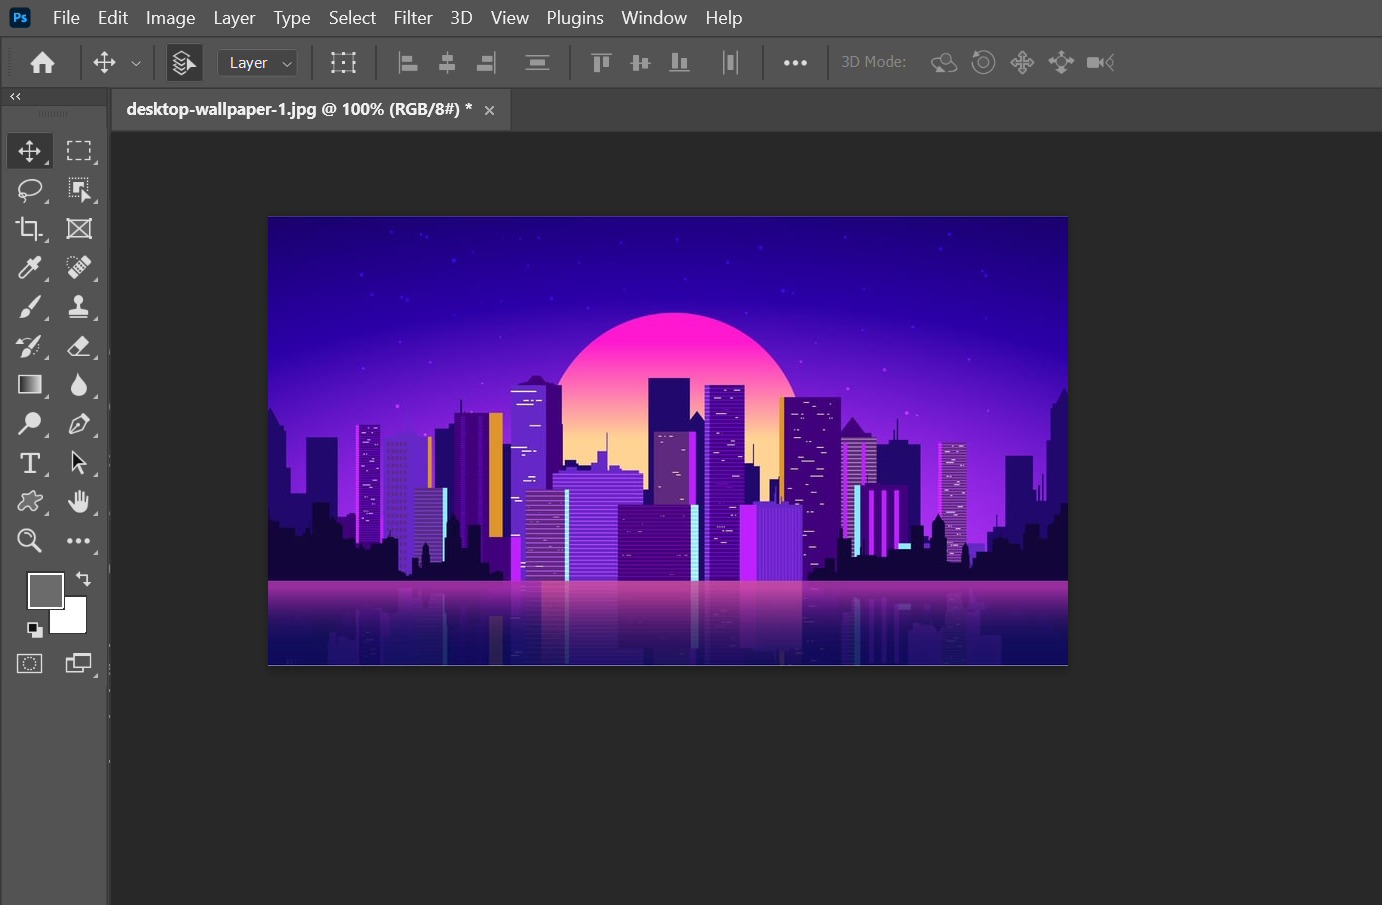
1. Open the image in Photoshop.

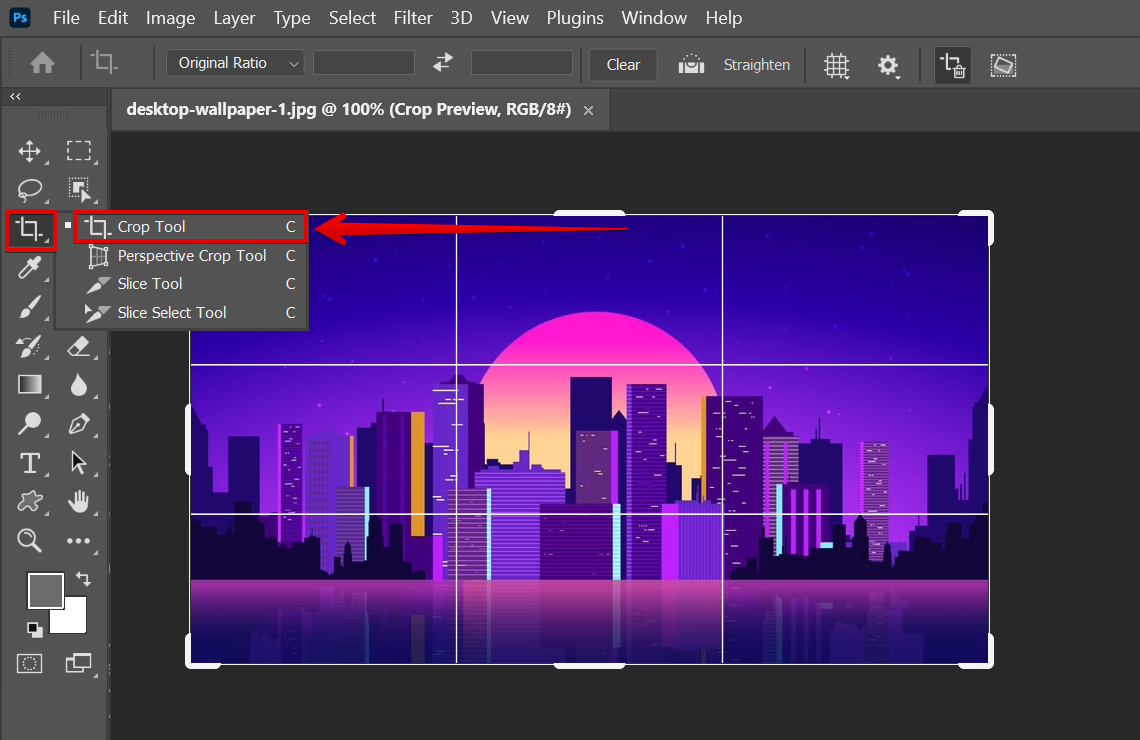
2. Select the Crop tool in the Toolbox.
NOTE: If you’re having a hard time finding the Crop tool from the toolbar, you can use the search feature of Photoshop to easily locate tools in one click. Just click on the “search” icon at the upper-right corner of the page and type in “crop” in the search tab, then choose “Crop Tool” from the options.

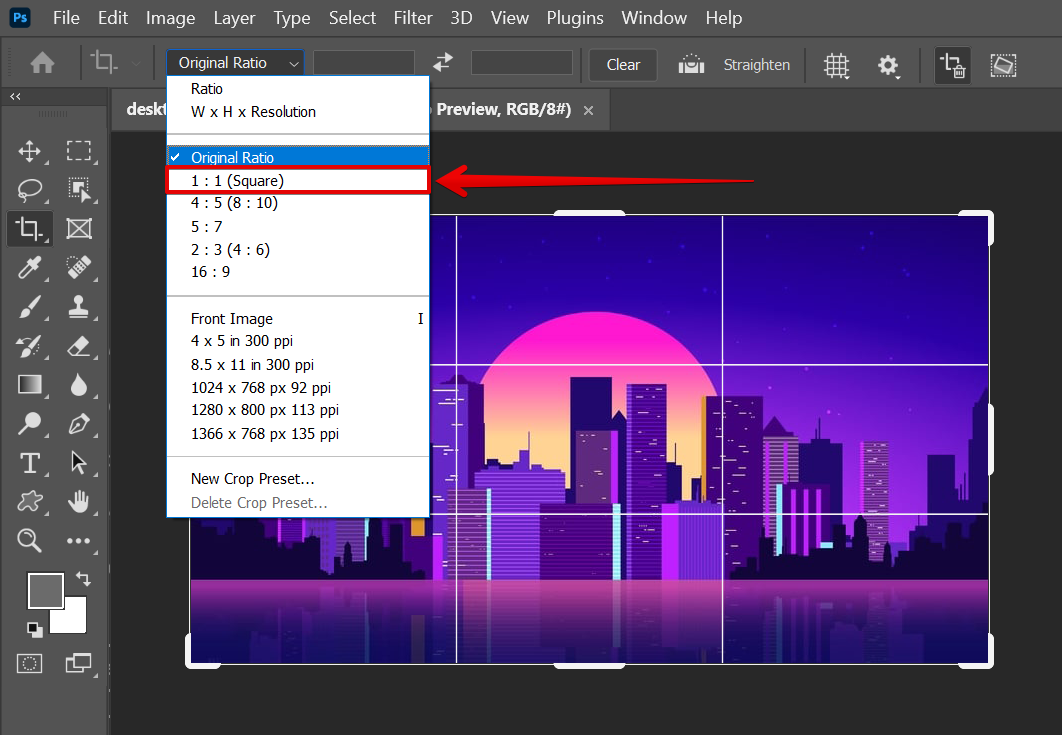
3. In the Options bar, select a preset from the Aspect Ratio drop-down menu or enter your own custom dimensions using the “New Crop Preset” option.

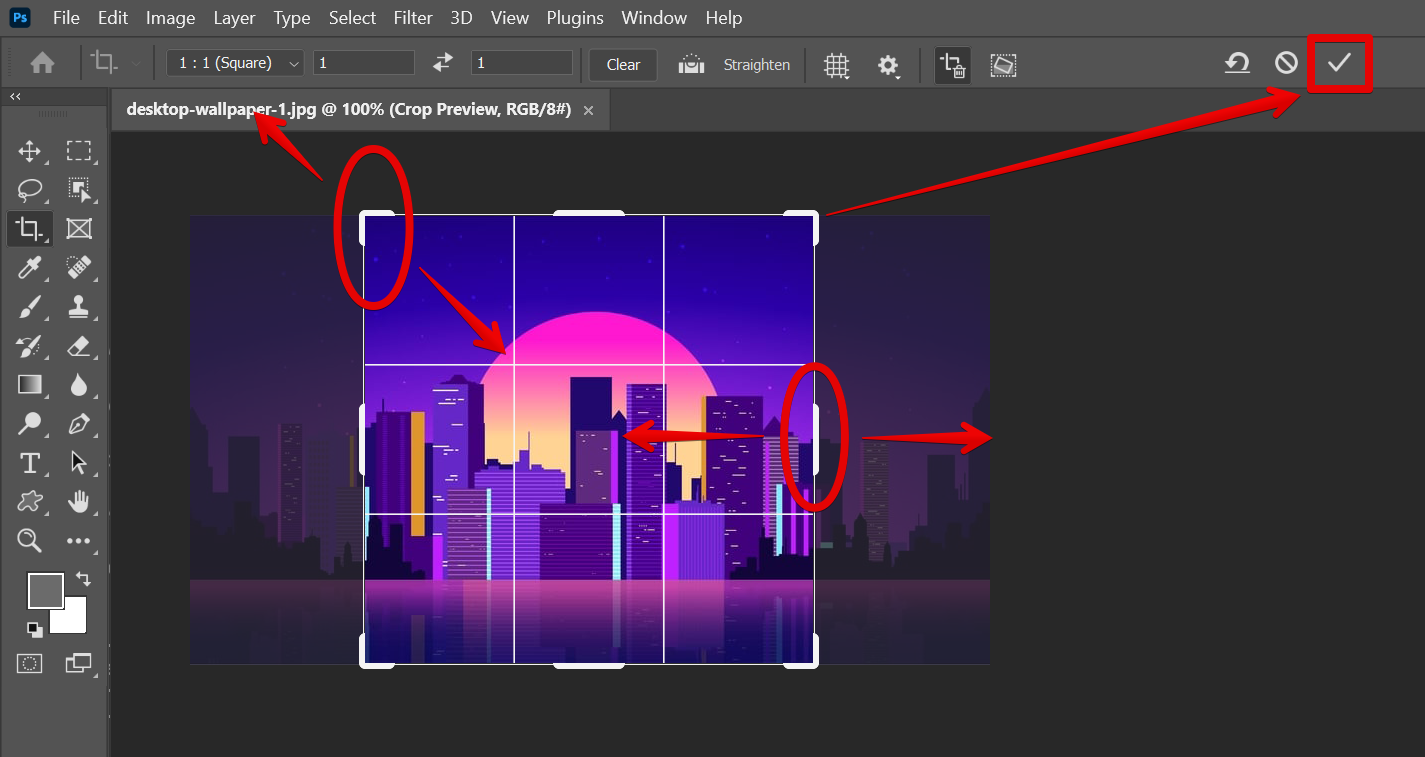
4. Drag any of the handles on the bounding box to resize it, then click and drag inside the bounding box to move it. You can also just choose one Aspect Ratio Preset from the options available. When you’re satisfied with your crop, click on the “check” icon.

5. You are now able to change the aspect ratio of your image in Photoshop!

PRO TIP: Photoshop’s aspect ratio is the ratio of the width to the height of an image. To change the aspect ratio, select “Crop Tool” from the toolbar options. You can either select from the Aspect Ratio Presets available or simply enter new values for the width and height of your image. Keep in mind that changing the aspect ratio will distort the image.
Aspect ratio is an important consideration when cropping images. By constraining the aspect ratio, you ensure that the width and height of an image stay in proportion to each other. This can be helpful when you’re preparing images for print or web use.
While you can change the aspect ratio of an image using other methods, such as Free Transform, using the Crop tool gives you more control over how the final cropped image will look.
8 Related Question Answers Found
Color balance is a critical aspect of photography, and can be adjusted in many different ways in Photoshop. Here are a few tips to help get you started:
1. Check the overall color temperature.
There are a few different ways that you can change the angle of an image in Photoshop. One way is to use the Free Transform tool. With the Free Transform tool selected, you can click and drag on the image to rotate it.
In Photoshop, there are a few different ways that you can adjust colors. You can use the levels tool, the curves tool, or the hue/saturation tool. You can also adjust colors by using the color balance tool or the vibrance tool.
It’s easy to adjust colors in Photoshop! There are a few different ways to go about it. First, you can use the Hue/Saturation tool.
There are a few different ways that you can adjust color balance in Photoshop. One way is to use the levels tool. To do this, go to the Image menu and select Adjustments > Levels.
Photoshop offers a variety of color adjustment options that can be used to enhance the colors in your images. You can adjust the brightness, contrast, hue, saturation, and lightness of an image, or convert it to a different color mode. Color adjustments can be made to an entire image, or to specific areas using selections.
There are a few different ways that you can color separate in Photoshop. One way is to use the color channels. To do this, go to the channels panel and click on the channel that you want to use for your color separation.
When it comes to digital design, color is everything. The colors you choose will set the tone of your design and can make or break a project. That’s why it’s so important to get them just right.
