A perspective grid is a tool that can be used to help align elements in a design. It can be used to create the illusion of depth and dimension in a design and can be a helpful tool for creating compositions that feel balanced and harmonious. There are a few different ways to create a perspective grid in Photoshop, and the method you choose will likely depend on the specific needs of your design.
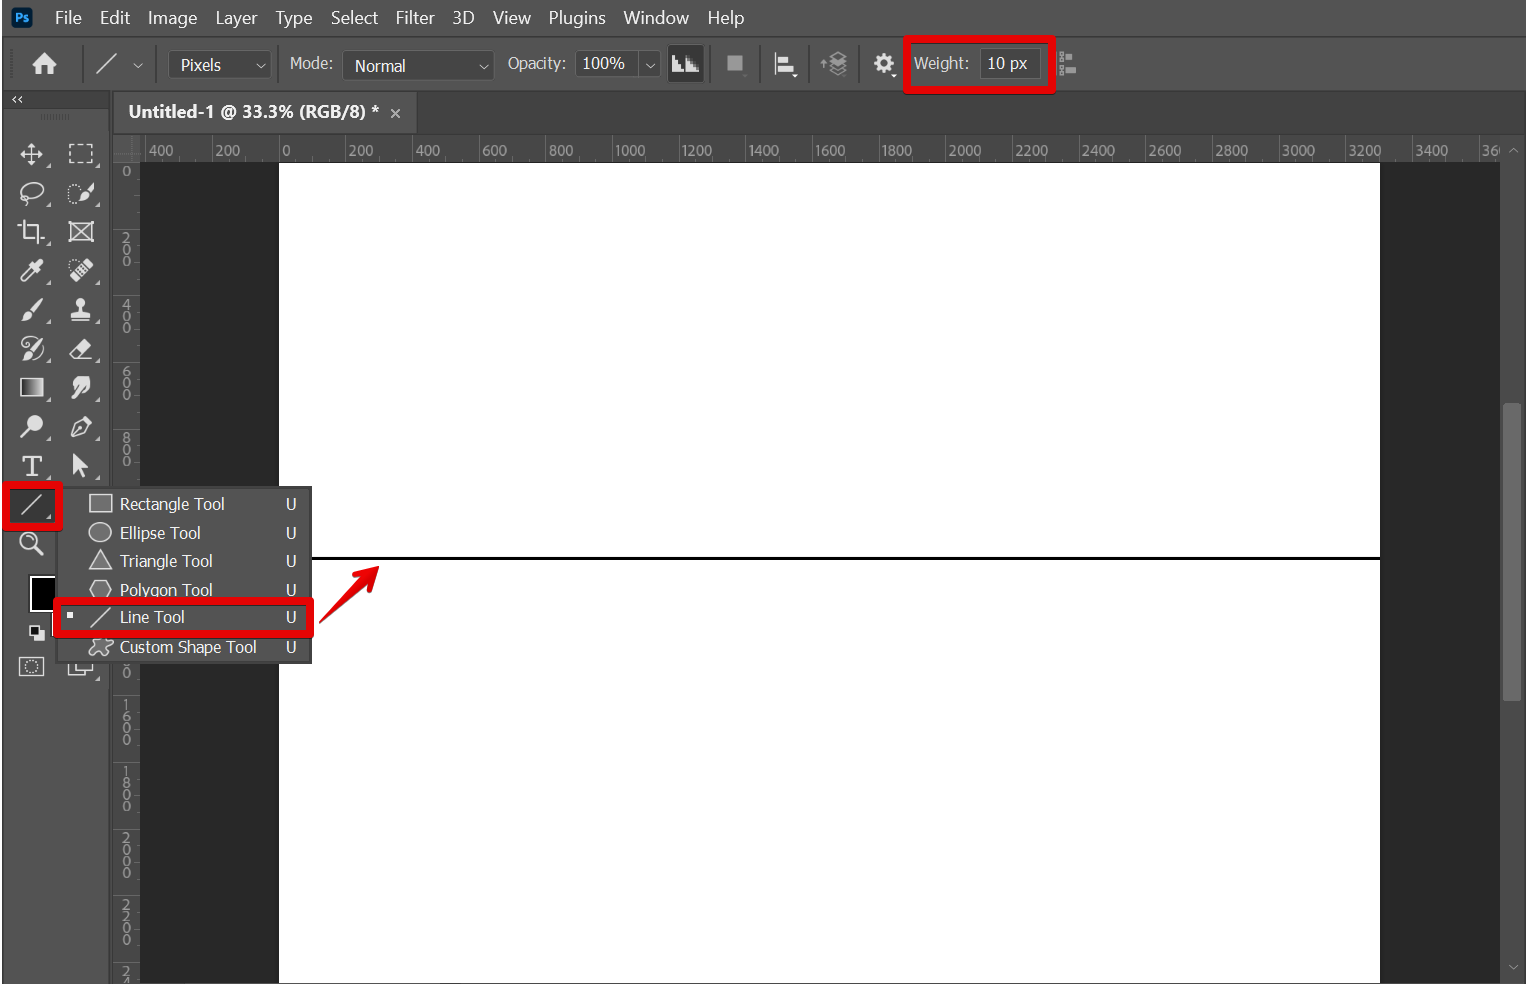
One way to create a perspective grid is to use the Line Tool and Polygon Tool. First, we will be using the Line Tool by selecting it from the left toolbar. With the Line tool selected, click and drag to draw a horizontal line at the center.
Then, select the Polygon Tool and go to the top menu to adjust some settings.
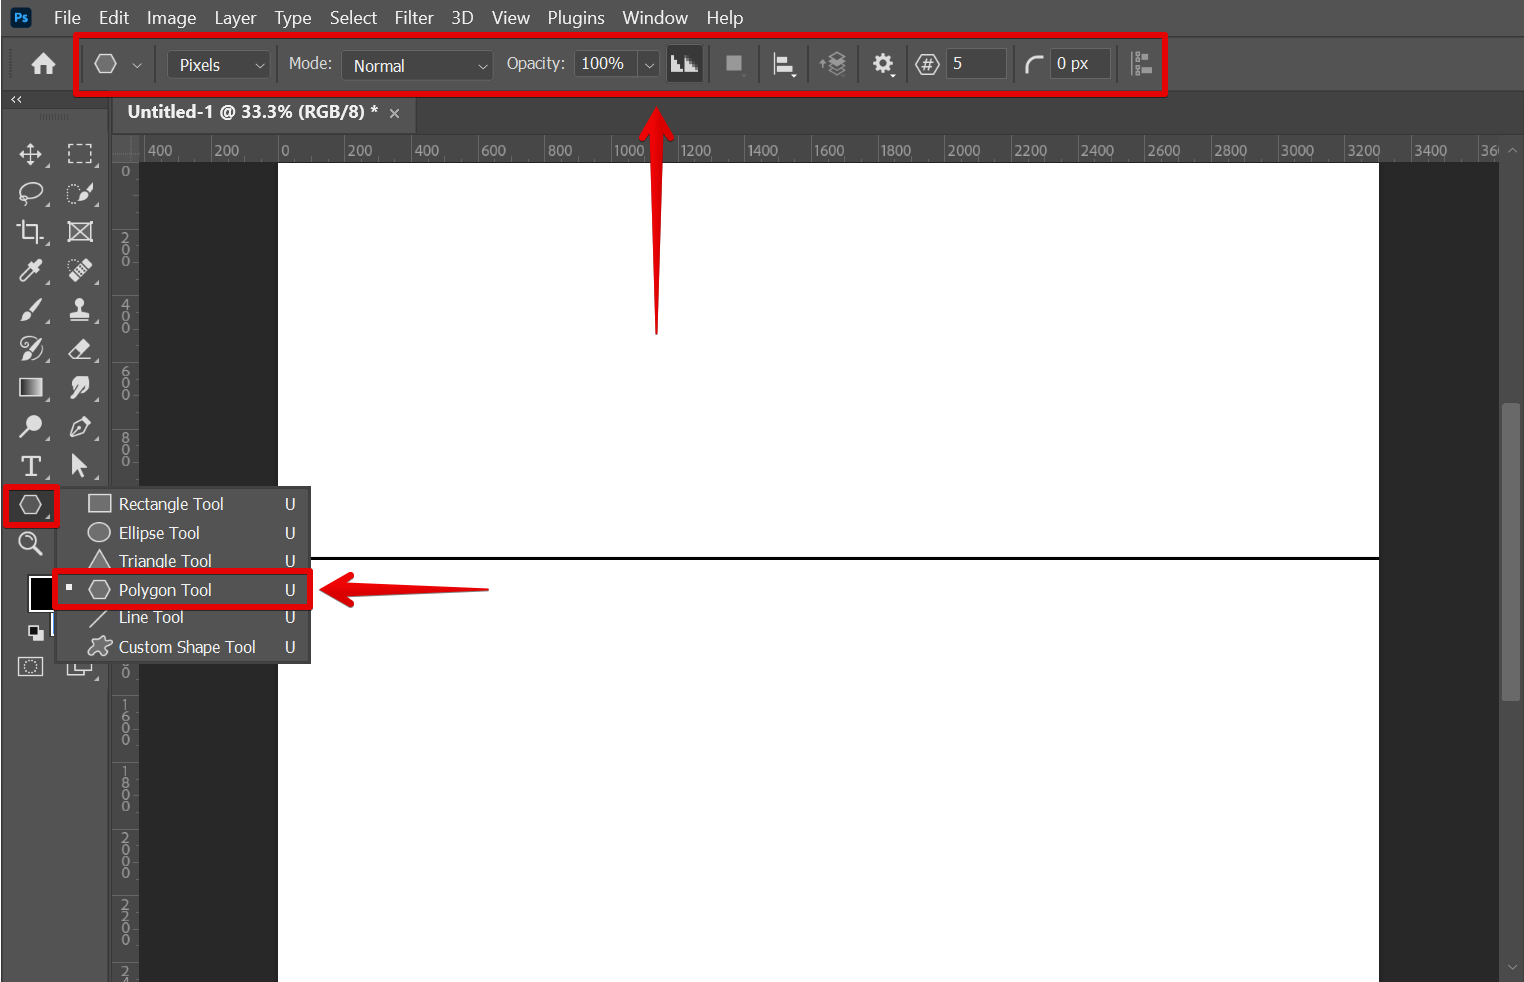
Set the Tool Mode to “Pixels” and the Number of Sides/Points to “100“.
![]()
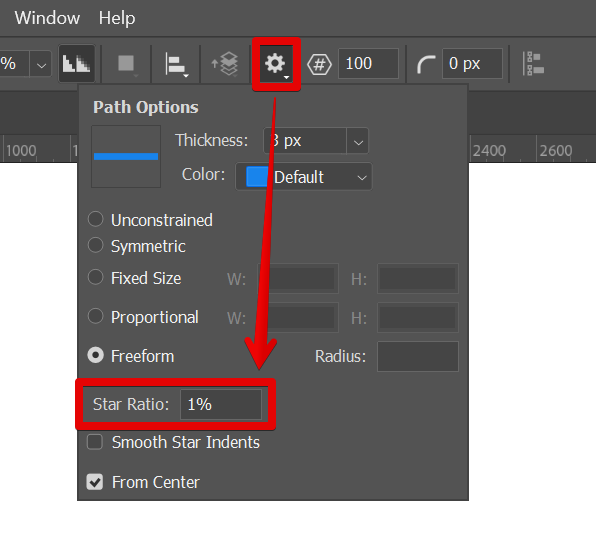
Then, click on the gear icon and set the Star Ratio to “1%“.
You can now start creating the perspective lines. To do this, click at the center of the line created earlier then drag up to the edge of the canvas. Once the perspective lines are already covering the whole canvas, release your mouse.
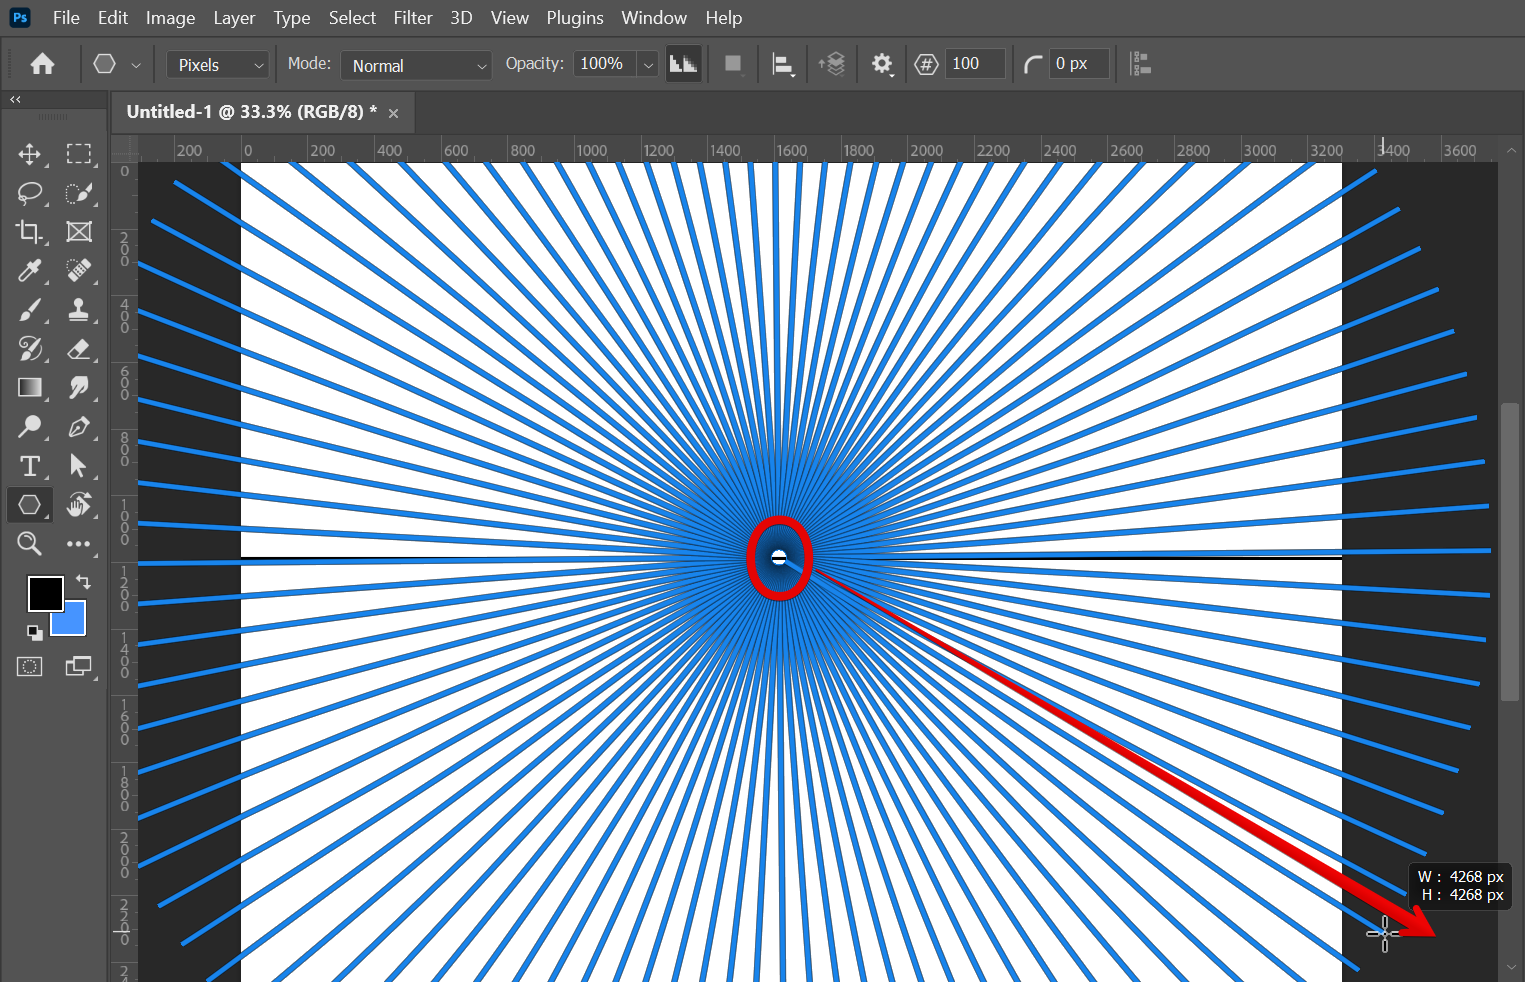
This will create a grid of lines that can be used as a guide for aligning elements in your design.
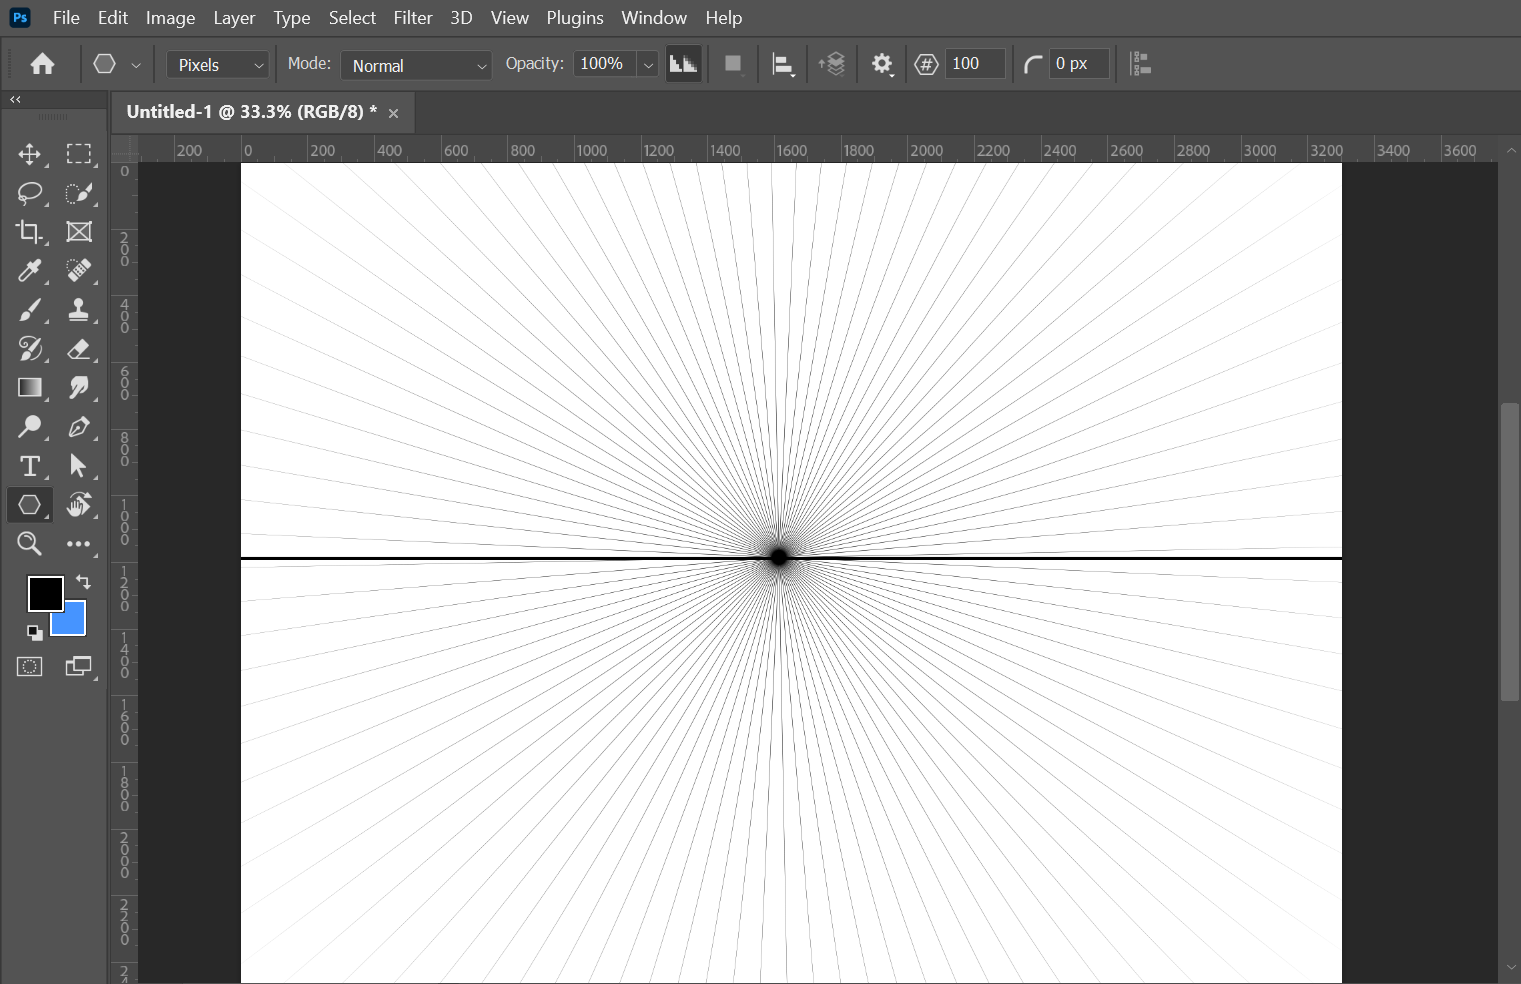
Once you have created your perspective grid, you can begin aligning elements in your design. To do this, simply select an element and position it so that it lines up with one of the lines in the grid. You can also use the Transform tool to change the size or shape of an element so that it better fits within the composition.
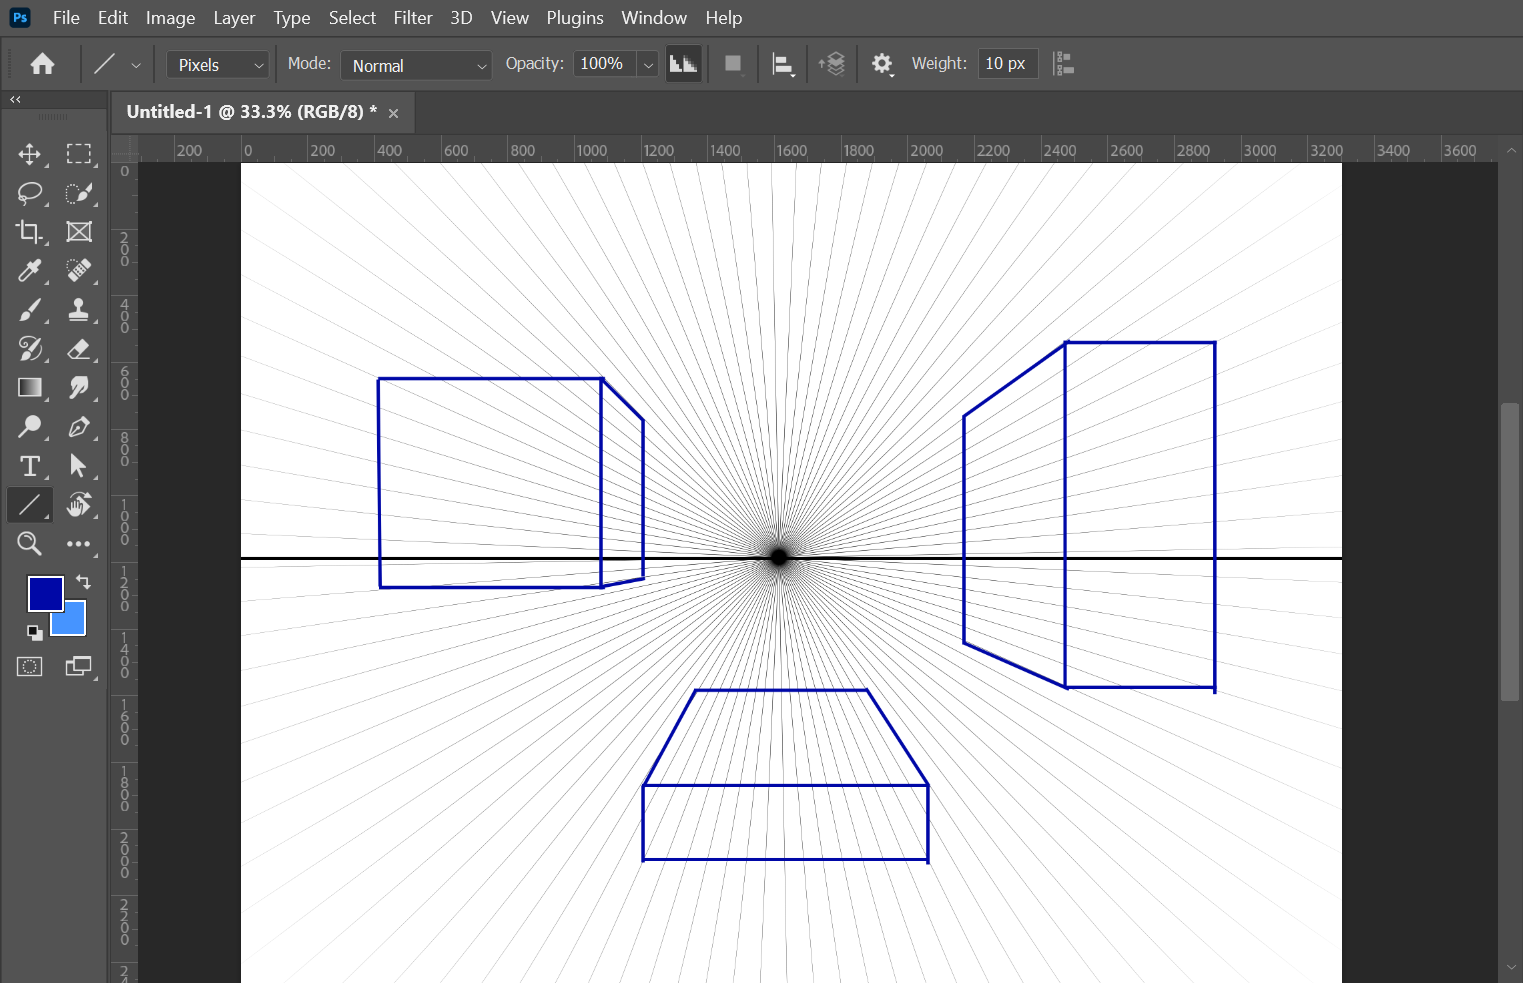
When you are finished aligning elements in your design, you can delete the perspective grid by selecting it and pressing Delete/Backspace. Alternatively, you can leave the perspective grid in place and use it as a background layer for your design.
The Perspective Grid tool can be a helpful tool for creating compositions with depth and dimension. By using this tool, you can easily align elements in your design so that they appear to recede into the distance or pop out from the page.