There are a few steps to follow so that you can create a scan effect in Photoshop.
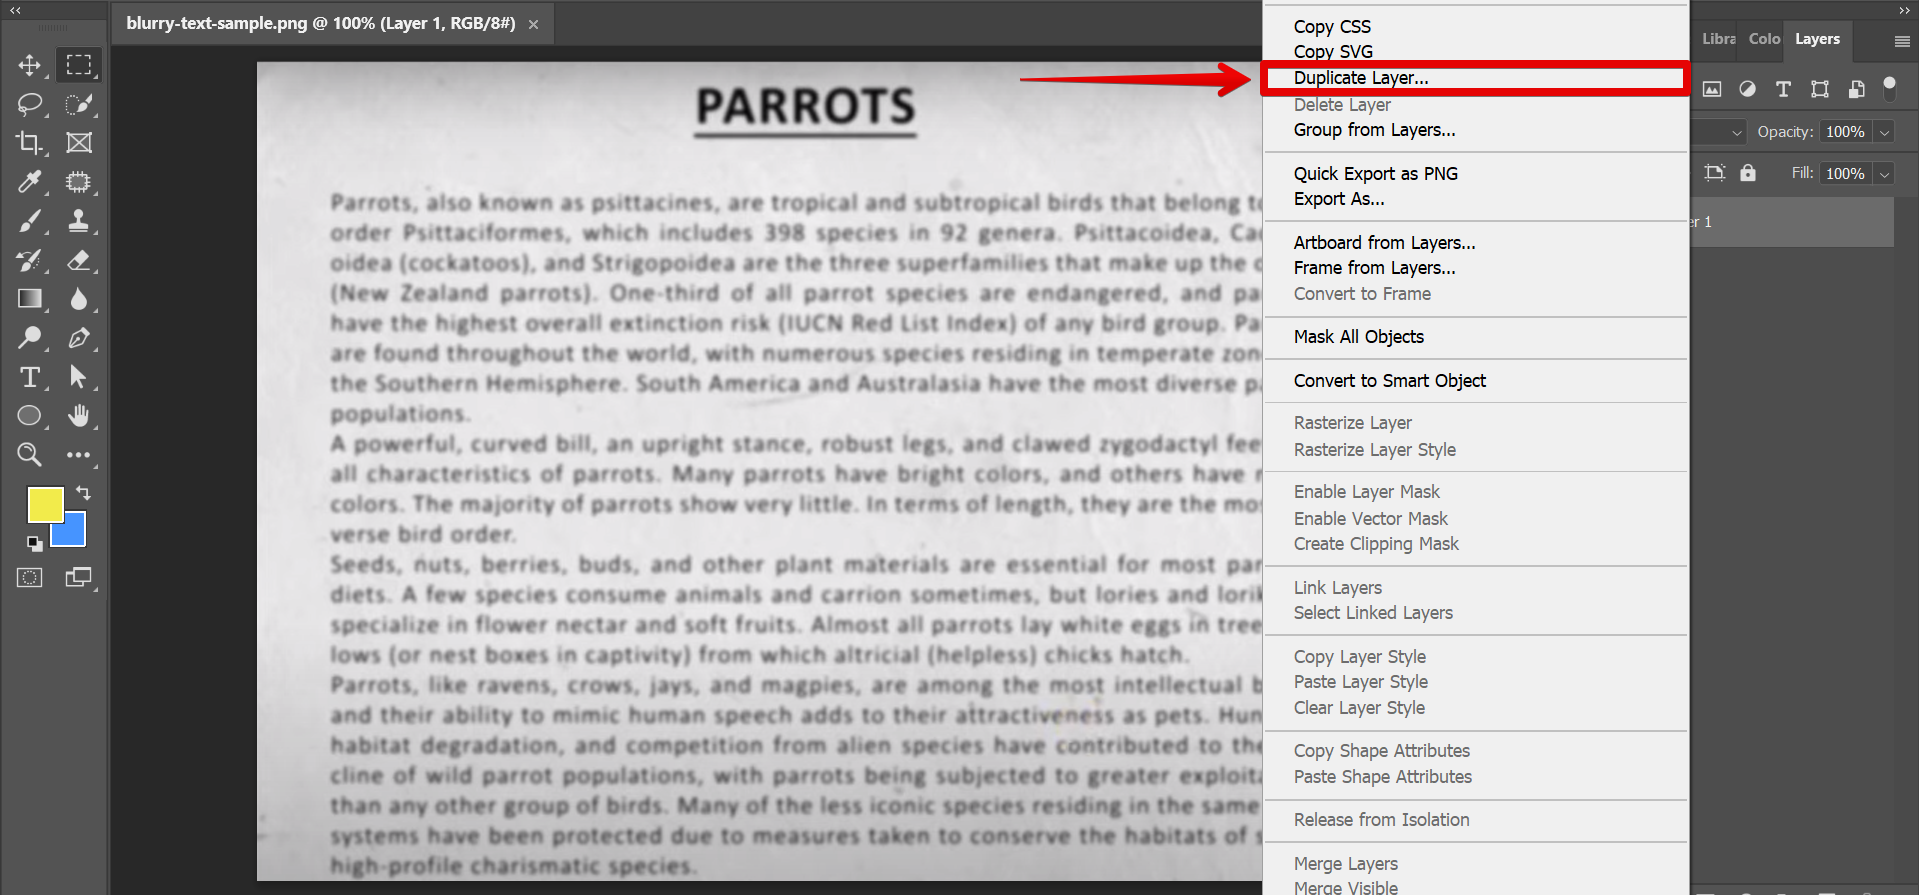
The first step is to duplicate your layer. Select the layer of your image in the Layers section. Right-click on it and select the “Duplicate Layer” option.
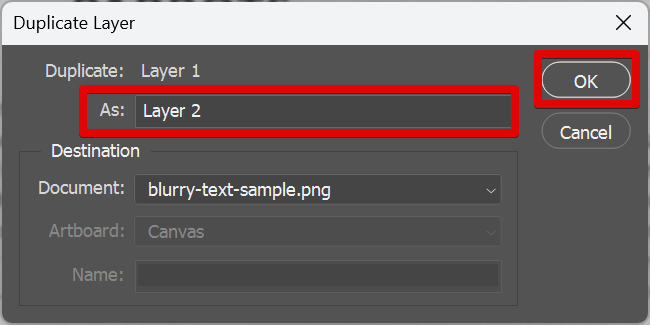
Then, type a name for your duplicate layer and click on the “Ok” button.
The second step is to apply a High Pass Filter. With the duplicate layer selected, go to Filter > Other > High Pass. This will open up the High Pass window.
NOTE: The High Pass Filter in Photoshop is a tool used to sharpen digital images by accentuating high-frequency areas and removing low-frequency areas. It is a type of filter that increases the contrast between edges and smooth areas in the image. It is a versatile tool that can be used for many purposes, including sharpening images, creating a scan effect, and even removing unwanted noise from an image.
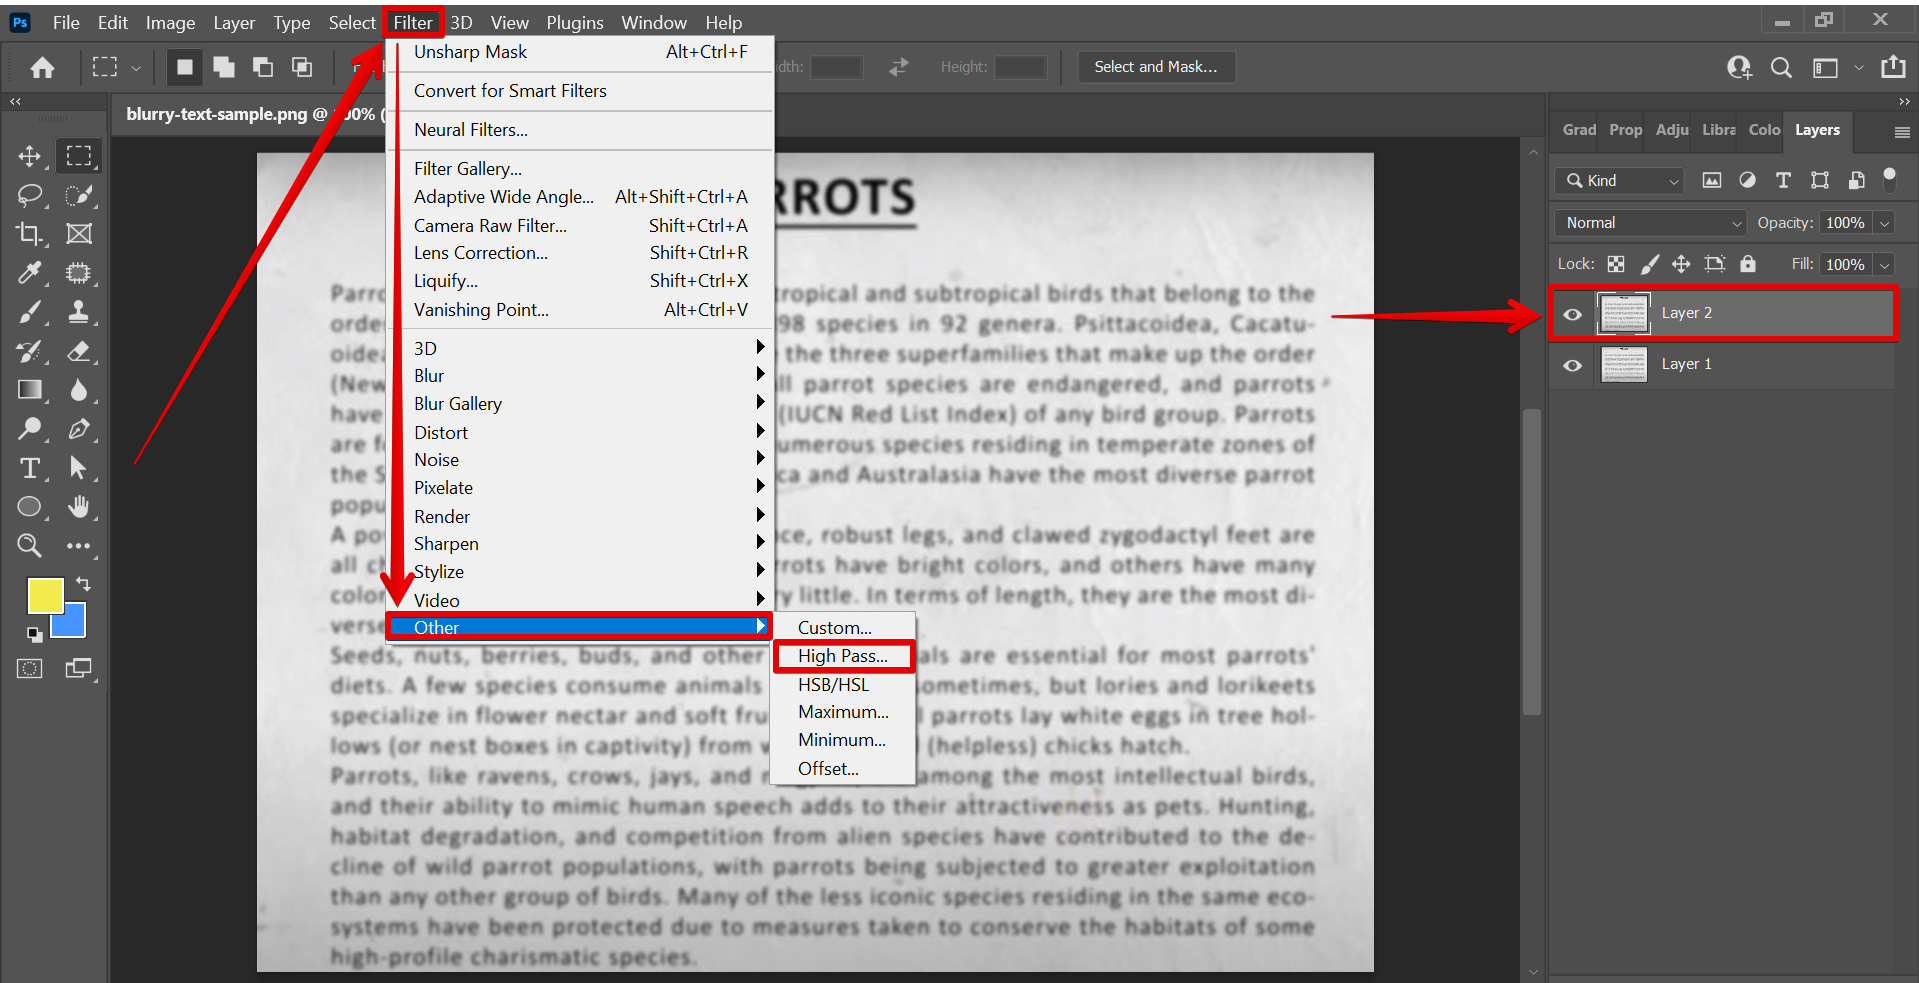
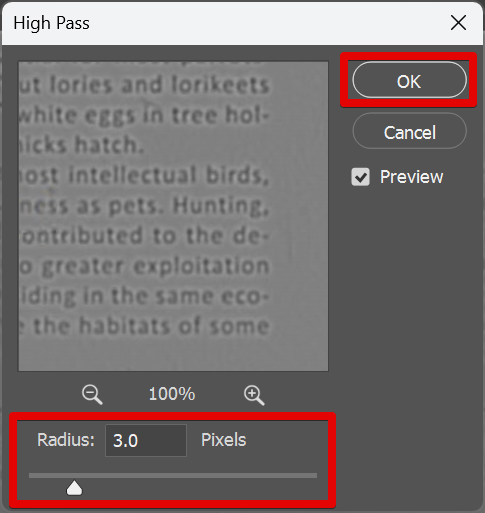
In the High Pass window, adjust the radius accordingly. In this example, we will set it to “3 pixels.” Once done, click on the “Ok” button to apply the filter.
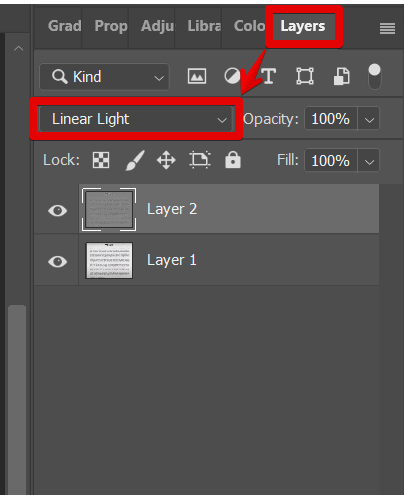
The next step is to go to the Layers window and select “Linear Light” as the duplicate layer’s blending mode.

Then, select both of the image layers and merge them. To do this, simply right-click on the selected layers and select the “Merge Layers” option.

PRO TIP: Please be aware that the ‘How Do I Create a Scan Effect in Photoshop?’ tutorial on the website may not be suitable for all users. Some of the techniques demonstrated in the tutorial could result in damage to your images if used incorrectly. We recommend that you only attempt to use these techniques if you are confident in your Photoshop skills and knowledge.
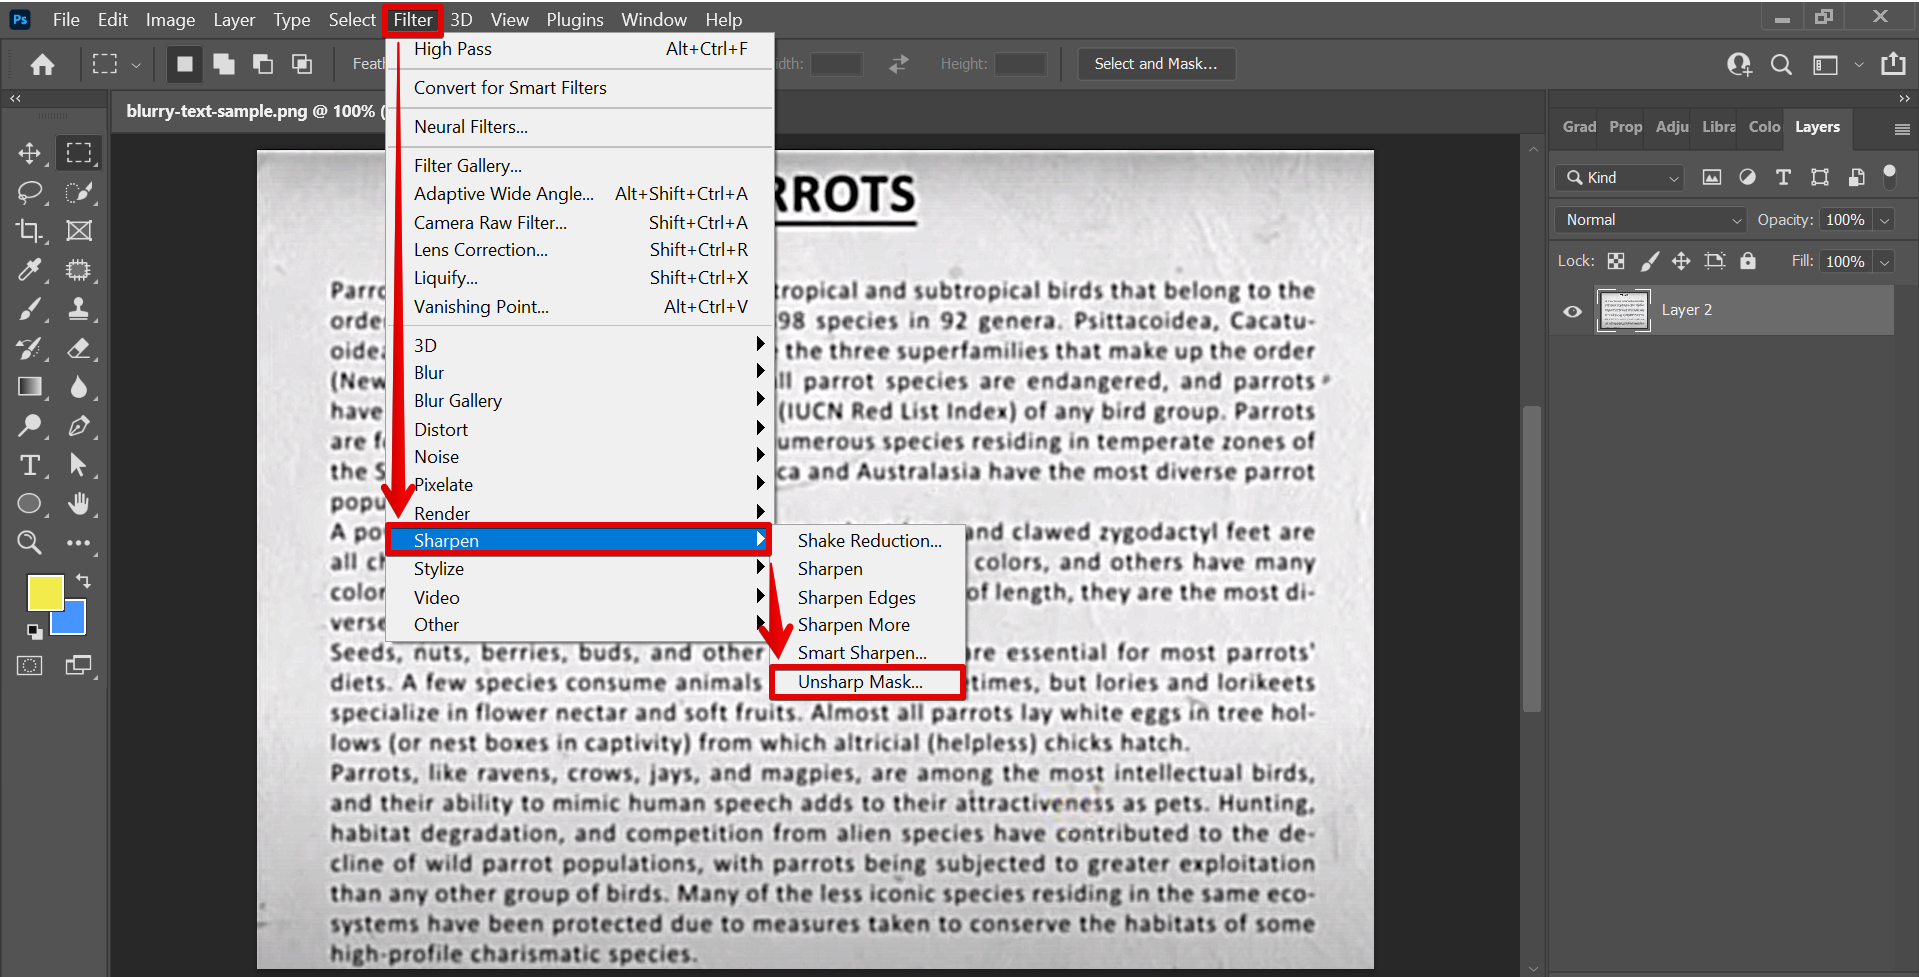
Once the layers are merged, go to Filter > Sharpen > Unsharp Mask.
NOTE: The Unsharp Mask Filter is a tool that enhances the edges and details in an image by creating a contrast between pixels that are adjacent to each other. By increasing the contrast of the edges in an image, the unsharp mask filter can make an image look more like a scanned document or a halftone print.

In the Unsharp Mask window, set the amount to your preference. You’ll see a preview of what the sharpened area will look like. In this example, we will set the amount to “500.” Once done, click on the “Ok” button.

Repeat the Unsharp Mask step until you achieve your preferred clarity in the scan effect.

And there you have it! You can now make a scan effect in Photoshop!

Conclusion: There are several ways that you can create a scan effect in Photoshop. Depending on what look you are going for, you can use either the High Pass Filter, Unsharp Mask Filter, or both of them. Experiment with each one to see which gives you the best results.
10 Related Question Answers Found
High dynamic range photography is a technique that allows you to capture a greater range of tonal detail in your images than is possible with a standard camera. The result is an image with both deep shadows and bright highlights, without the washed-out or flat look that can often happen when working with a limited dynamic range. Creating an HDR effect in Photoshop is a relatively simple process, and one that can produce some stunning results.
In Photoshop, the Ray Effect can be used to add a realistic touch to your images. This effect is perfect for creating sunrays, light beams, or even light streaks. To create a ray effect, you’ll need to use the Line Tool.
In Photoshop, there are a variety of ways to create screen effects. One way is to use the Screen Mode option in the Layer Blending Modes menu. Another way is to use the Screen Filter options in the Filter Gallery.
HDR, or high-dynamic range, photography is a technique that allows you to capture more detail in both the shadows and highlights of an image. HDR photos are often taken with a DSLR camera using three different exposures, and then combined into one image using software like Photoshop. If you’re interested in trying HDR photography, there are a few things you should keep in mind.
A scanline is a line that is scanned across a raster image, usually from left to right. Each scanline is made up of a series of pixels, and the pixels are usually stored in memory in left-to-right order. A scanline often represents one horizontal line of pixels in an image, but it can also represent a vertical line or even a diagonal line.
Laser eye surgery is one of the most popular vision correction procedures performed today. This type of surgery can correct a number of vision problems, including nearsightedness, farsightedness, and astigmatism. The surgery itself is relatively quick and painless, and the recovery period is usually short.
The scanline tool in Photoshop is a quick and easy way to remove unwanted objects from your photos. Simply select the object you want to remove, and then click the “Scanline” button in the toolbar. The scanline tool will automatically remove the selected object from the photo.
There are a few different ways that you can create a pixel effect in Photoshop. One way is to use the ‘Filter’ menu and select ‘Pixelate’. You can then experiment with the different settings to create the desired effect.
When you want to create the look of a film in Photoshop, there are a few things you can do to give your image that desired effect. To start, you will want to open your image in Photoshop. Once your image is open, go to Image > Adjustments > Curves.
Photoshop is a very versatile program that can be used to create all sorts of effects. One of the most popular effects is the 3D effect. This can be achieved in a number of ways, but the most common method is to use the layer styles.


![]()
