When you have a photograph with a solid color background, an alpha channel is the best way to bring in text or another graphic so it stands out against the background. Creating an alpha channel from a colored photograph is one of the simplest techniques when designing graphics for print or the web because it doesn’t require extra steps or any special software tools.
Let’s take a look at how this works and why it can be useful in different situations.
What are alpha channels?
Compositing is a popular way to use Photoshop. The term “compositing” refers to the act of layering many images on top of one another to form a new image. The opacity of each pixel is an essential consideration when layering images on top of one another.
The alpha channel, along with the standard red, green, and blue channels, stores the transparency value of each pixel. In Photoshop, it is used to save the user’s current selection. When it comes to transparency, black means invisible and white means completely visible.
If you want to use stock photos in your projects, you have to pay a monthly charge. Given that the stock photos you’re using are free to use in any way you see fit, you may find yourself using the same image for many purposes.
If you wanted to remove the image’s background for each separate assignment, though, you’d be wasting time and potentially damaging the data in the process. In addition, cut-outs are too messy to share with another designer if you ever find yourself working together.
What, then, is the answer? You guessed it: alpha channels.
In general, the internet employs RGB raster pictures. That’s because each image is made up of three smaller images, one for each of the fundamental colors.
How to create an alpha channel in Photoshop?
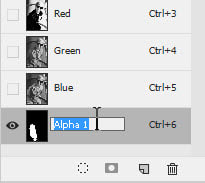
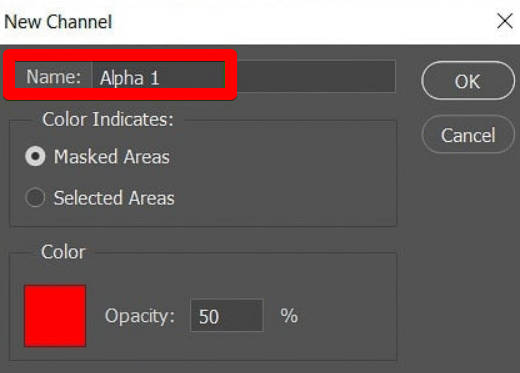
An alpha channel is a separate grayscale image that is used to control the transparency of the layer it is attached to. In Photoshop, you can create an alpha channel by selecting the layer you want to make transparent and choosing Layer > New > Channel from the menu. This will open the New Channel dialog, where you can choose to create a copy of the layer as an alpha channel or select an existing channel to use as an alpha channel.
When you create an alpha channel, it will appear as a mask in the Layers panel. You can edit this mask just like any other image, using the Brush tool or other painting tools.
If you paint on the alpha channel with a black brush, this will make the layer it is attached to transparent in those areas. If you paint with a white brush, this will make the layer opaque in those areas. You can also use the Eraser tool to erase parts of the alpha channel.
Once you have created an alpha channel, you can use it to control the transparency of the layer it is attached to. To do this, select the layer and then click on the “Add Layer Mask” icon in the Layers panel.
This will add a mask icon next to the layer, which you can click on to reveal the mask thumbnail. Then, click on the “Set Transparent Pixel” option in the Properties panel and drag your cursor over the areas of the image that you want to be transparent.
Now that you know how to create and use an alpha channel in Photoshop, you can start using them to control transparency in your images!
How to delete an alpha channel
In Photoshop, select Window > Channels to get the tab for erasing alpha channels. Just right-click the unwanted alpha channel and choose the remove channel option. All selection data stored in the alpha channel will be permanently erased as well.
Because of the extra space alpha channels take up in your files, using them can slow down your workflow and the rate at which you can save your work. A document can have up to 24 alpha channels, but it’s best to delete them as soon as they’re not needed.
In order to keep your document size to a minimum, you should remove alpha channels whenever you are done with them and won’t be using them again in the future.
The Channels panel is where you’ll want to go to remove an alpha channel. Then, pick “Delete Channel” from the context menu after right-clicking the unwanted alpha channel.
Conclusion
Now that we know everything there is to know about the alpha channel, we can include it into any design. First and first, we need to grasp the idea behind any given task, and from there, we can apply that idea to any number of projects.
I trust you’ve gained valuable insight into the alpha channel, and if you have any questions or would want to see an article devoted to graphic design, please let me know in the space provided below.
Good luck with your studies!