How to isolate one color in Photoshop
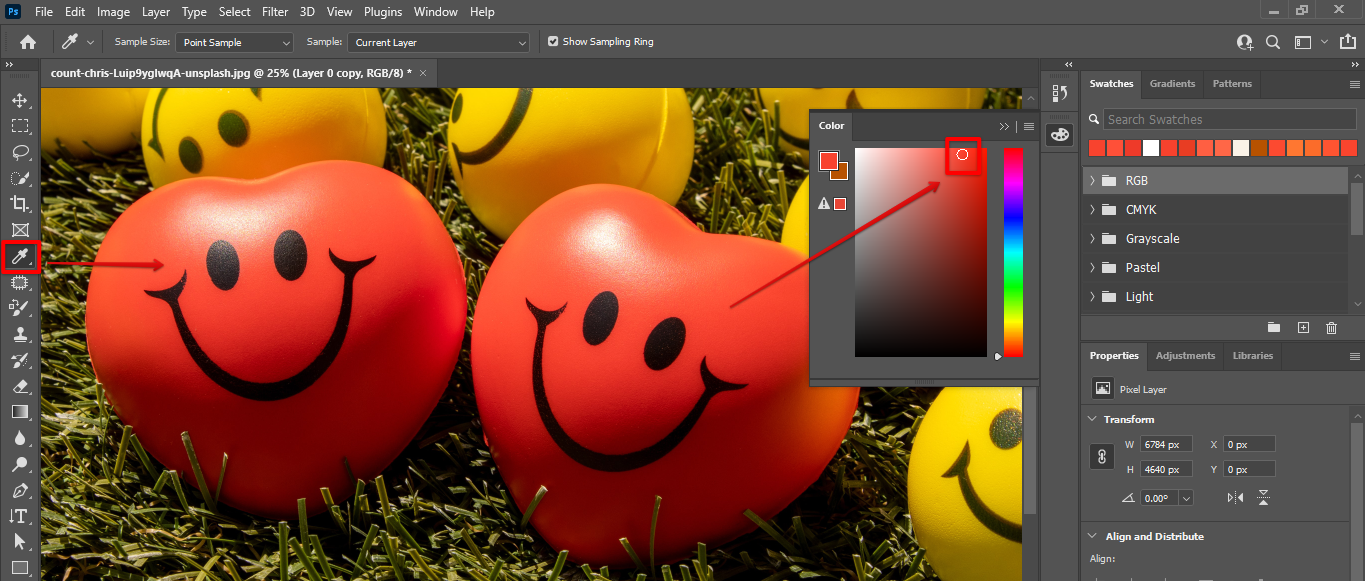
There are a few ways to isolate one color in Photoshop. The first is to use the Eyedropper tool. To do so, navigate to the Tools toolbar and click the Eyedropper tool. Next, click on the color you want to isolate and hold down the Shift key while clicking on the other colors in the image. Finally, release the Shift key and select the color you just isolated.
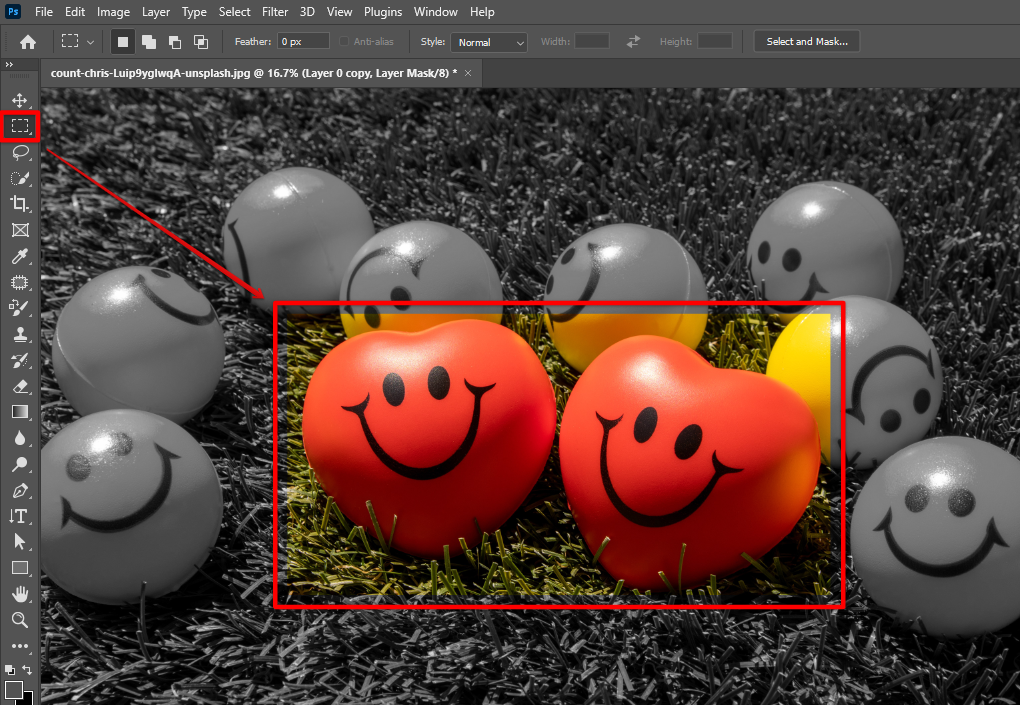
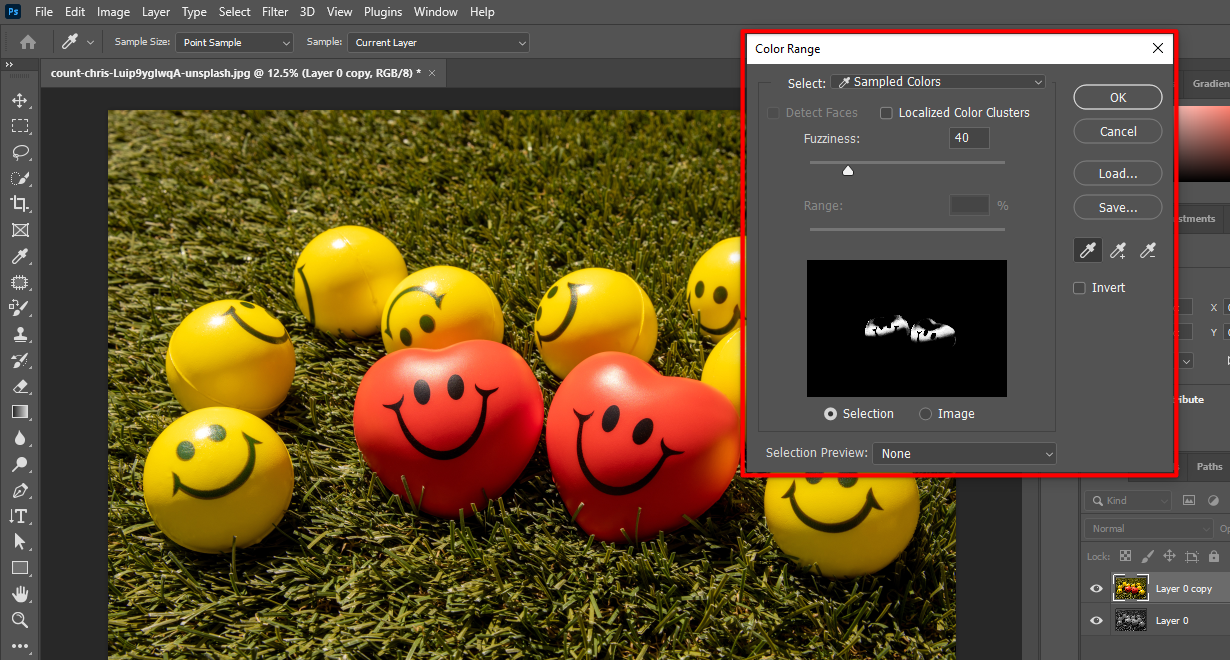
Another way to isolate a color is to use the Color Range tool. To do so, click on the Rectangular Marquee tool and then click on the color you want to isolate.
PRO TIP: When isolating colors in Photoshop, it is important to be careful not to overdo it and create an unrealistic image. It is also important to be aware of the color balance of your image and make sure that the colors you are isolating are in keeping with the overall tone of the image.
Next, click on the Color Range button and click on the left side of the color range to isolate the color. Finally, click on the right side of the color range to add the color back into the image.

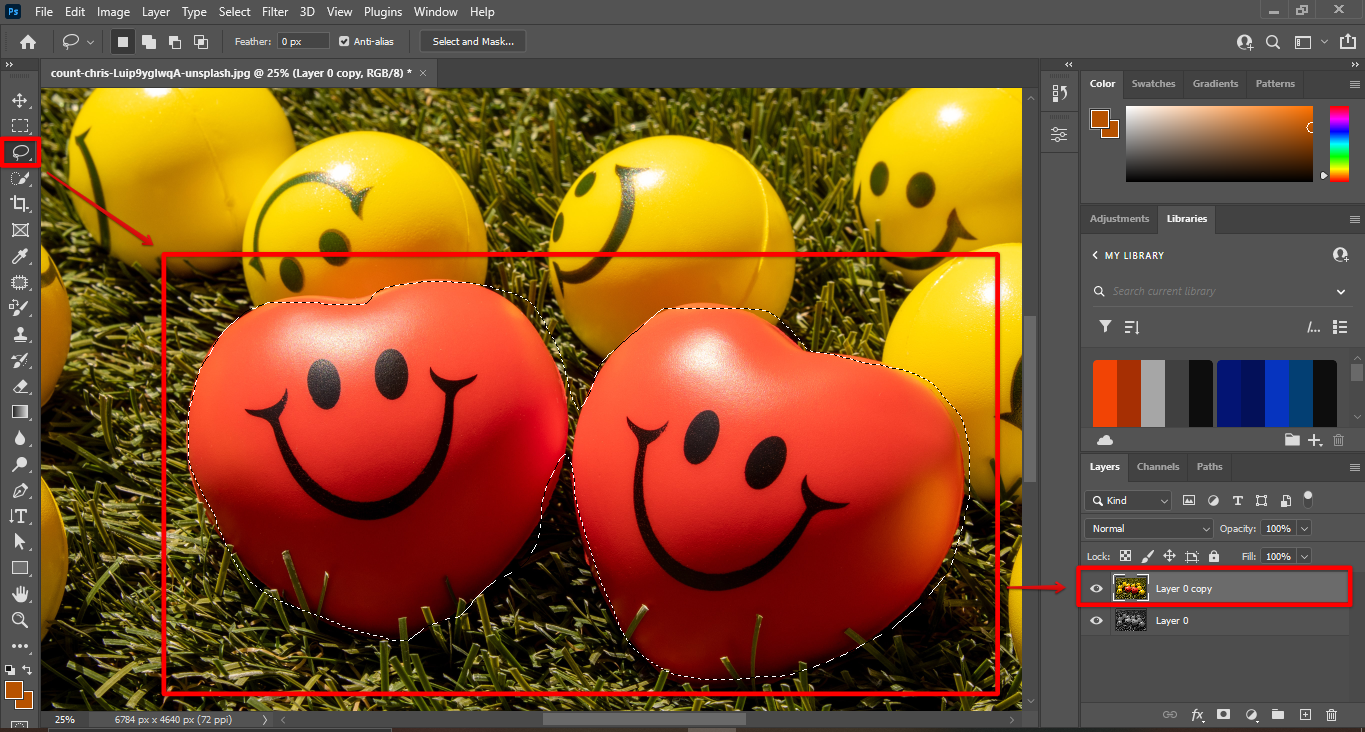
The final way to isolate a color is to use the Lasso tool. To do so, click on the Lasso tool and then click on the color you want to isolate. Next, drag the lasso around the color you want to isolate. Finally, release the Lasso tool and select the color you just isolated.
You can use any of the tools above to isolate one color in Photoshop. However, to achieve the desired effect to isolate one color from the rest of the colors of an image, there are preceding steps you must do.
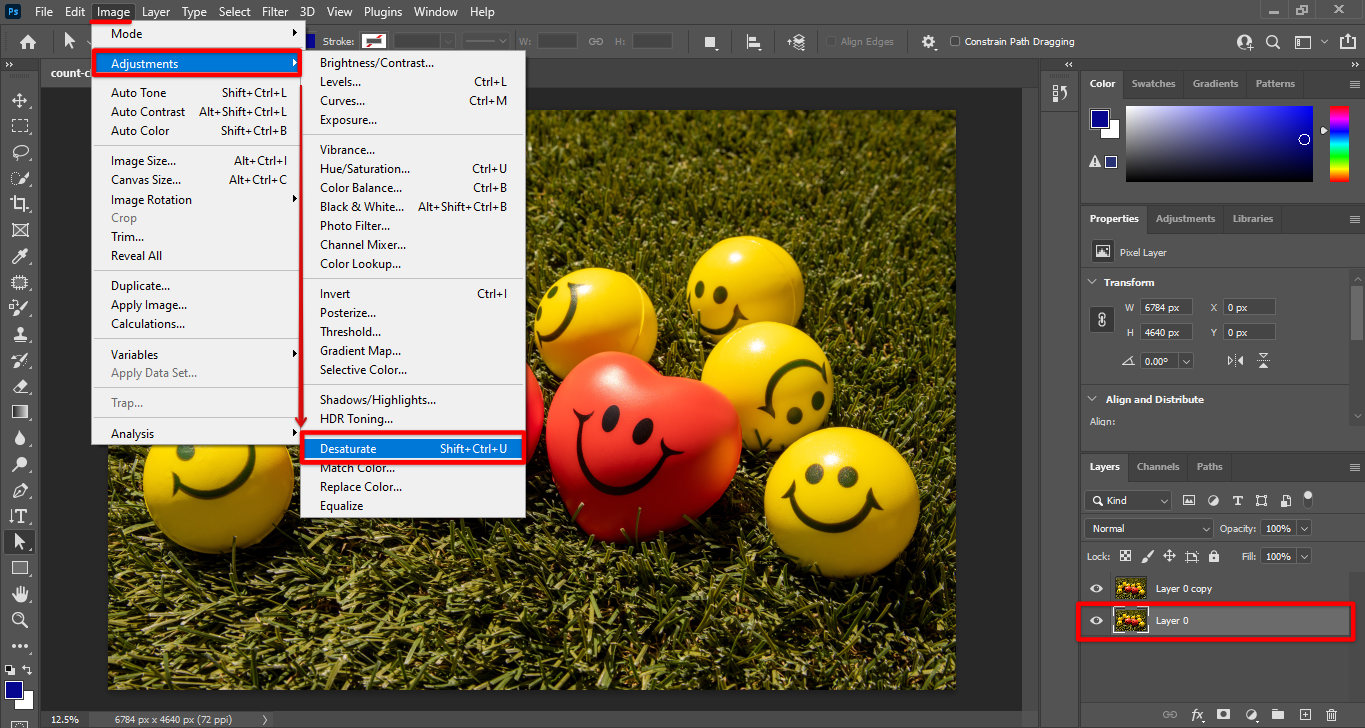
First, duplicate your image layer. Then, go to Image>Adjustments to Desaturate your original image so your isolated color in the duplicated image layer will be highlighted.
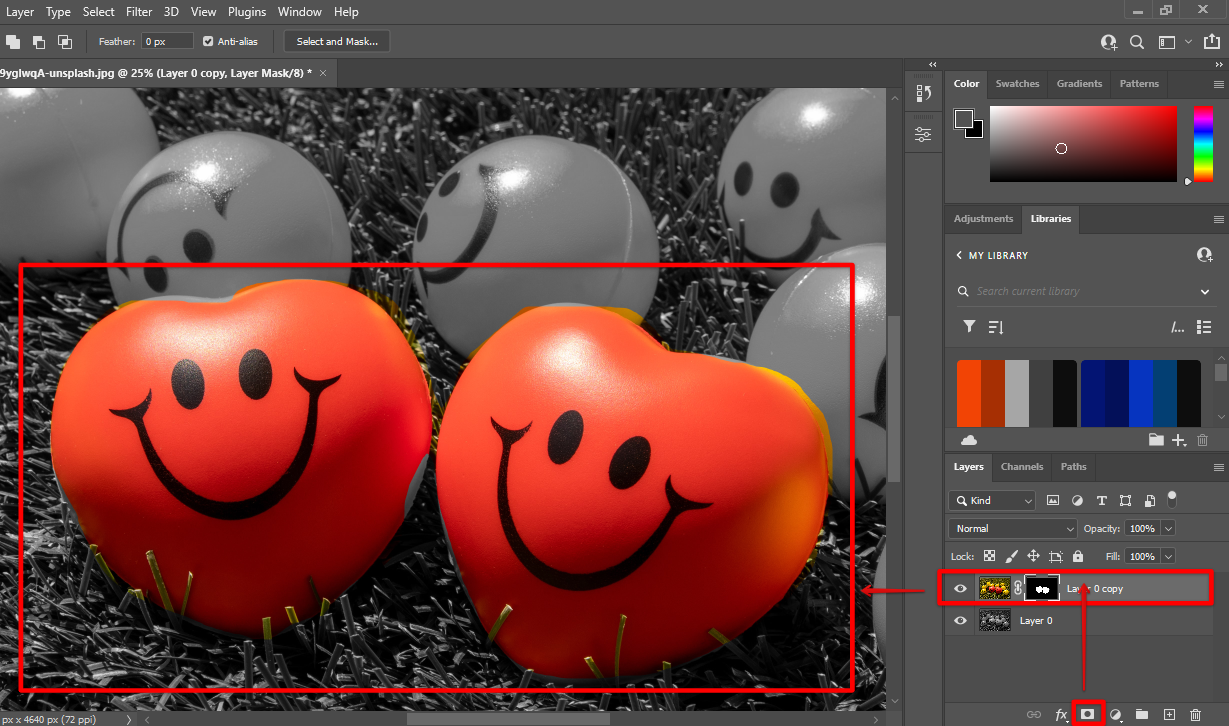
In your copied layer, use any of the tools above to start working on the color isolation. Once you’re done, go to the Layers panel, click the Create a Vector Mask tool and watch the transformation of your image.
10 Related Question Answers Found
There are a few different ways that you can isolate a color in Photoshop. One way is to use the Select Color Range tool. With this tool, you can click on a color in your image and Photoshop will select all pixels that are similar to that color.
There are a few different ways that you can isolate and replace colors in Photoshop. One way is to use the Select Color Range tool. With this tool, you can select a specific color or range of colors to isolate.
There are a few ways to remove one color in Photoshop. One way is to use the Select Color tool. With this tool, you can click on the color you want to remove to select it.
There are a few different ways that you can isolate an image in Photoshop. One way is to use the “Select” tool, and another is to use the “Layer Mask” tool. The “Select” tool is located in the toolbar on the left side of the screen.
There are a few different ways that you can isolate part of an image in Photoshop. One way is to use the Pen tool. With the Pen tool, you can click around the edge of the area that you want to isolate and then click the “Make Selection” button.
There are a few different ways that you can remove one color from an image in Photoshop. One way is to use the Selective Color tool. With this tool, you can Target a specific color range and then adjust the hue, saturation, and lightness levels until the color is removed.
There are a few different ways that you can isolate an area in Photoshop. One way is to use the lasso tool to draw around the area that you want to isolate. Another way is to use the magic wand tool to click on the area that you want to isolate.
There are a few different ways to separate an image in Photoshop. One way is to use the layer mask tool. With the layer mask tool, you can click and drag to create a selection around the area that you want to keep.
There are times when you’ll be working in Photoshop and you’ll need to grab a color sample from an image. Maybe you’re trying to recreate a color scheme, or perhaps you’re trying to match colors between two different images. Whatever the reason, it’s easy to do with the Color Picker tool.
There are a few ways to remove all but one color in Photoshop. One way is to use the Color Range tool. With this tool, you can select a specific color range in an image and delete all other colors.