If you have a checkered background in your image, it’s probably because you’re viewing the image in transparency mode. Transparency mode is used to see through the background of an image to the layers below it.
When you’re in transparency mode, the background is usually checkered if the Grid is set to a certain size. You can remove the checkered background from your image by simply changing the size of the grid.
To remove the checkered background:
1. Open your image in Photoshop.

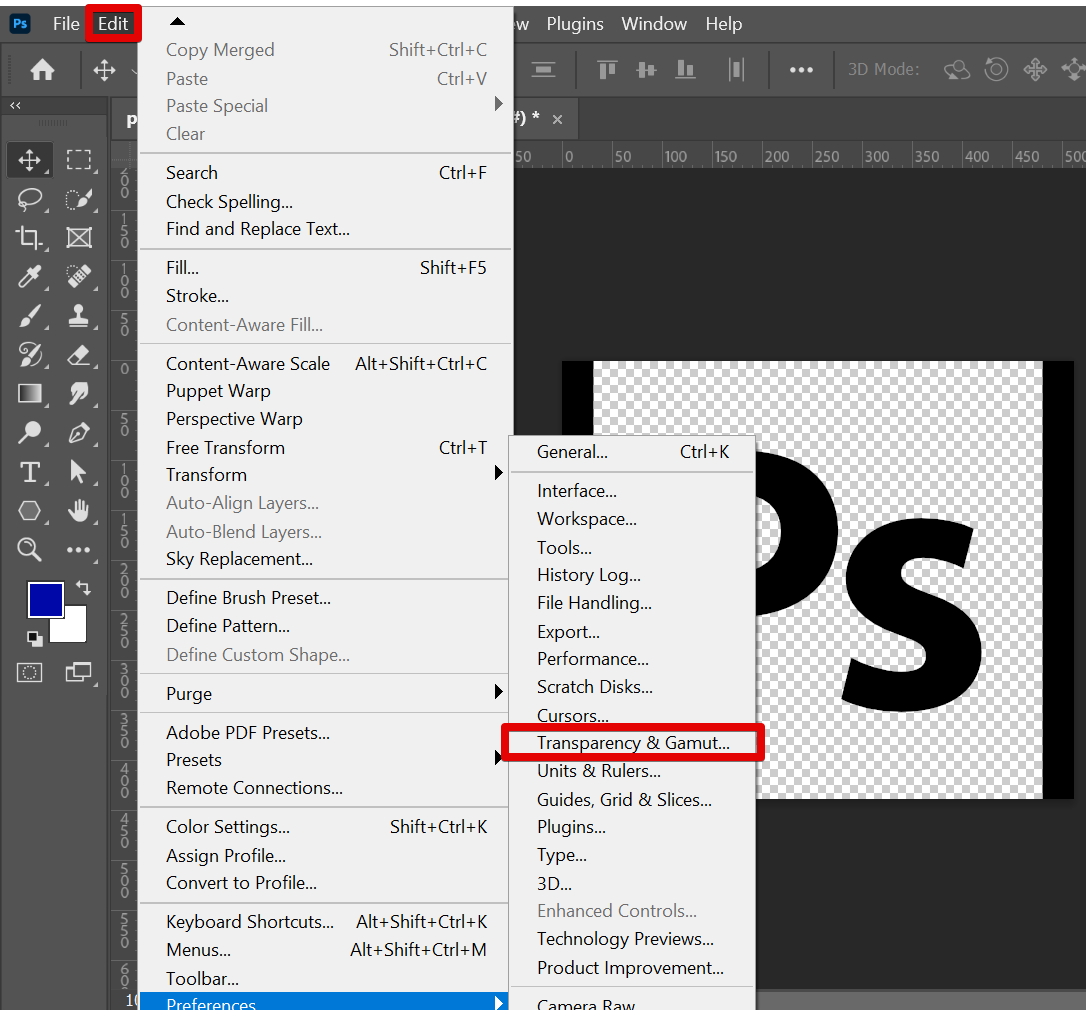
2. Click on the “Edit” menu at the top of the screen and go to Preferences > Transparency & Gamut.
3. Go to the Transparency Settings section, and you will see that the Grid Size is set to the default which is “Medium“. This creates the checkered background of your image.

4. Change the Grid Size to “None” then click on the “Ok” button to save your changes.
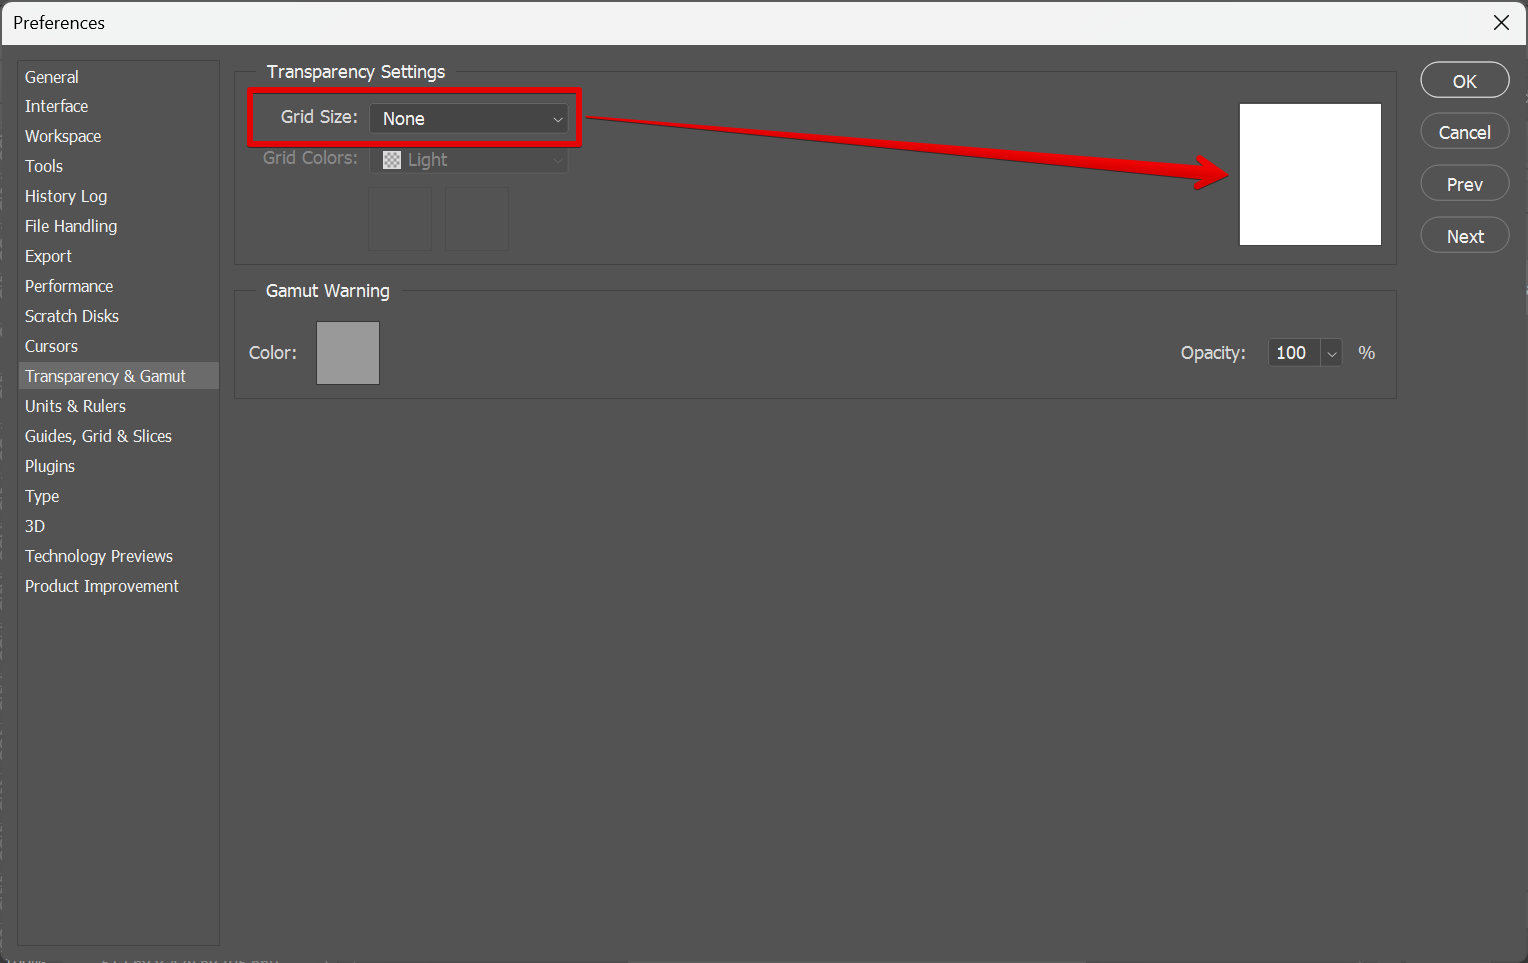
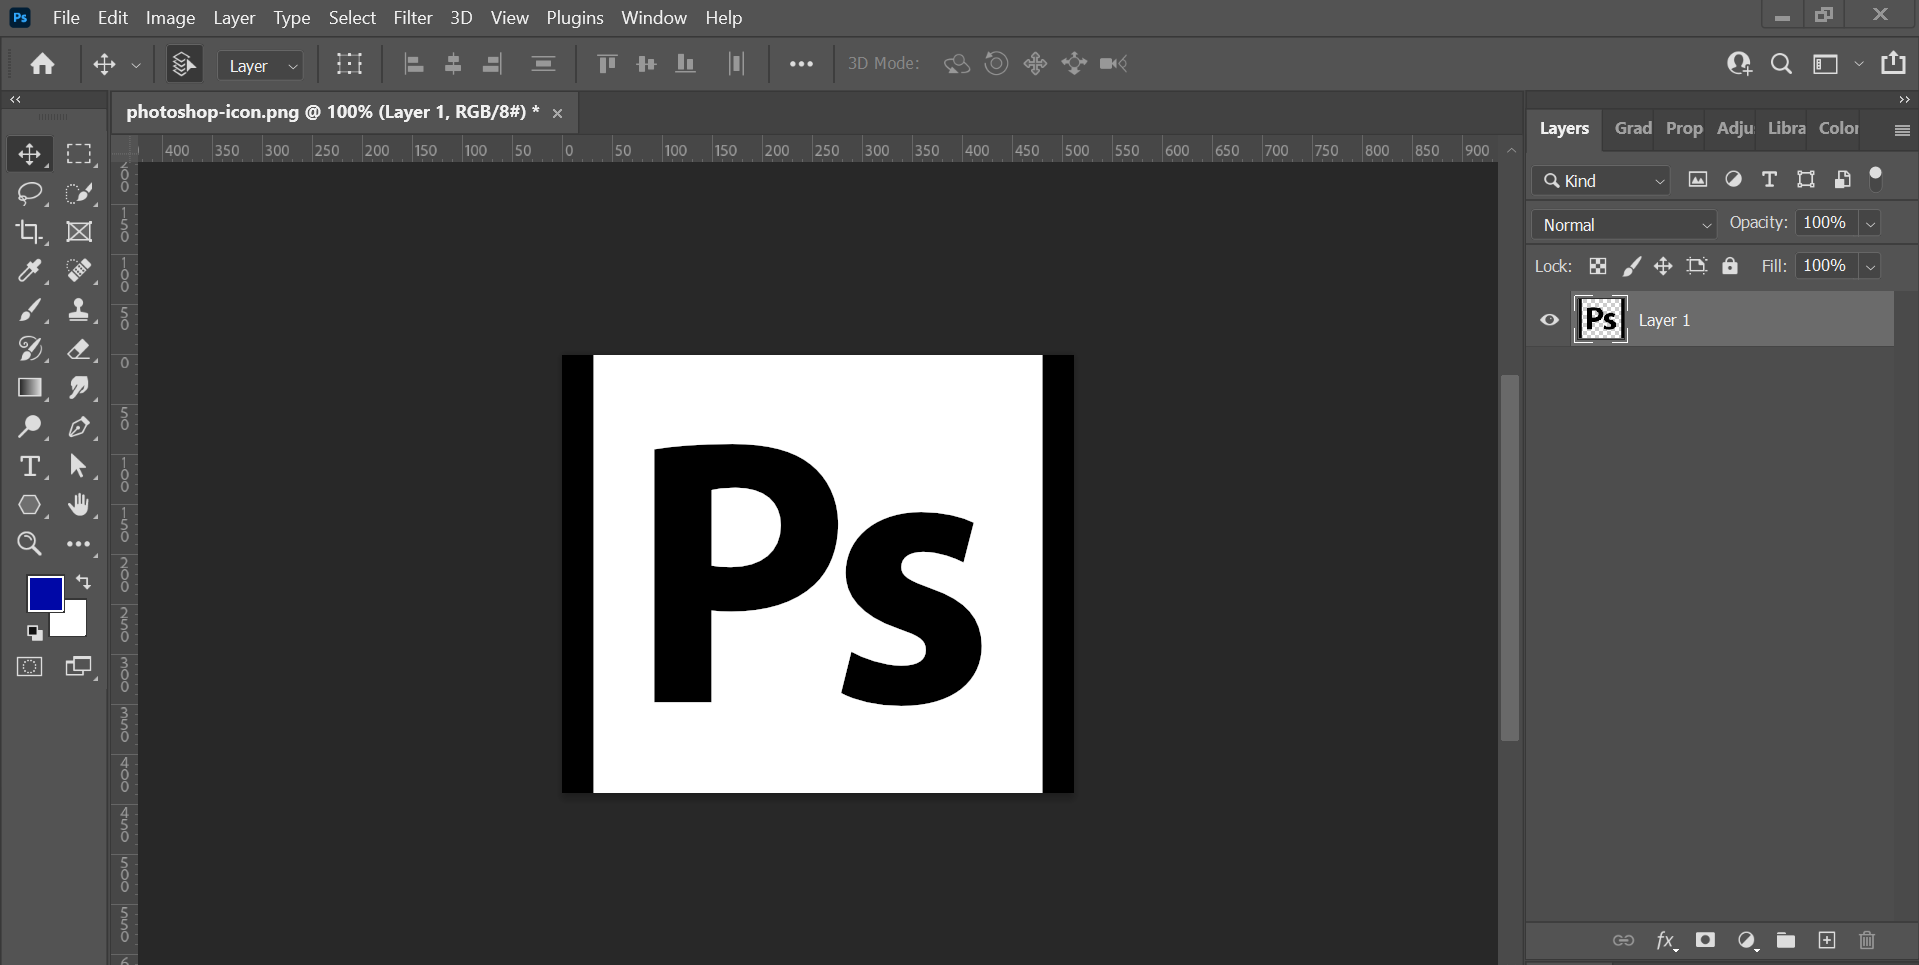
The checkered background should now be gone and you should see a white background.
PRO TIP: Checkered backgrounds in Photoshop can be removed by going to the Transparency Preferences window. Here, you can change the Transparency Settings and set the Grid Size to “None”. Your checkered background should now be replaced by a white background. Be sure to use it carefully!
Conclusion:
The checkered background indicates transparency in an image. You can remove it by simply changing your Transparency Settings in the Preferences menu in Photoshop.
To do this, open your image and go to Edit > Preferences > Transparency & Gamut. Change the Grid Size to None and the checkered background will be gone and replaced with a white one.
9 Related Question Answers Found
The checkered background in Photoshop is called the transparency grid, and it’s there to help you see which areas of your image are transparent. If you want to get rid of the checkered background, you can do so by changing the background color in the Preferences dialog box. To change the background color, go to Edit > Preferences > Interface.
If you are a web designer, you have probably noticed the ugly grey checkered background that sometimes appears in Photoshop. This is caused by the ‘ transparency grid ‘ option in Photoshop’s preferences. The transparency grid is a feature that is designed to help you see transparent areas of an image more easily.
There are a few ways to remove the background of an image in Photoshop. One way is to use the Quick Selection Tool. With the Quick Selection Tool active, click and drag over the area of the image you want to keep.
There are a few different ways that you can remove the background from an image in Photoshop. One way is to use the magic wand tool. With this tool, you can click on the background area of an image and it will automatically select it for you.
If you have a picture that has a lot of patterns in it, and you want to remove some of them, there are a few things that you can do. One is to use the clone stamp tool. With this tool, you can select an area of the image that doesn’t have any patterns in it, and then clone it over the top of the areas that do have patterns.
If you’re wondering how to remove eraser marks in Photoshop, there are a few different ways you can do it. One way is to use the clone stamp tool. With the clone stamp tool, you can select an area of the image that doesn’t have any eraser marks and use it to cover up the eraser marks.
There are many ways to remove blemishes in Photoshop, but the most common and effective way is to use the Healing Brush tool. First, create a new layer in your Photoshop document. Then, select the Healing Brush tool from the Toolbox.
There are two excellent options in Photoshop if you need to eliminate an entire color. Working with color can be quicker than the process of making a complex selection around your subject. A precise selection that completely removes a chosen color range can be made only with a few clicks.
Assuming you would like to remove the background of an image in Adobe Photoshop, there are a few ways to go about it. One option is to use the “Quick Selection Tool.”
With this tool, you can click and drag your mouse across the areas of the image you want to keep and Photoshop will automatically select them. Then, you can click the “Inverse” button at the top of the screen and delete the background.