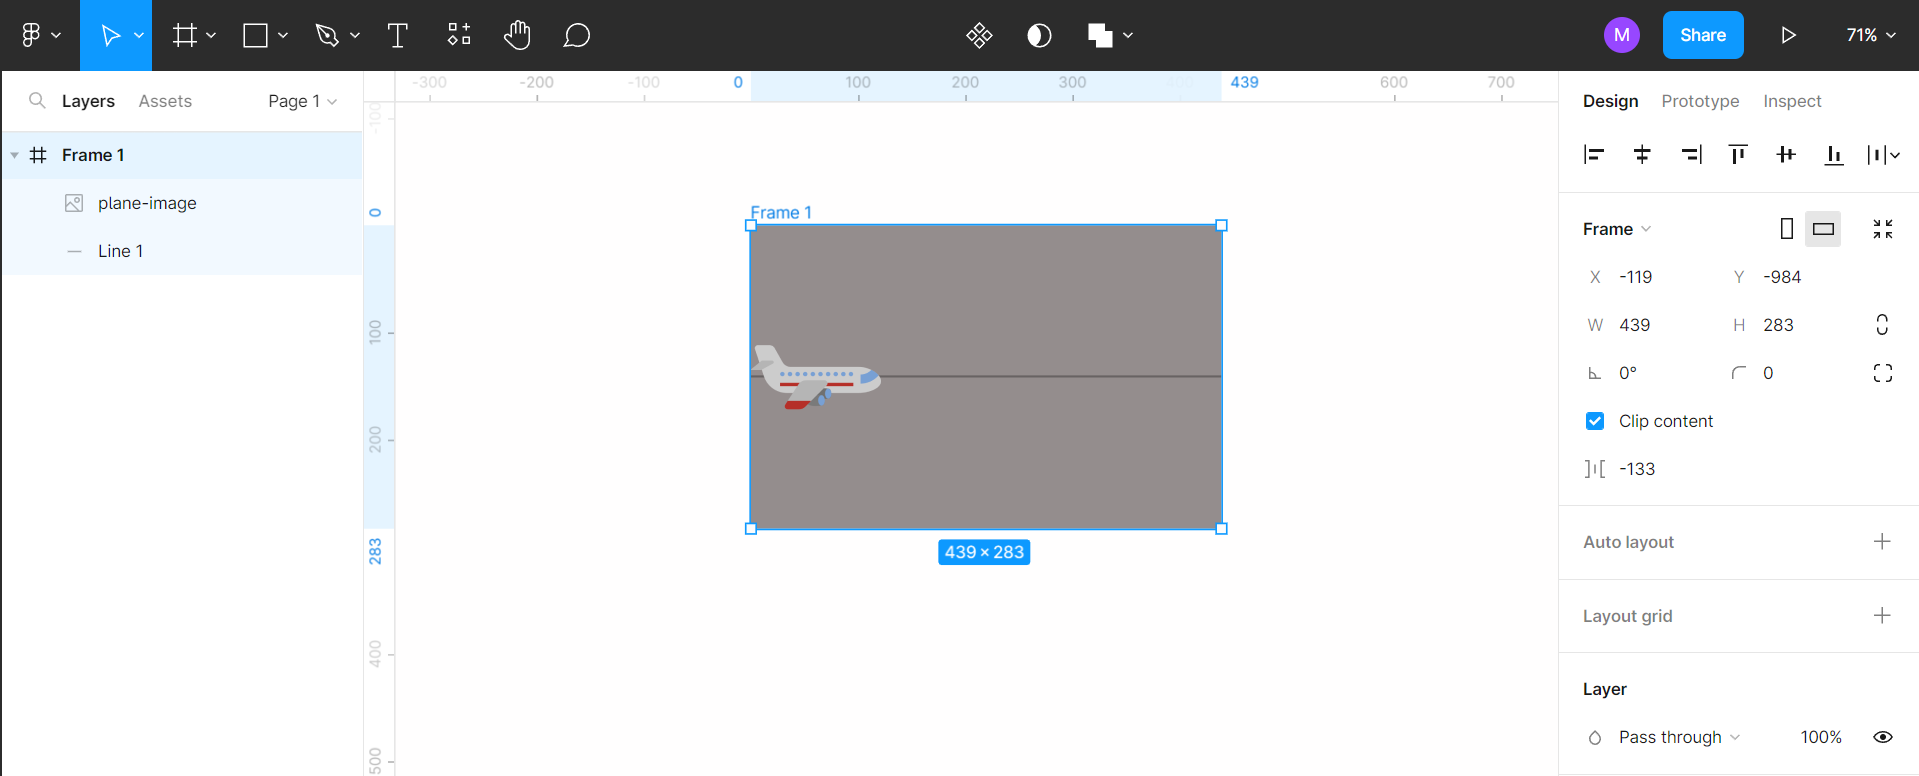
Figma is a great design tool for creating high-fidelity prototypes, but did you know that you can also save your prototypes as GIFs? This can be really useful for sharing your designs with others or for creating marketing materials. Here’s how to do it:
First, open your Figma prototype in the editor.
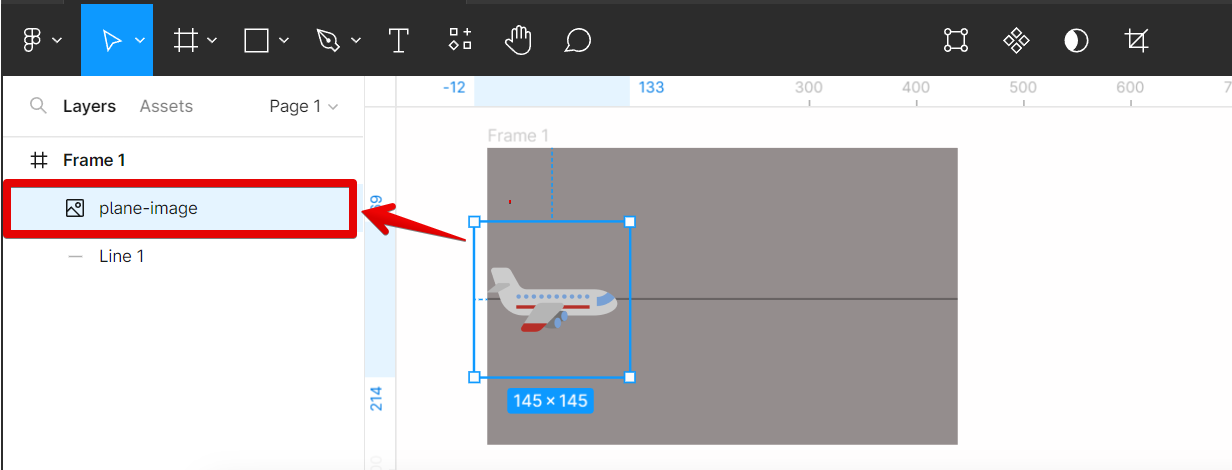
Then select the layer that you want to apply motion in the GIF that you will make.
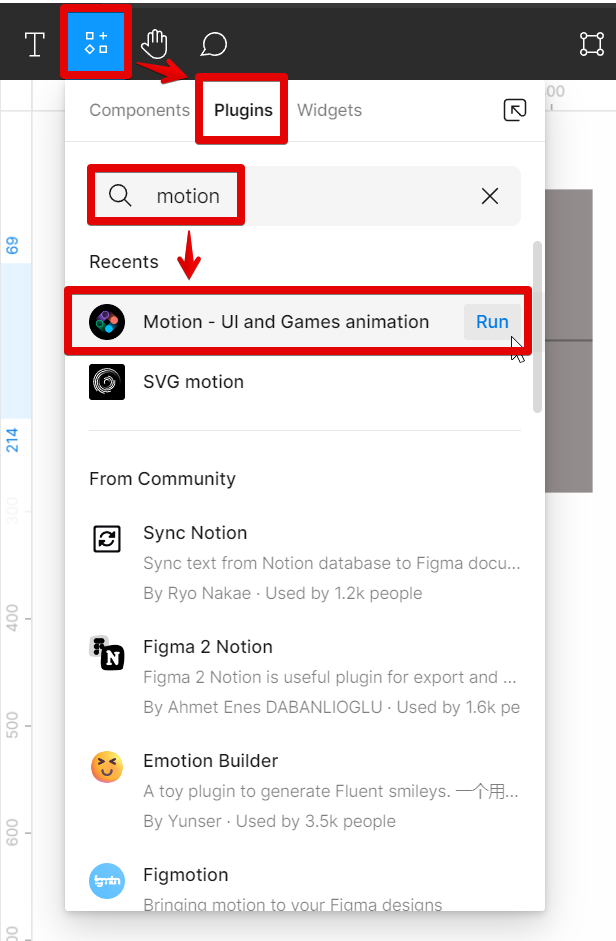
From there, go to the “Resources” tab at the top menu bar and search for the “Motion” plugin and run it.
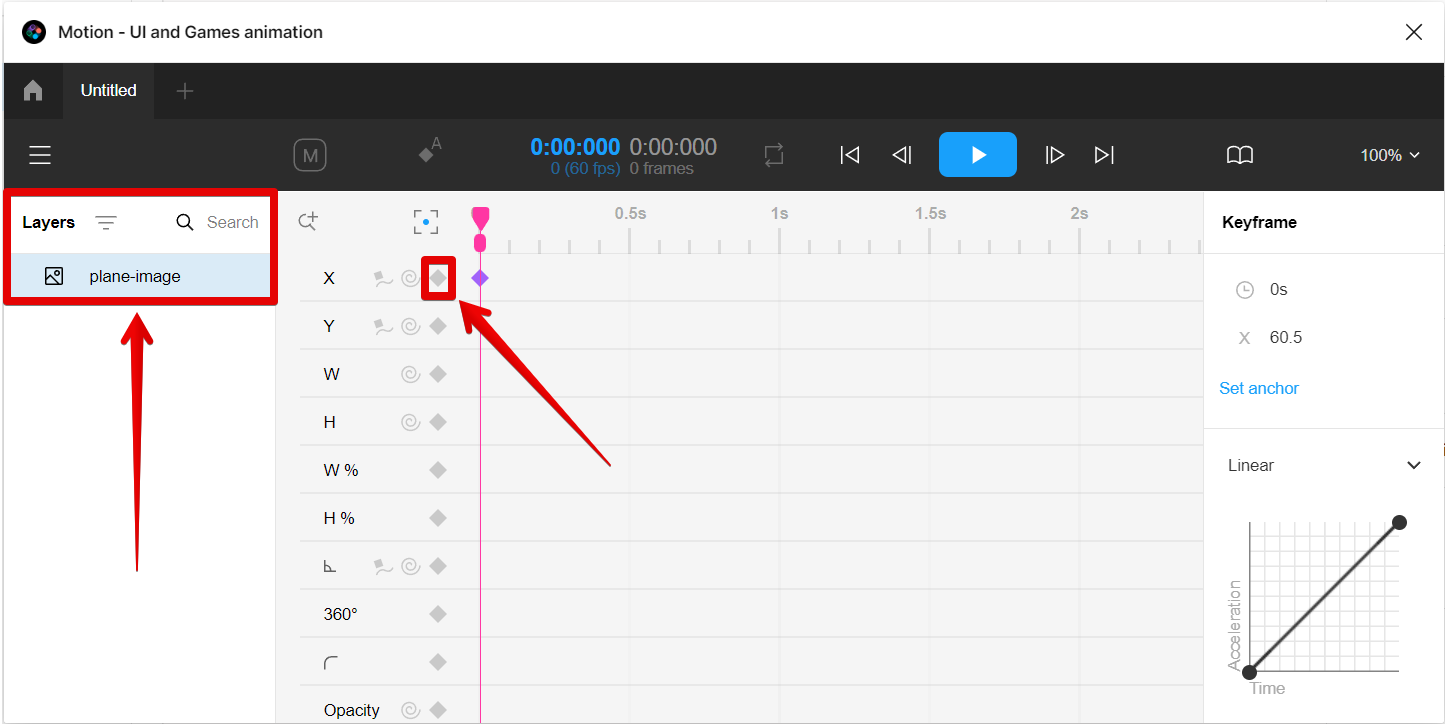
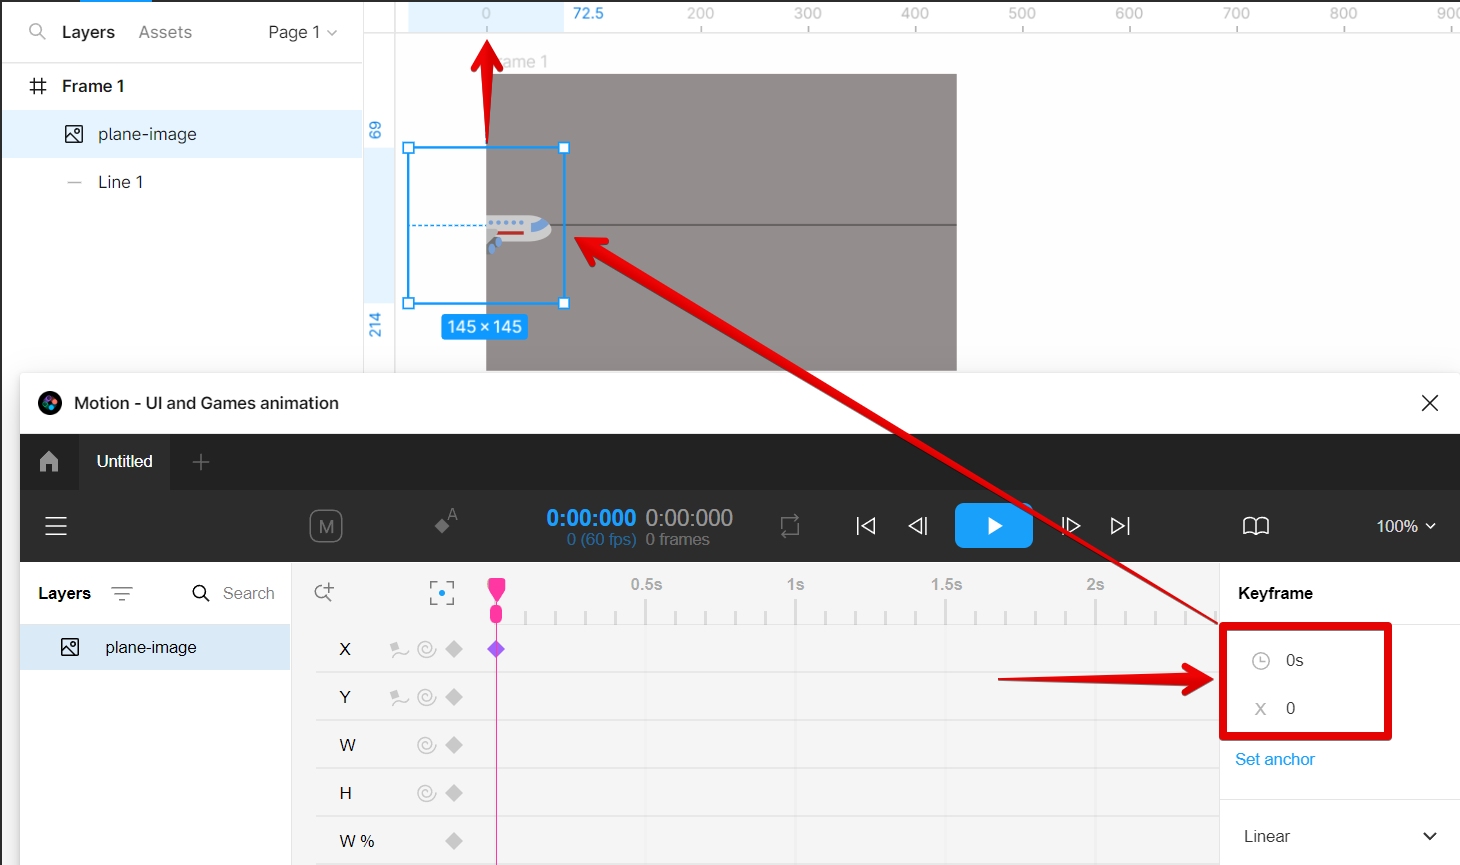
In the running Motion plugin, make sure that the layer you selected is reflected in the Layers section. Once done, add a keyframe by clicking on the diamond icon.
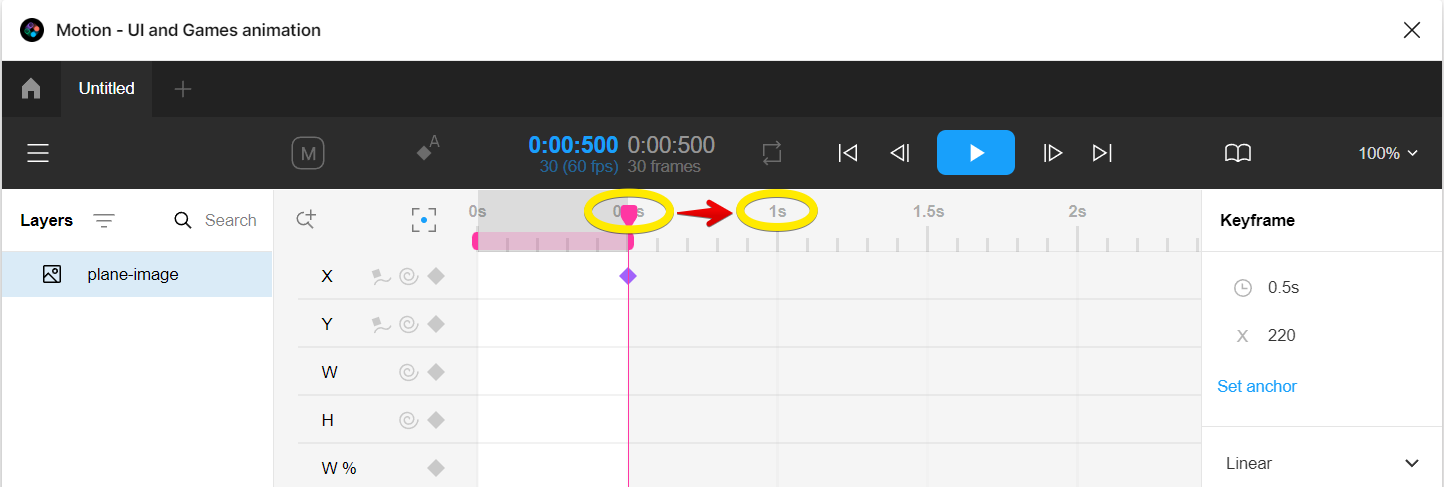
Then, go to the Keyframe section on the right to adjust the x-axis position of the layer at a specific time. In this case, the position would be at the “o” x-axis. Once done, press “Enter” on your keyboard, and you can see a preview of its effect on your layer’s position in the canvas.
NOTE: This will depend on the current position of your layer in your Figma canvas and the way you want your layer to move. You can use the ruler guides available in Figma surrounding your canvas. Adjust accordingly.
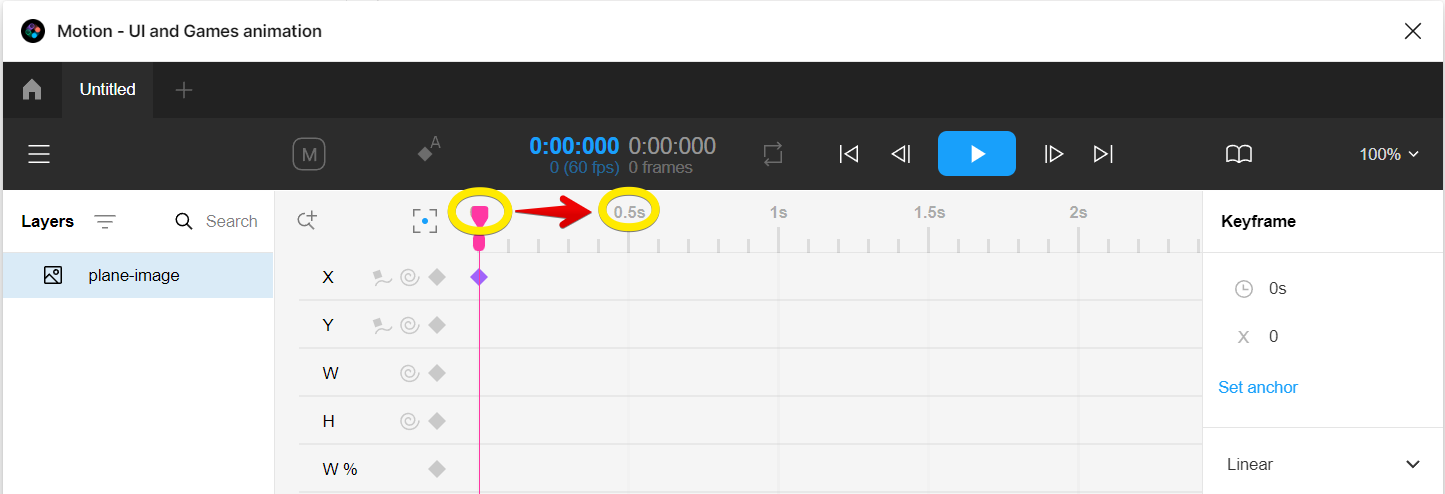
Next is to drag on the pink handle to its next position.
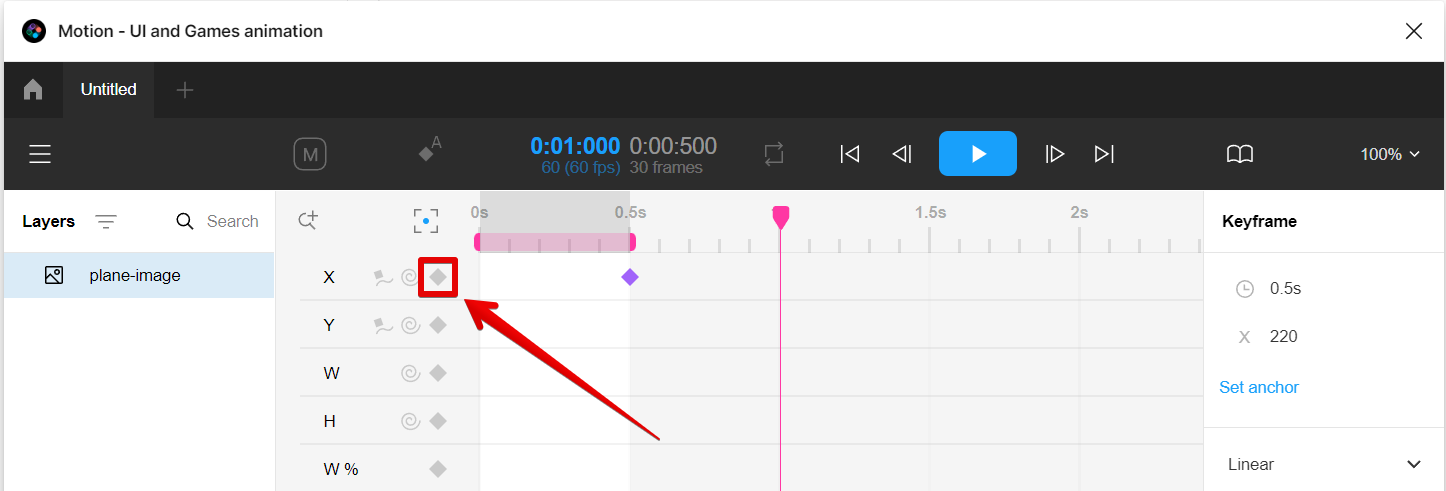
Then, click on the diamond icon to add the second keyframe and go to the Keyframe section to adjust the position.
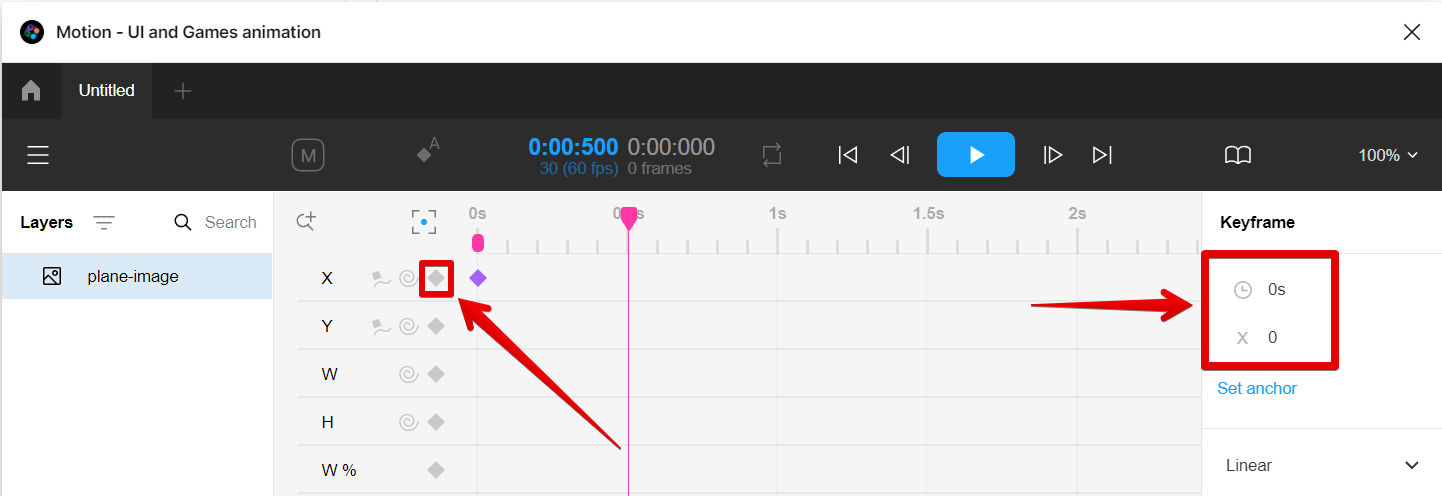
Once you have adjusted the position, press the “Enter” key and check its effect on your canvas.
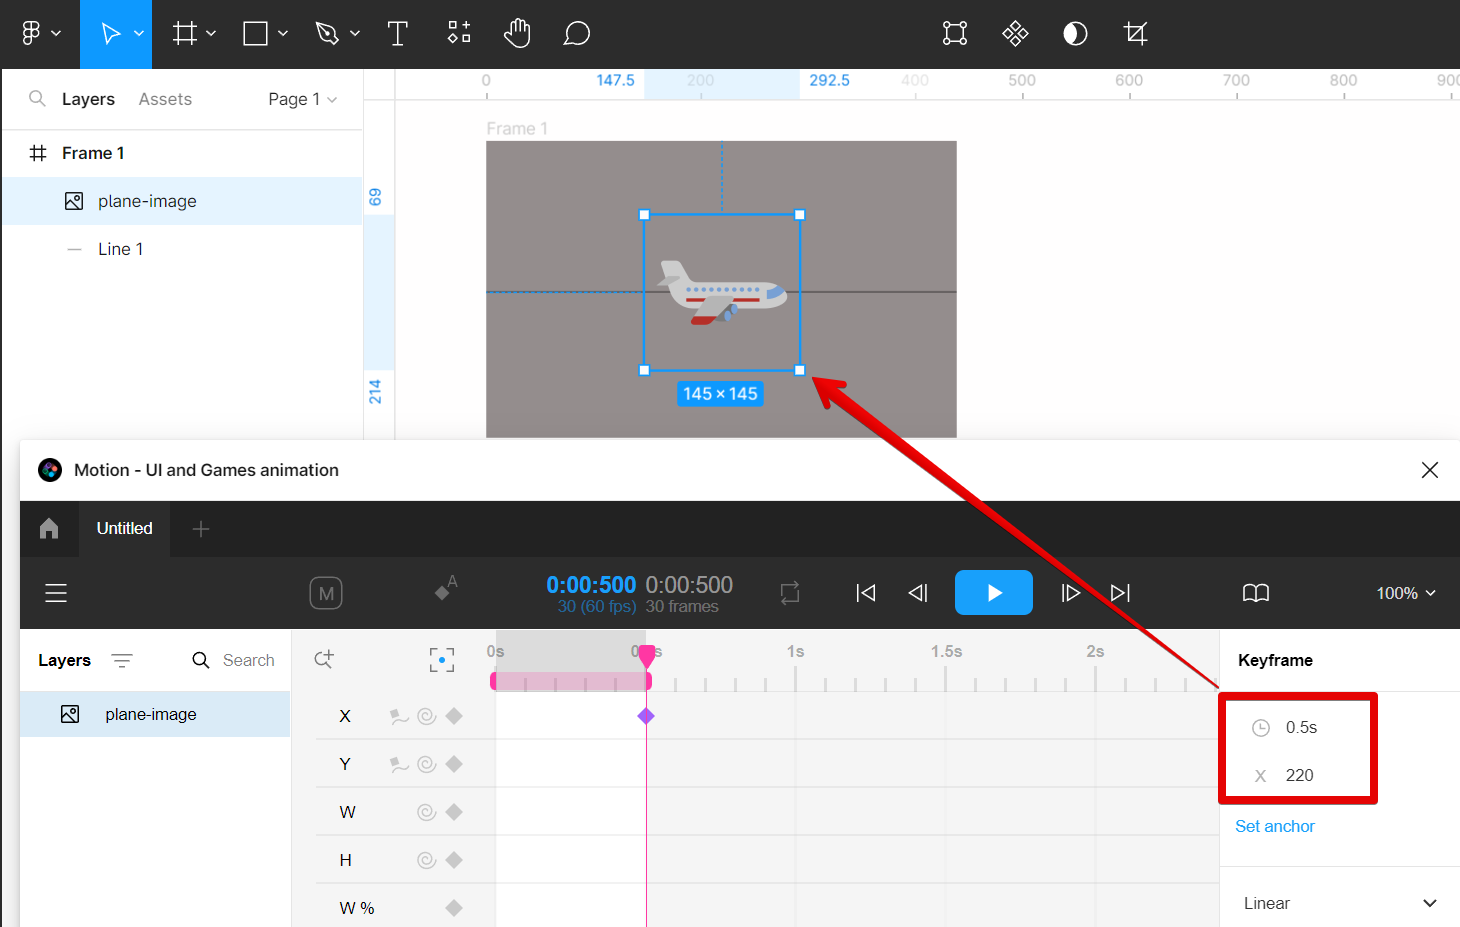
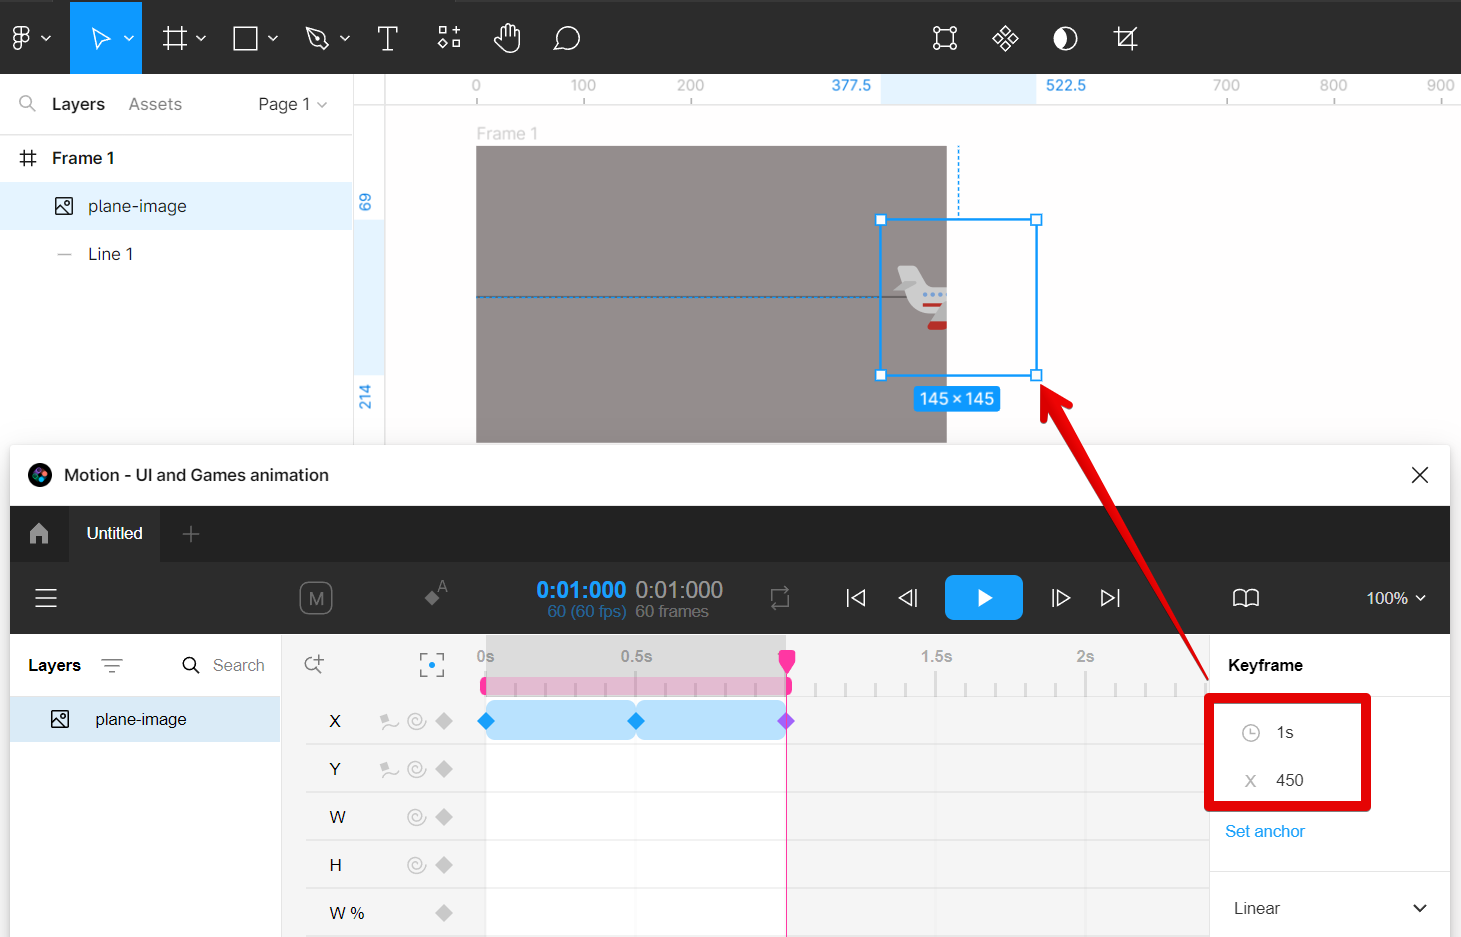
From there, drag the pink handle to its third position on the timeline.
Then, click on the diamond icon to add your third keyframe.
Adjust the position of your layer for the third keyframe and see the preview on your canvas.
PRO TIP: If you are planning to save a Figma prototype as a GIF, please be aware that there are some potential issues that could occur. First and foremost, please be aware that GIFs have a limited color palette, so your prototype may not look exactly as you intended. Additionally, GIFs can also be quite large in file size, so please make sure that you have enough storage space before exporting your prototype. Finally, please note that Figma currently only supports exporting prototypes as GIFs on the desktop app; the web app does not currently have this feature.
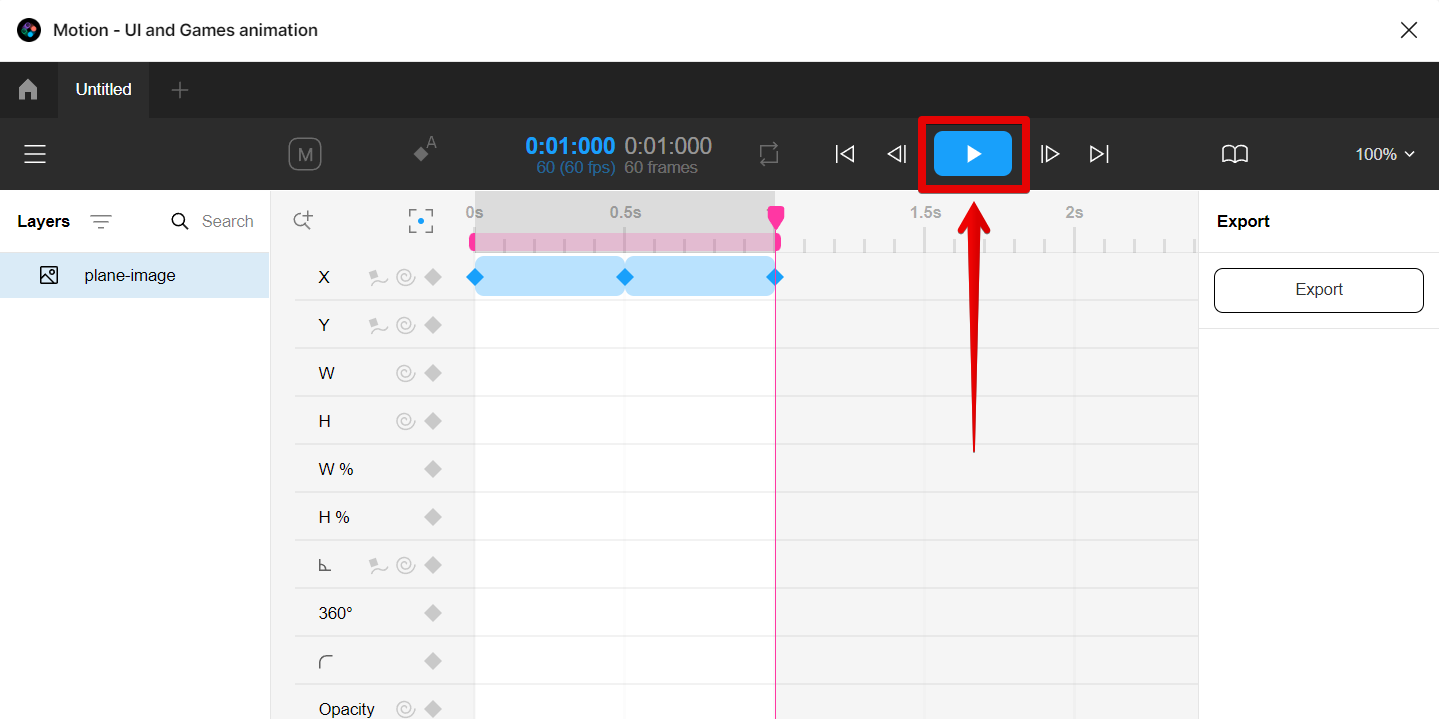
Once done, check the preview of your design by clicking on the play button in the top menu.
NOTE: Higher frame rates will also result in larger file sizes, so it’s a good idea to experiment with different settings to find the perfect balance for your needs.
Once you’re satisfied with your design, you can now export this as a GIF file. To do this, in the Motion plugin, go to Main menu > File > Export.
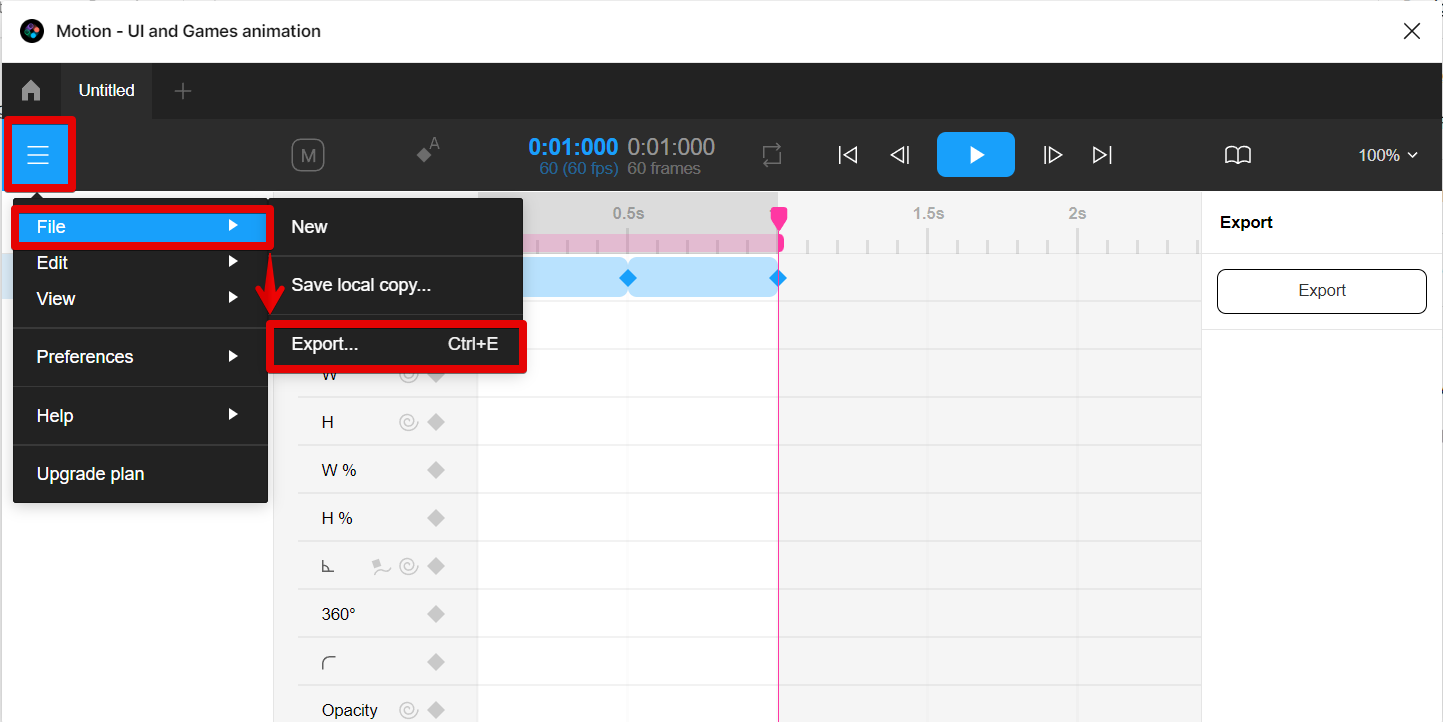
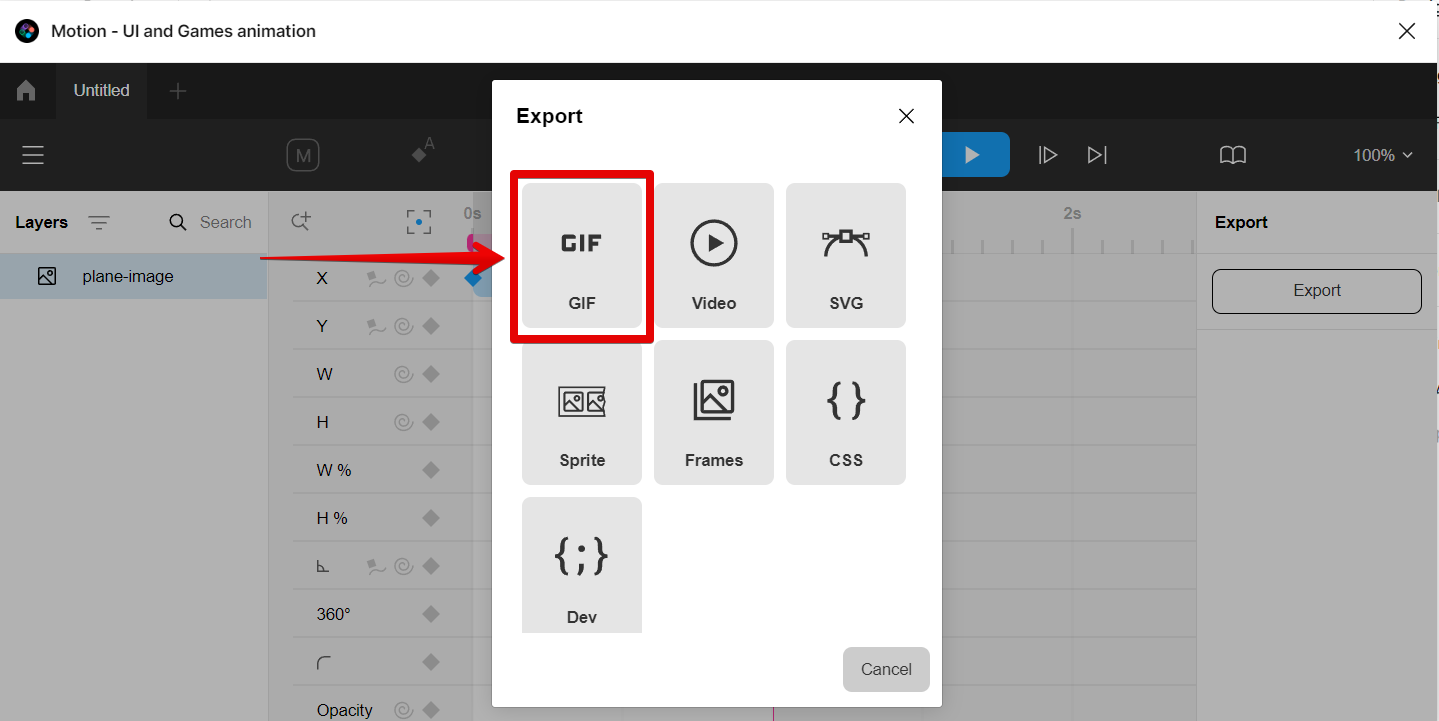
Then select the GIF file type from the options.
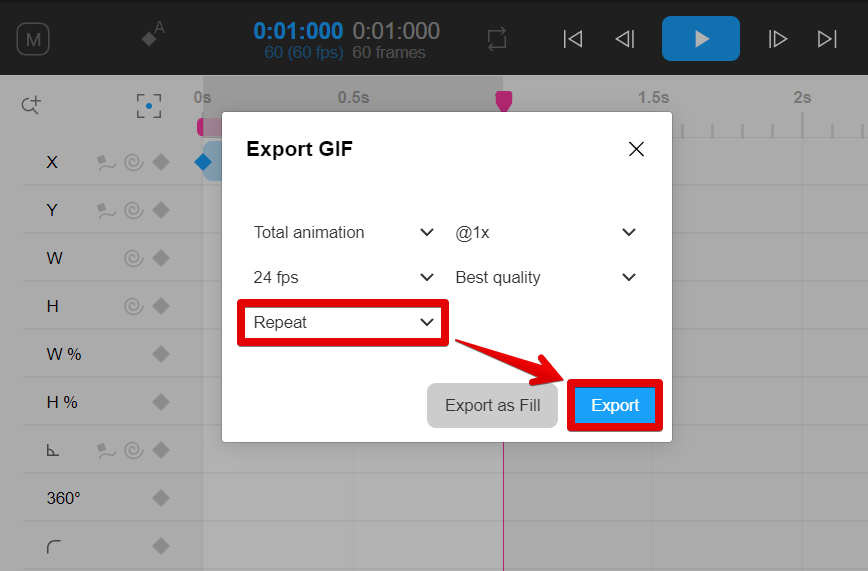
Finally, select the “Repeat” option so that the motion applied will repeat by itself in the GIF, then click on the “Export” button.
So there you have it! Now you know how to save your Figma prototypes as GIFs. Give it a try and see how it can help you in your workflows.
7 Related Question Answers Found
Figma is a great tool for designing user interfaces, and one of the things that makes it so powerful is its ability to animate interface elements. One of the most common ways to animate in Figma is to create a frame-by-frame animation, also known as an animated GIF. To create a frame-by-frame animation in Figma:
1.
Figma is a vector drawing program that allows you to create designs that can be scaled up or down without losing quality. One of the great things about Figma is that you can export your designs as GIFs, which can be used on websites or in email signatures. To save a Figma file as a GIF, first open the file in Figma.
There are a few different ways that you can save a prototype as a GIF in Figma. One way is to use the ‘Export as GIF’ function in the File menu. This will allow you to export your prototype as a GIF file, which you can then save to your computer.
The question of whether you can export a Figma prototype as a GIF has been asked by many people. The answer is yes, but there are some things to keep in mind when doing so. First and foremost, when you export a Figma prototype as a GIF, the quality will not be as high as it would be if you exported it as a video.
GIFs are a great way to add some fun and personality to your website or blog, and they’re easy to make with Figma. Here’s how:
1. Choose the frame you want to use for your GIF.
There are a few ways to save a GIF from a Figma prototype. The first way is to simply take a screenshot of the prototype. To do this, open the prototype in Figma and then press the “Command + Shift + 4” keys on your keyboard.
GIFs are a popular way to add animation and interest to a website or document, but can you put a GIF in a Figma prototype? The answer is yes, but there are a few things to keep in mind. First, when you add a GIF to a Figma prototype, it will automatically start playing.