Anti-aliasing is a process of removing jaggedness from the edges of objects in digital images. Jaggedness is caused by the pixels that make up an image not lining up perfectly horizontal, vertical, or diagonal lines.
When you zoom in on an image, you can see these jagged lines, especially on the edges of objects. Anti-aliasing smooths out these jagged lines by filling in the gaps between pixels with intermediate colors.
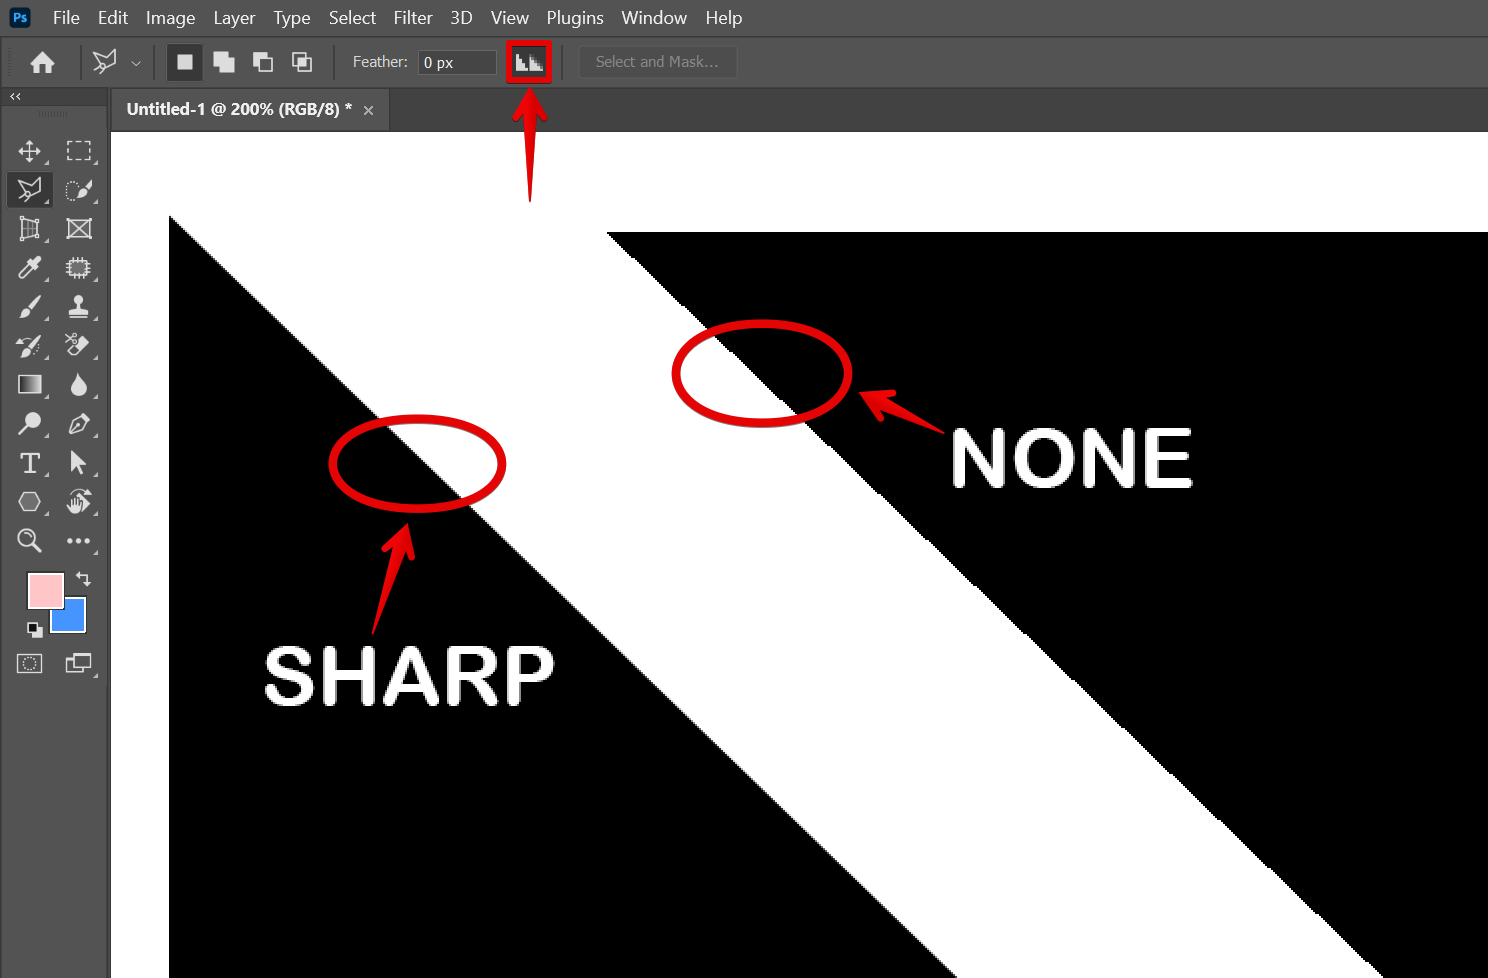
In Photoshop, there are two anti-aliasing options: “None” and “Sharp”. “None” turns off anti-aliasing completely, while “Sharp” leaves it turned on. Here, you can see two examples where the anti-aliasing options were applied.
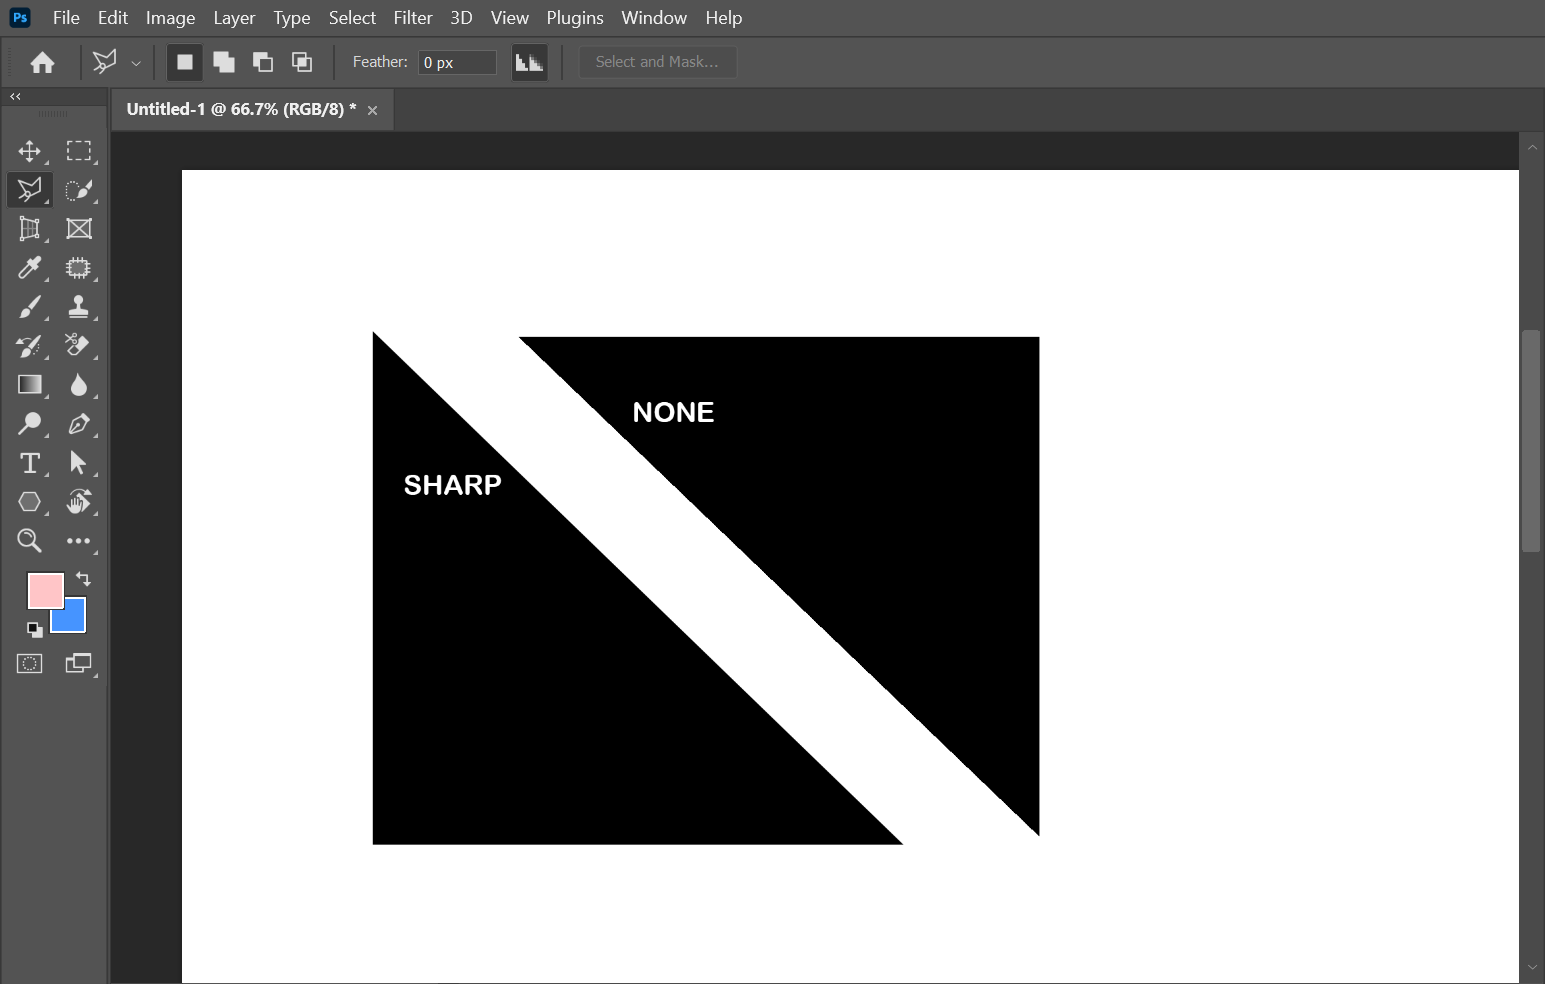
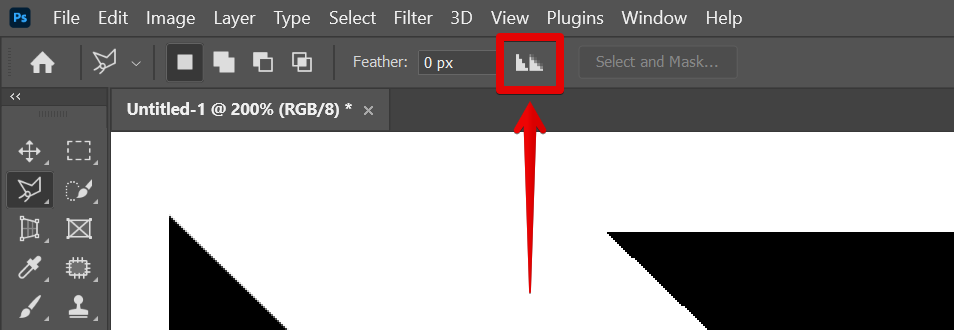
If you’re having trouble seeing the difference between the two, try zooming in on an image (pressing CTRL + or Command + on a Mac). You can see the Anti-Alias button at the top menu. Simply click on this to turn it on and off. With “None” selected, the lines will appear jagged; with “Sharp” selected, they’ll appear smooth.
PRO TIP: If you are not familiar with Photoshop or graphic design, it is best not to attempt to change the anti-aliasing settings. Anti-aliasing is a technical term that refers to the process of smoothing out the edges of images when they are displayed on a screen. It is a complex setting that can have a big impact on the overall look of an image, and it is best left to those who are familiar with its use.
So, if you want to turn off anti-aliasing completely, click on the Anti-Alias button to turn it off. This will disable the feature altogether, leaving your lines and edges nice and sharp.
If you want to leave it turned on, simply check if the Anti-Alias button has a black background indicating that it is currently turned on.

9 Related Question Answers Found
There are a few different ways that you can distort part of an image in Photoshop. One way is to use the Liquify filter. To do this, go to Filter > Liquify.
When it comes to dealing with dust in Photoshop, there are a few different ways that you can go about it. One way is to simply use the Clone Stamp tool to clone over the dust spots. Another way is to use the Healing Brush tool, which will actually blend in the pixels around the dust spot so that it’s not as noticeable.
There are a few ways to remove objects from photos in Photoshop. One way is to use the Selection tool and click and drag the object you want to remove off of the photo. Another way is to use the Eraser tool and click and drag the object you want to remove off of the photo.
When you take a photo, your camera records a range of information about the image, such as the date and time it was taken, the exposure settings, and the GPS location. This data is known as EXIF data, and it can be really useful when you’re trying to organize your photos. However, there are also some privacy concerns surrounding EXIF data.
There are many ways to distort an area in Photoshop. One way is to use the Liquify filter. To do this, go to Filter > Liquify.
In Photoshop, you can erase part of an image using the Eraser tool. With the Eraser tool, you can choose from a variety of brush sizes and shapes, and you can also adjust the opacity and flow of the brush. To use the Eraser tool:
Select the Eraser tool from the Tools palette.
There are a few ways to mask part of an image in Photoshop. One way is to use the pen tool to draw a path around the area you want to keep, and then use the stroke command with a white brush to make the selection visible. Another way is to use the Quick Mask mode.
In Photoshop, the eraser tool is used to delete a selected area. First, make a selection using one of the selection tools. Then, click and hold on the Eraser tool in the toolbox.
If you have a smart object in your Photoshop project that you want to remove, there are a few ways to do it. One way is to simply select the layer that contains the smart object and press the delete key. This will remove the layer from your project.