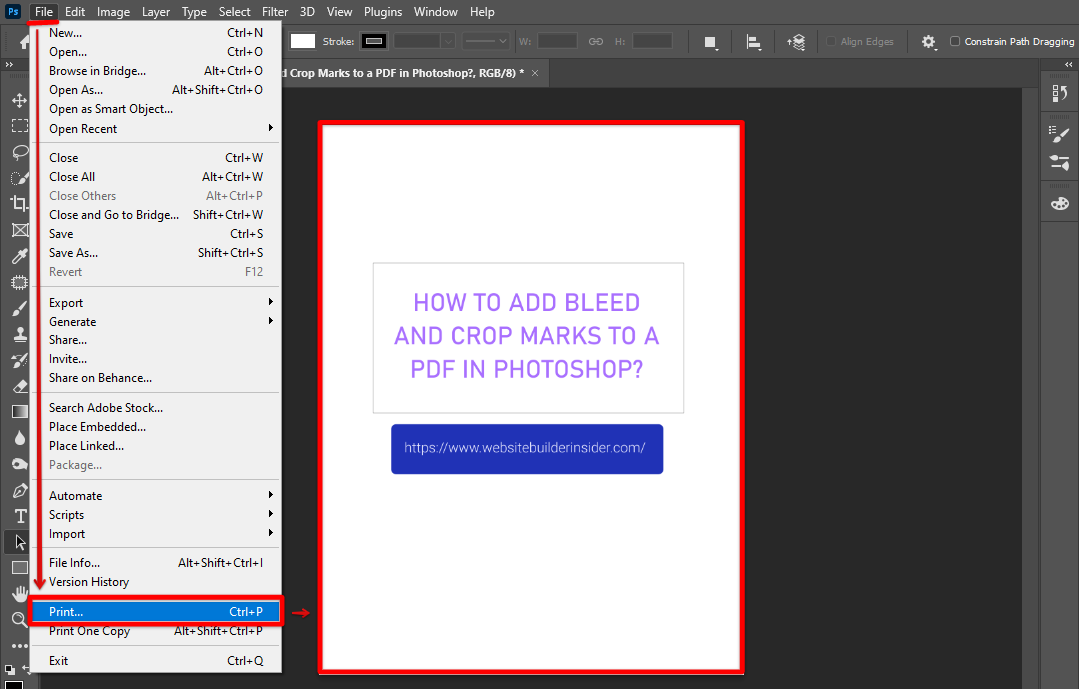
Adding bleed and crop marks to a PDF in Photoshop is a simple process that can be completed in a few steps. First, open the PDF file in Photoshop. Next, go to the File menu and select Print.
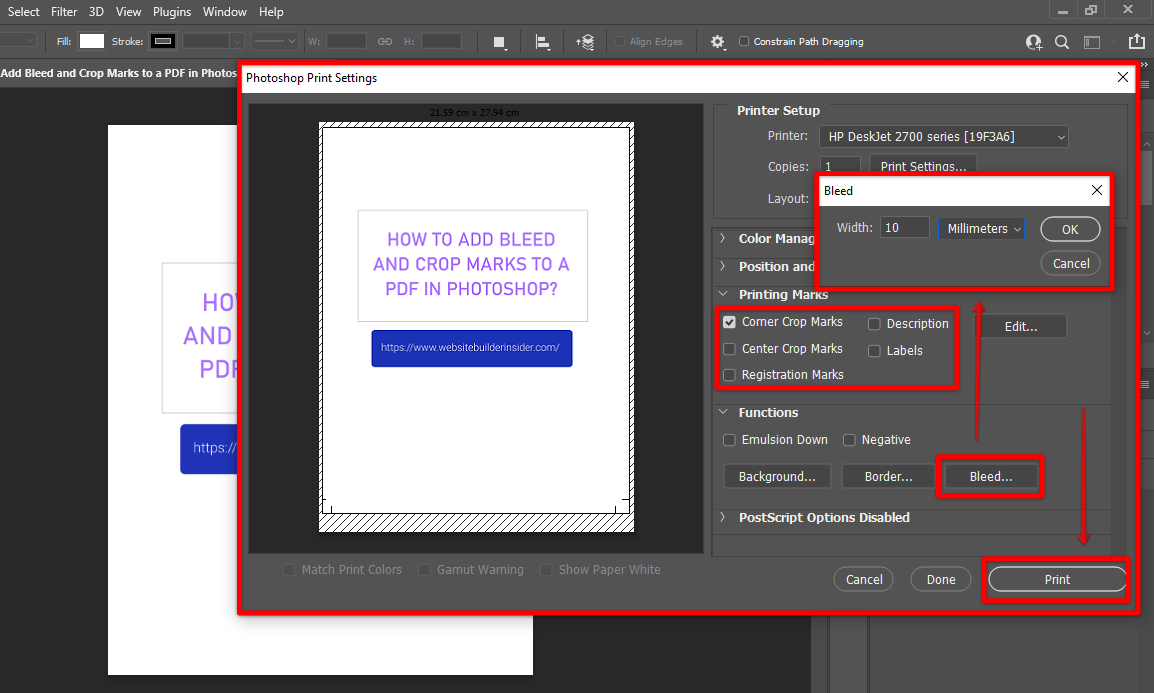
In the Print dialog box, select the Bleed and Crop Marks option from the list of available choices. Finally, click Print to output the file with the added bleed and crop marks.
Adding bleed and crop marks to a PDF in Photoshop is a simple process that can be completed in just a few steps:
PRO TIP: Adding bleed and crop marks to a PDF in Photoshop can be tricky. If you’re not careful, you may end up with a file that is too large or too small for your intended use.
1. Open the PDF file in Photoshop.
2. Go to the File menu and select Print.
3. In the Print dialog box, select Bleed and Crop Marks from the list of available choices.
4. Click Print to output the file with the added bleed and crop marks.
Adding bleed and crop marks to your PDF files in Photoshop is a great way to ensure that your printouts are accurate and professional looking. By following these simple steps, you can easily add these important elements to your PDFs in just a few minutes.
9 Related Question Answers Found
Adding bleed and crop marks in Photoshop is a pretty simple process, but there are a few things to keep in mind. First, you’ll need to make sure your document is set up correctly. Bleed and crop marks need to be added to documents that are being printed, so the first step is to go to File > New and make sure the ‘Print’ option is selected.
When it comes to design, there are a few key things that you need to know in order to create professional looking designs. One of those things is how to add bleed and crop marks in Photoshop. For those that don’t know, bleed is the term used for when you want your design to go all the way to the edge of the page.
Adding crop marks in Photoshop is a relatively easy process, and there are a few different ways to do it. One way is to use the “Crop Marks” option in the “File” menu. This will bring up a dialog box with options for setting the size of the crop marks and the distance between them.
Crop marks, also known as trim marks, are those little lines that you see on the corners of a printed document. They show the printer where to cut the paper so that the final product is the correct size. You may have noticed them on business cards, flyers, or other documents that you have had printed.
If you’re a Photoshop user, you’re probably well aware of the Crop Tool. But what happens when the Crop Tool goes haywire? How do you fix it?
When working with images in Adobe Photoshop, you may find yourself in need of the Crop Tool. This tool allows you to select and remove portions of an image, giving you greater control over the final product. In order to use the Crop Tool, first make sure that it is selected in the Tools palette.
Adding bleed and trim to your Photoshop file is a simple process that can make a big difference in the overall look of your document. By adding bleed, you ensure that any background colors or images extend to the edge of the page, giving your document a polished look. Adding trim marks also helps to ensure that your document is printed correctly, and that any margins are correctly aligned.
If you’re anything like me, you’re constantly using the Crop Tool in Photoshop. Whether you’re cropping images for a web page or preparing photos for a print project, the Crop Tool is an essential part of the workflow. So, when it suddenly disappears, it can be quite frustrating.
If you’re a photographer, chances are you’re familiar with the process of cropping images. Cropping is a great way to improve the composition of an image, or to remove distractions from the background. But what if you want to crop an image in Photoshop without constraining the aspect ratio?