Gradient blur is a way to make an image look softer and dreamy. There is a straightforward way to do gradient blur in Figma, and you can adjust its effect on an image.
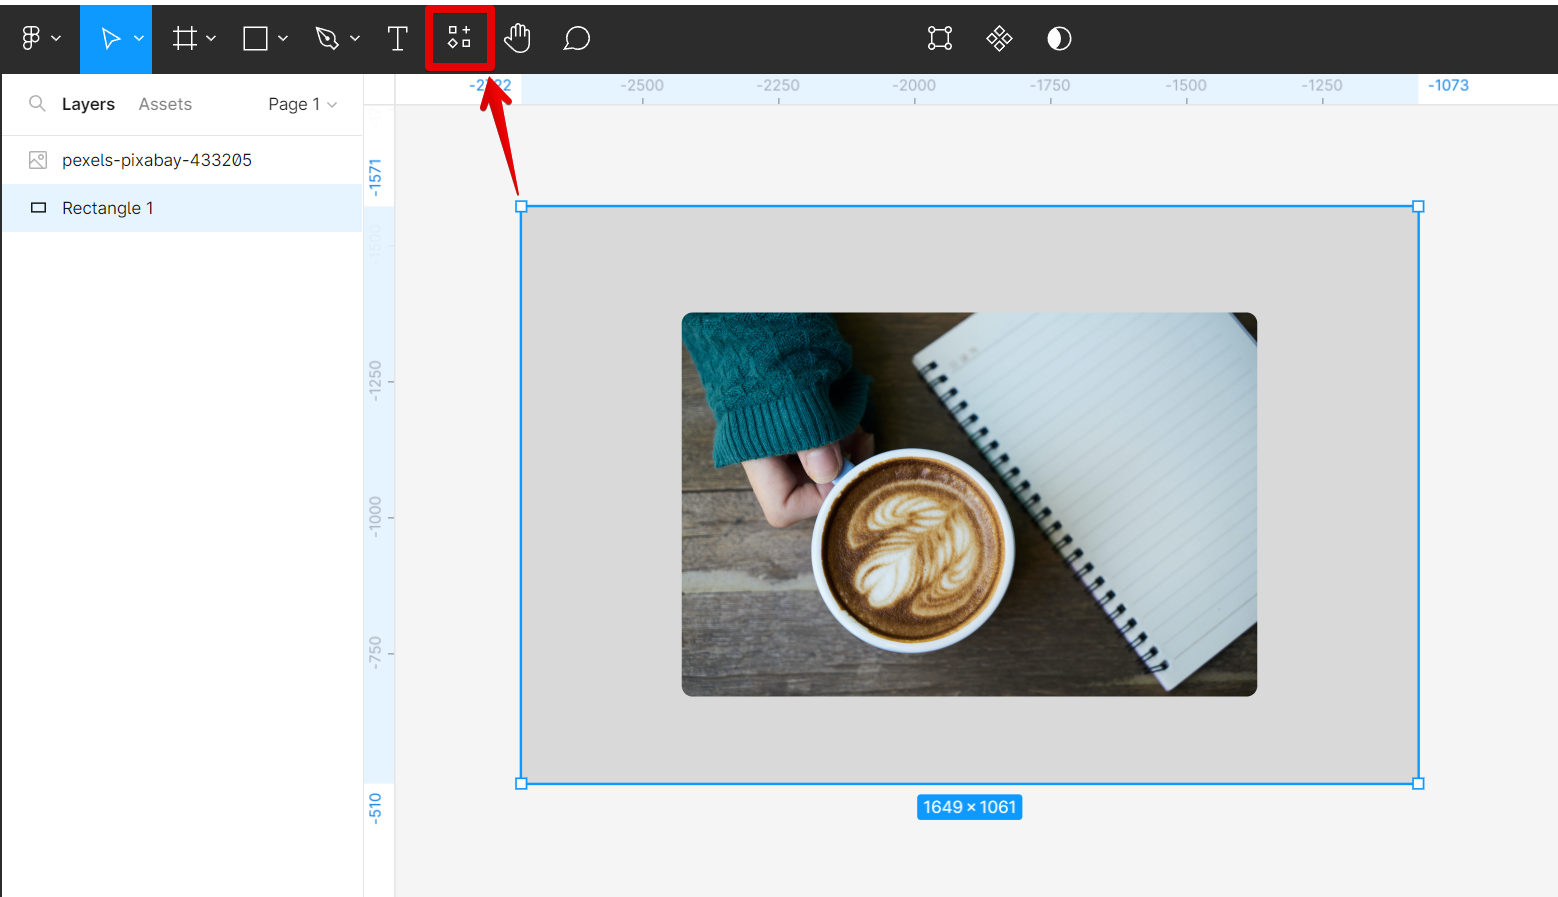
To create a gradient blur, first, select the layer you want to add a gradient blur. Then, go to the top menu and open the Resources tab.
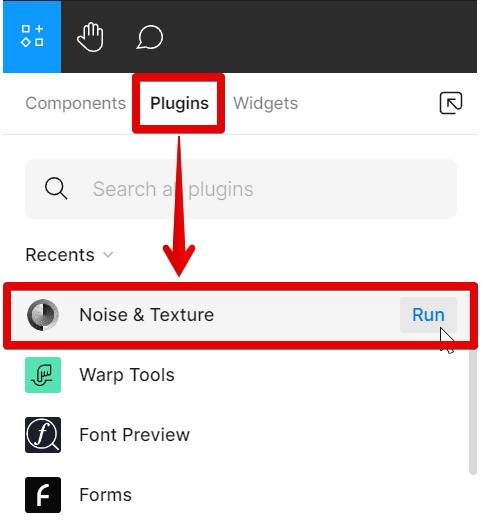
In the Resources menu, open the Plugins panel and run the Noise and Texture plugin.
NOTE: The Noise and Texture plugin dynamically generates seamless tiled noise, textures, patterns, gradients, and more.
Once the Noise and Texture plugin is already running, go to the Gradients tab.
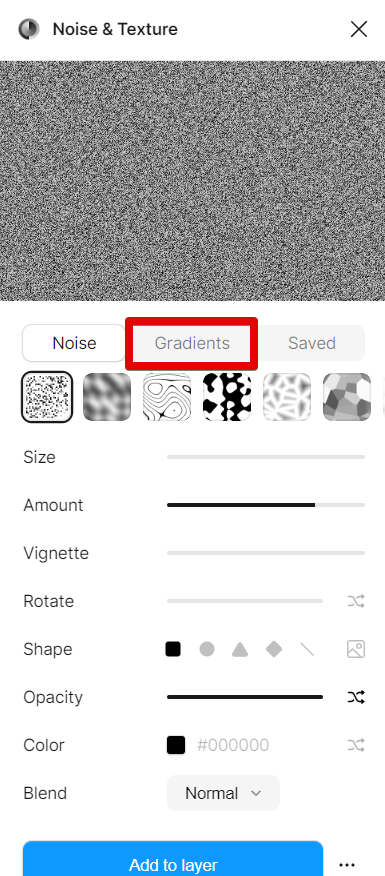
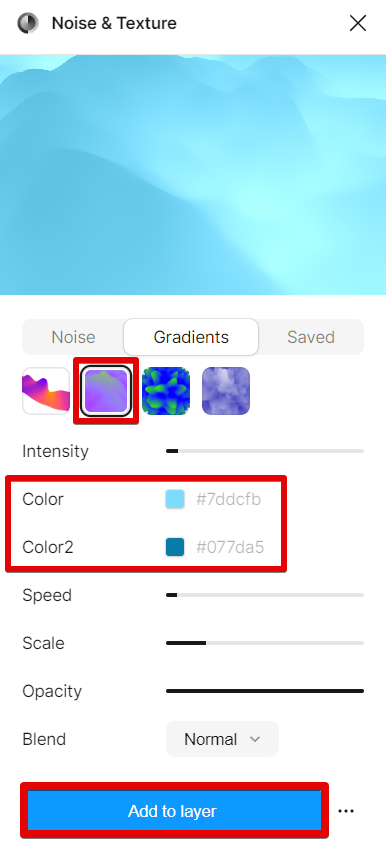
Here, you will find the Gradients Settings. There are four types of gradients in this plugin: Stripe, Rolling Plane, Spherical, and Mountains. You can choose what kind of gradient you want to use and the color combination reflected on it. You can also adjust the Intensity, Scale, Opacity, and Blend of the gradient you want to apply. Once done, click on the “Add to layer” button.
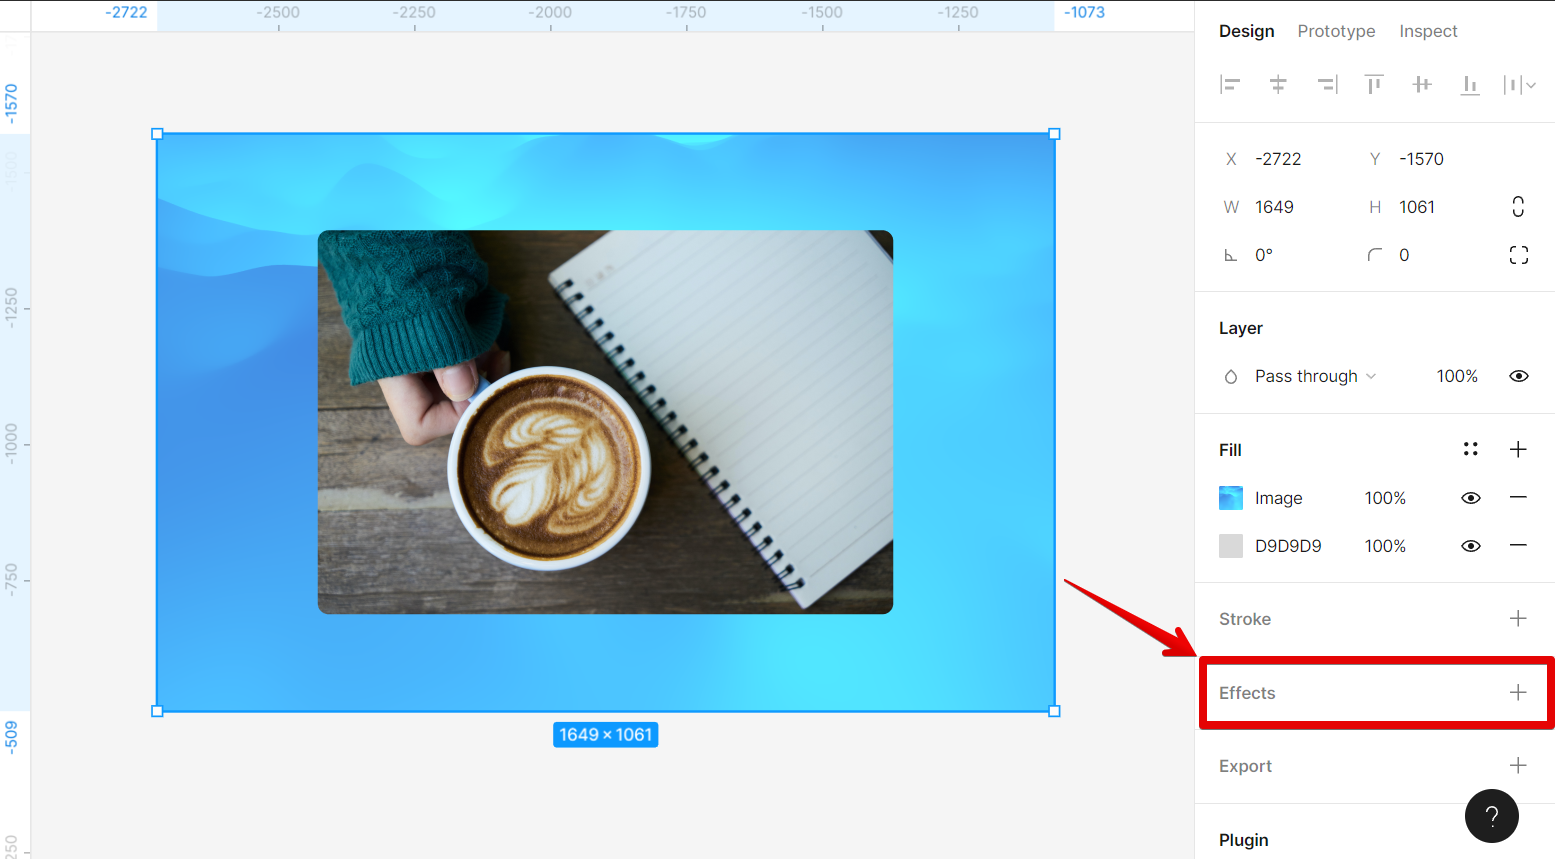
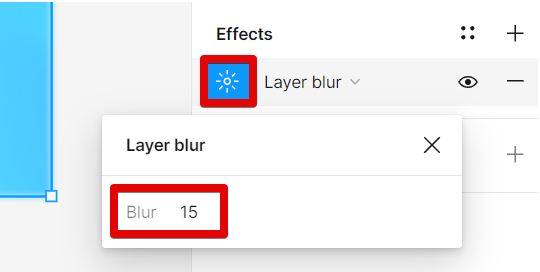
The color gradient should now be applied to your layer. To add a blur to this gradient, go to the Effects section under the Design tab and click on the “+” icon beside it to add an effect to your gradient layer.
From there, choose “Layer blur” from the list of Effects options and adjust the Blur settings. In the Blur settings, you can choose how much blur you want to add.
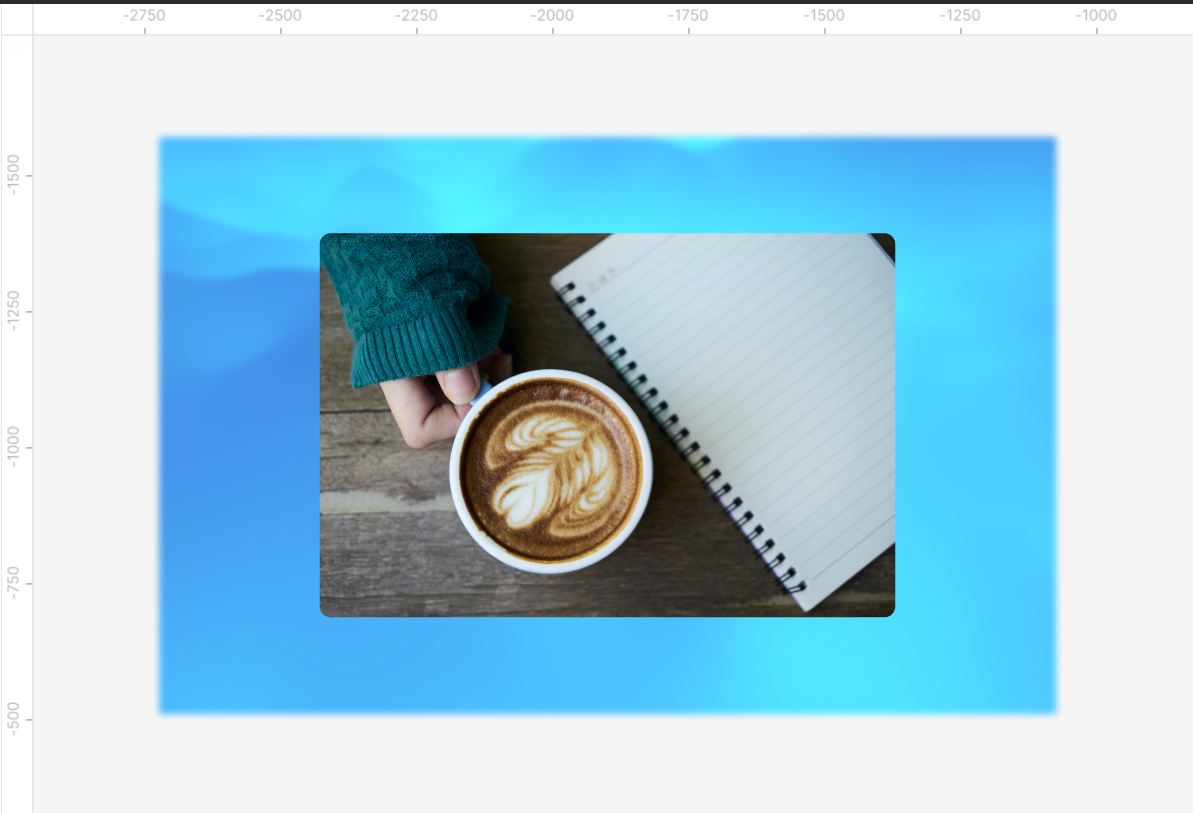
And that’s it! Your design should now have that dreamy look with the gradient blur!
10 Related Question Answers Found
Gradient blur is a popular effect in graphic design and can be achieved in Figma using the Blur tool. To create a gradient blur, select the Blur tool from the toolbar and then click and drag on the object you wish to blur. As you drag, the object will become increasingly blurred.
Adding a blur effect to an element in Figma is a quick and easy way to add some visual interest to your design. To add a blur effect:
Select the element you want to add the effect to.
In the Properties panel on the right, scroll down to the Effects section. Click on the + icon.
There are a few ways to gradient an image in Figma. The first way is to use the Fill tool. With the fill tool selected, click on the image.
There are two steps to copy a gradient in Figma. The first is to use the “Copy” function and then the “Paste” function to apply the gradient. To copy a gradient using the “Copy” and “Paste” functions, follow these simple steps:
1.
There are multiple ways to do gradient in Figma. One way is to use the built-in gradient tool. To do this, select the object you want to apply the gradient to.
Gradients are a great way to add some color and personality to your web designs. They can be used to add some visual interest to your website or to make your text stand out. But can you do gradients in Figma?
Gradients are a great way to add some visual interest to your designs, and Figma makes it easy to create them. There are two ways to create gradients in Figma: using the Gradient tool, or by adding a Linear or Radial gradient fill to an object. To use the Gradient tool, select the object you want to apply the gradient to, then click and drag on the canvas to create a gradient.
A gradient is a gradual transition between two or more colors. In HTML, there are two ways to create a gradient. The first is using the background-image property, and the second is using the filter property.
When it comes to creating a gradient image in Figma, there are a few things you need to know. First, you need to create shapes using the shape tools available in Figma. However, if you want to use irregular shapes, you can use either the “Pen tool” or install a plugin.
Figma is a great design tool for creating beautiful user interfaces, and one of its most powerful features is the ability to apply gradients to images. You can use gradients to add depth and interest to your designs, and they’re especially useful for creating realistic backgrounds and buttons. In this tutorial, we’ll show you how to apply gradients to images in Figma.