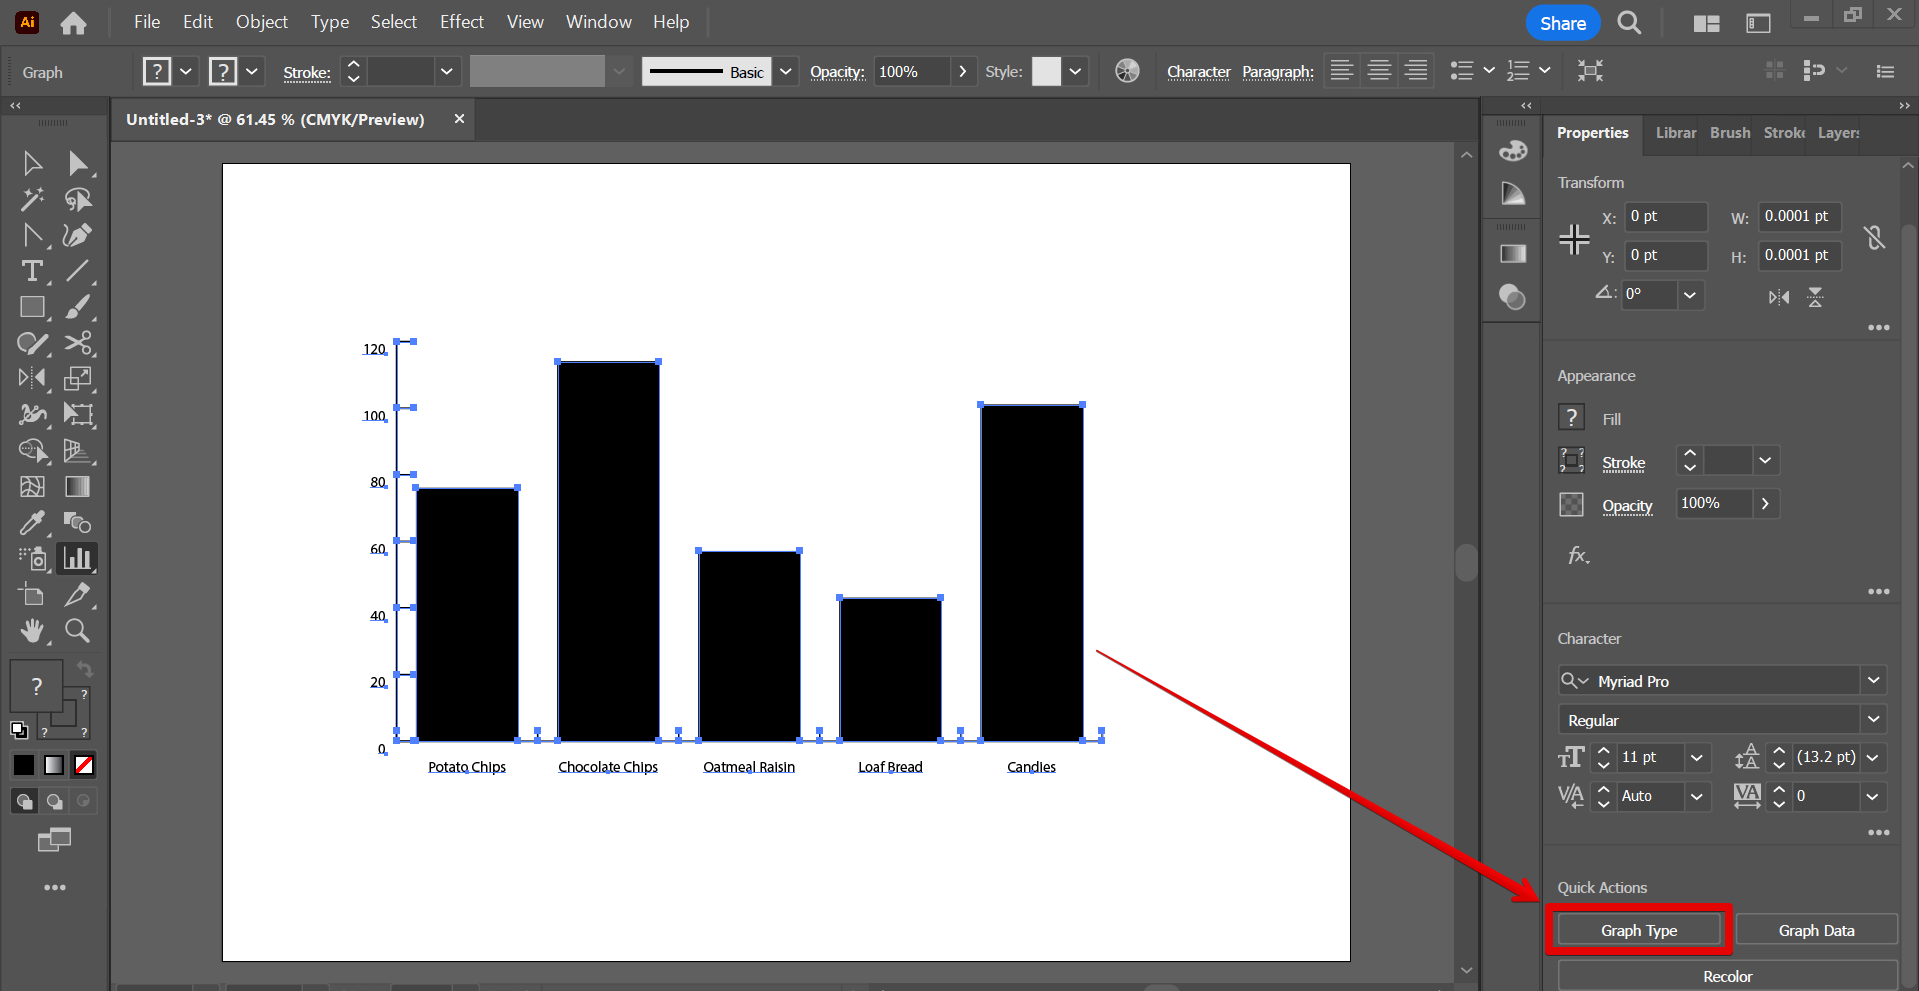
Editing graphs in Illustrator is a cinch! First, use the Selection Tool to select the graph you want to edit. Then, in the Properties panel, click on the Graph Type button.
NOTE: You can add a graph to your canvas using a variety of graph tools available in Illustrator. In this example, we used the Column Graph Tool.

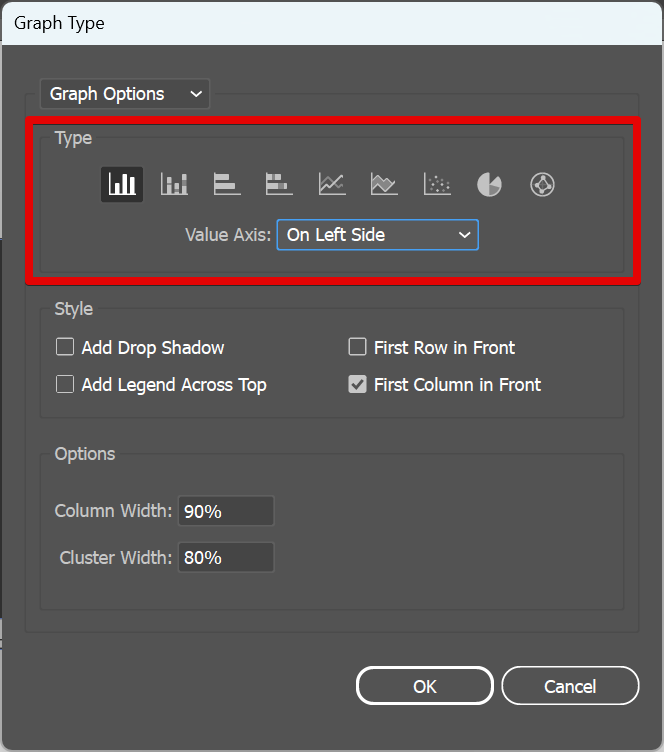
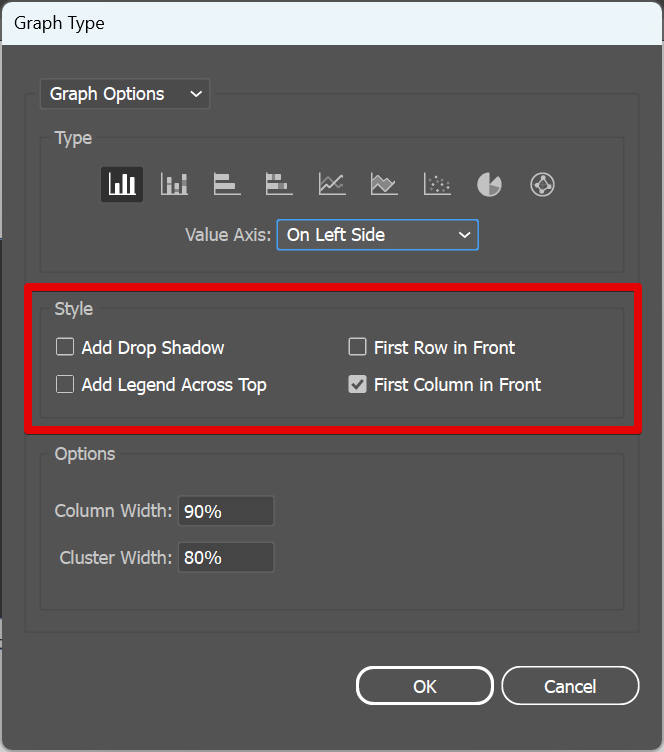
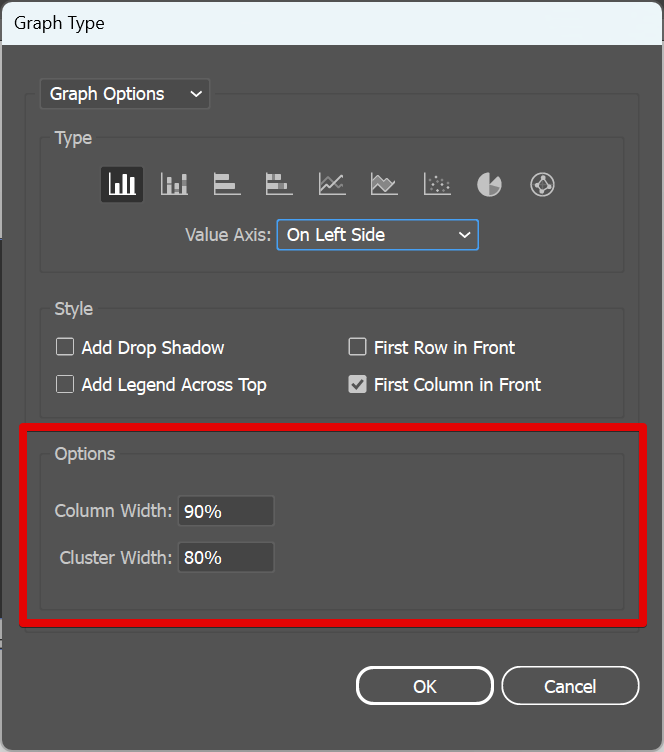
In the Graph Type window, you can change the following settings:
Type: This setting determines the type of graph displayed in the graph editor panel. The options are Column, Stacked Column, Bar, Stacked Bar, Line, Area, Scatter, Pie, and Radar. You can also change the Value Axis position in this section.

Style: This setting lets you adjust the style of your graph. You can add a drop shadow, and legends to your graph using this section.

Options: This section is different for each of the graph types. This lets you adjust or add other functionalities available for the type of graph that you are using. In this case, we are using the Column type of graph, therefore, we can change its column width and cluster width in the Options section.

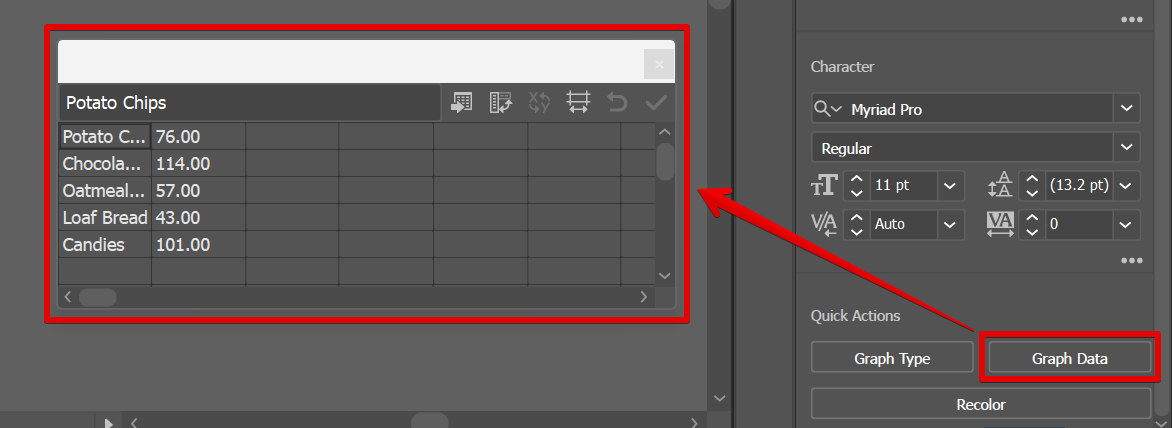
You can also use the Graph Data button in the Properties panel to change the data in the graph. With this, you can add or remove data labels in the graph editor.

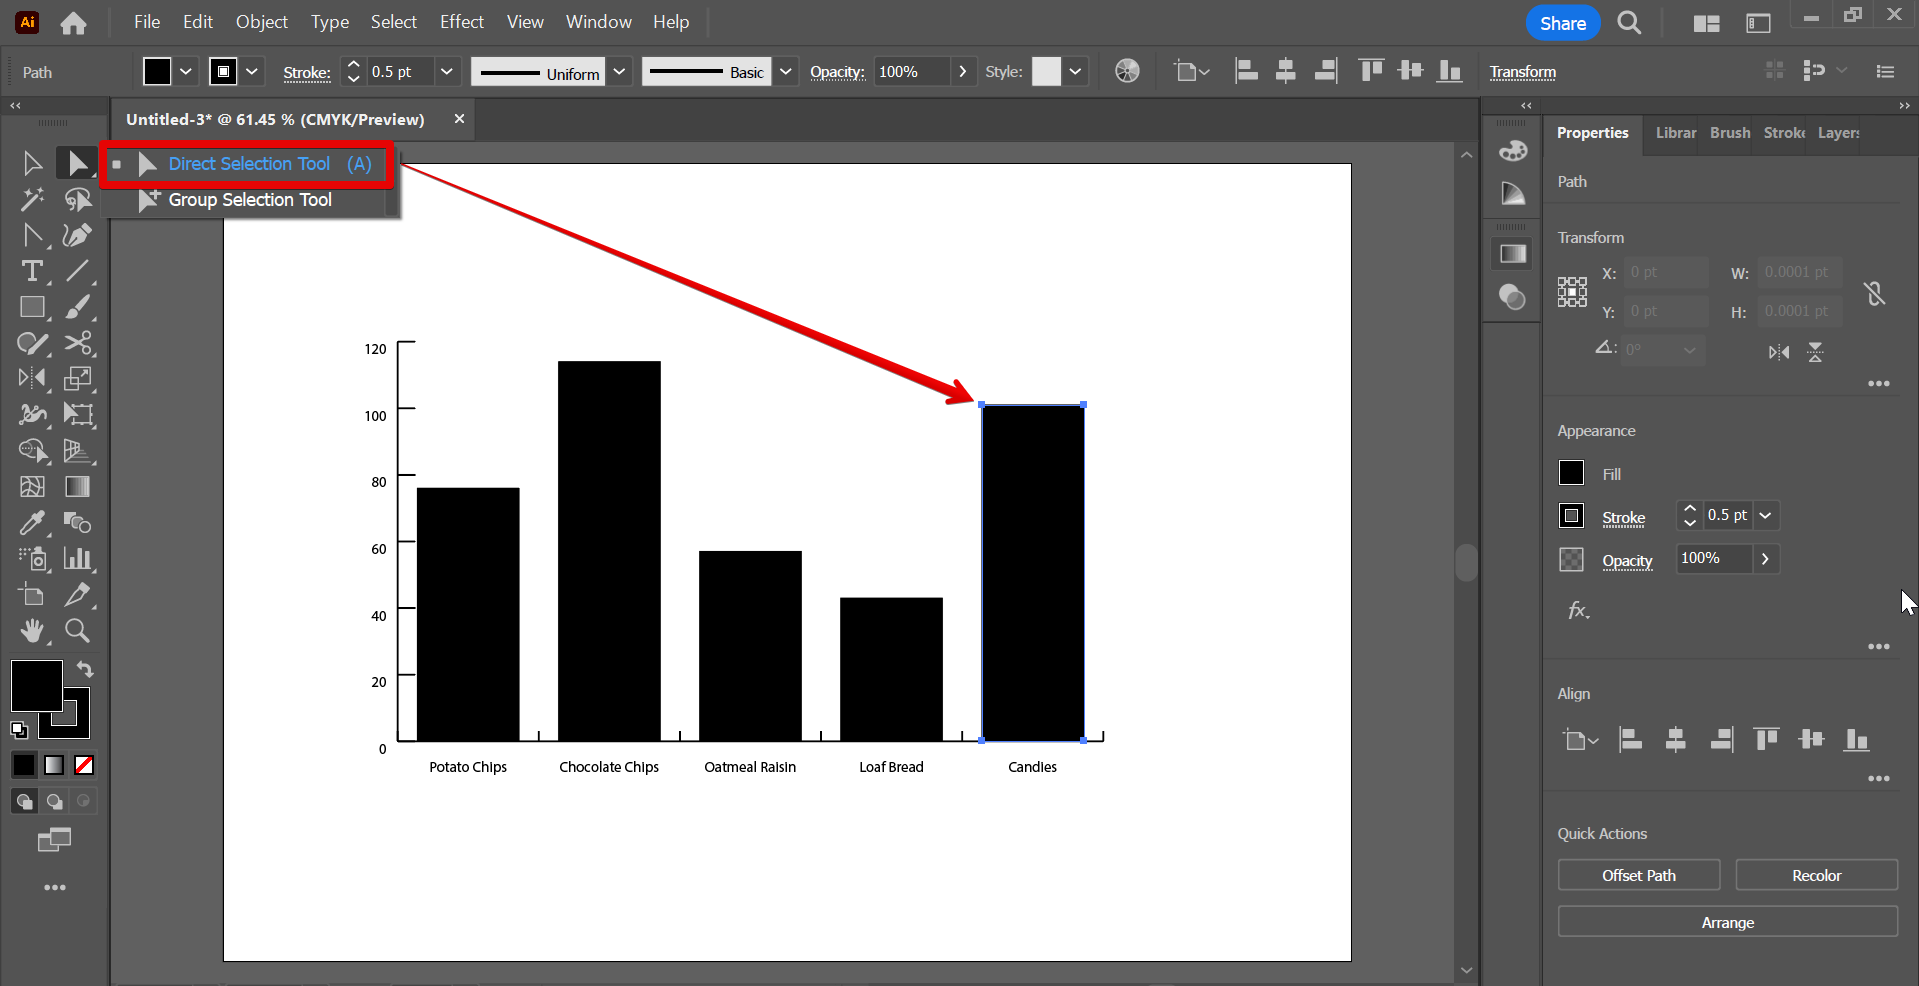
Another option is to change the color of your graph. To do this, first, select a part of your graph using the “Direct Selection Tool” on the left toolbar.

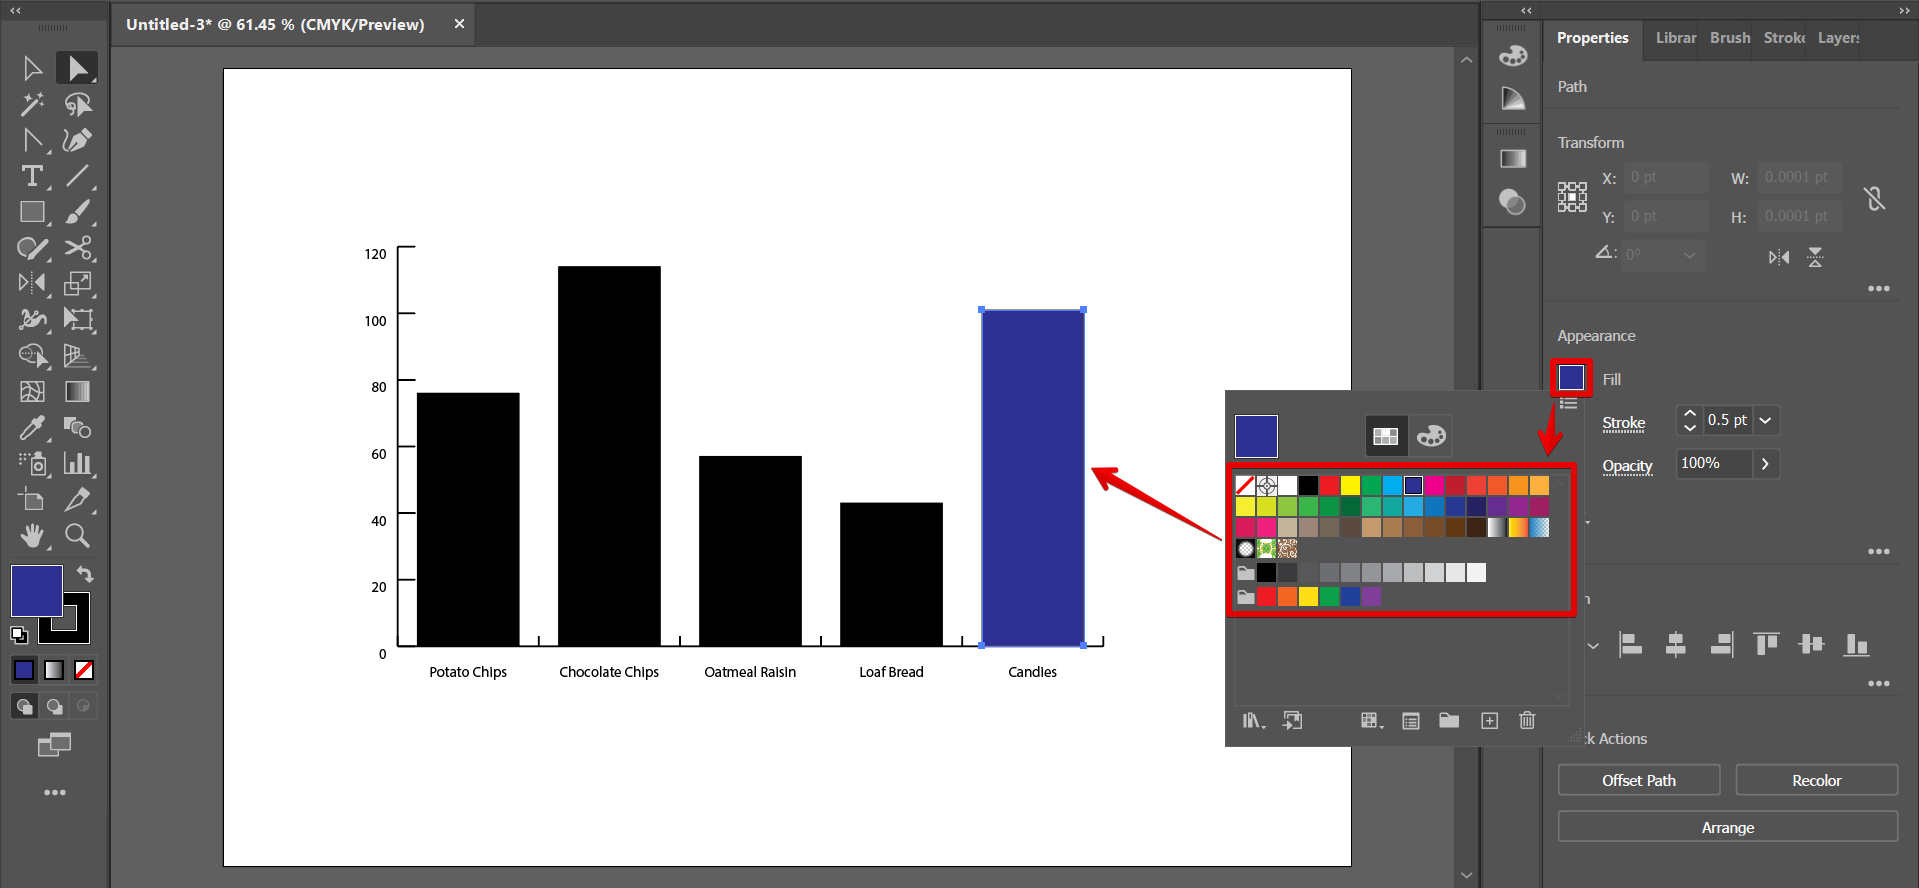
Then, go to the Fill section under the Properties panel. Click on the color box beside the Fill option and this will open the Color Picker window. Select the new color that you want to apply to your graph. You can change the color of the lines, bars, areas, and pies with this.

PRO TIP: When editing a graph in Illustrator, be careful not to accidentally move or delete any of the anchor points. Otherwise, your graph may become distorted or incorrect.
7 Related Question Answers Found
PDF editing in Illustrator is a two-step process. The first step is to create a PDF document using the standard PDF tools in Illustrator. The second step is to use the Document Properties dialog box to make the PDF editable.
Making 3D models in Illustrator can be a fun and creative way to create illustrations and graphics. It’s not as difficult as you might think, but there are a few important steps that you need to follow in order to create a 3D model. First, you need to create your Illustrator file in the correct format.
In this Illustrator tutorial, we will be learning how to create a 3D character using the Illustrator vector tools. We will be using the 3D Extrusion tool to create our character’s body, and then using the Transformation tool to adjust the position and shape of the character. We will also be using the Mesh tool to create the character’s skin and hair, and the Blending Mode tool to add some extra details to the character’s skin.
Making a puzzle piece in Illustrator is fairly simple. Open the Illustrator file you will be working with, and create a new document. Select the Rectangle tool (M), and create a 100x100px rectangle.
Creating a city map in Illustrator is relatively easy. First, create a new document in Illustrator and make sure the artboard is set to the desired size. Then, use the Rectangle Tool (M) to create a basic outline of the city.
Creating a Pattern in Illustrator
There are a few different ways to create a pattern in Illustrator. The first way is to use the Object Cutter tool. With this tool, you can cut out a shape that is based on a selected path.
There are a few ways to draw an arrow in Illustrator. The first is to use the Pen tool and draw a line from the starting point to the ending point. The second is to use the Stroke tool and draw a curve from the starting point to the ending point.
